 Creating Cassandra_installation playbookDeploying a Cassandra database manually on hundreds of machines might be a complicated and exhausting task. Fortunately, we have automation tools that can install all the needed packages on all nodes with minimal configuration. In this case, Ansible is a great tool to get the job done. Throughout this guide, I’ll provide a detailed overview of a simple example of how to install and configure the Ansible environment and then install, configure and run Cassandra databases using Ansible on multiple nodes. The real-life scripts are quite more sophisticated, using roles for each task, but I'll try to avoid complexities and show an introductory step-by-step case.
What is Ansible?
To keep things short, Ansible is a software tool that helps administrators install and manage packages, execute commands and manage files on multiple machines using just their hostnames or IPs. Ansible needs to be installed on one machine called the Control Node (it can be your laptop). The nodes that are going to be pinged by the control node are called target nodes and do not need any installation since Ansible is a push-based configuration management system. Below you can see a simple visualization of how Ansible works:
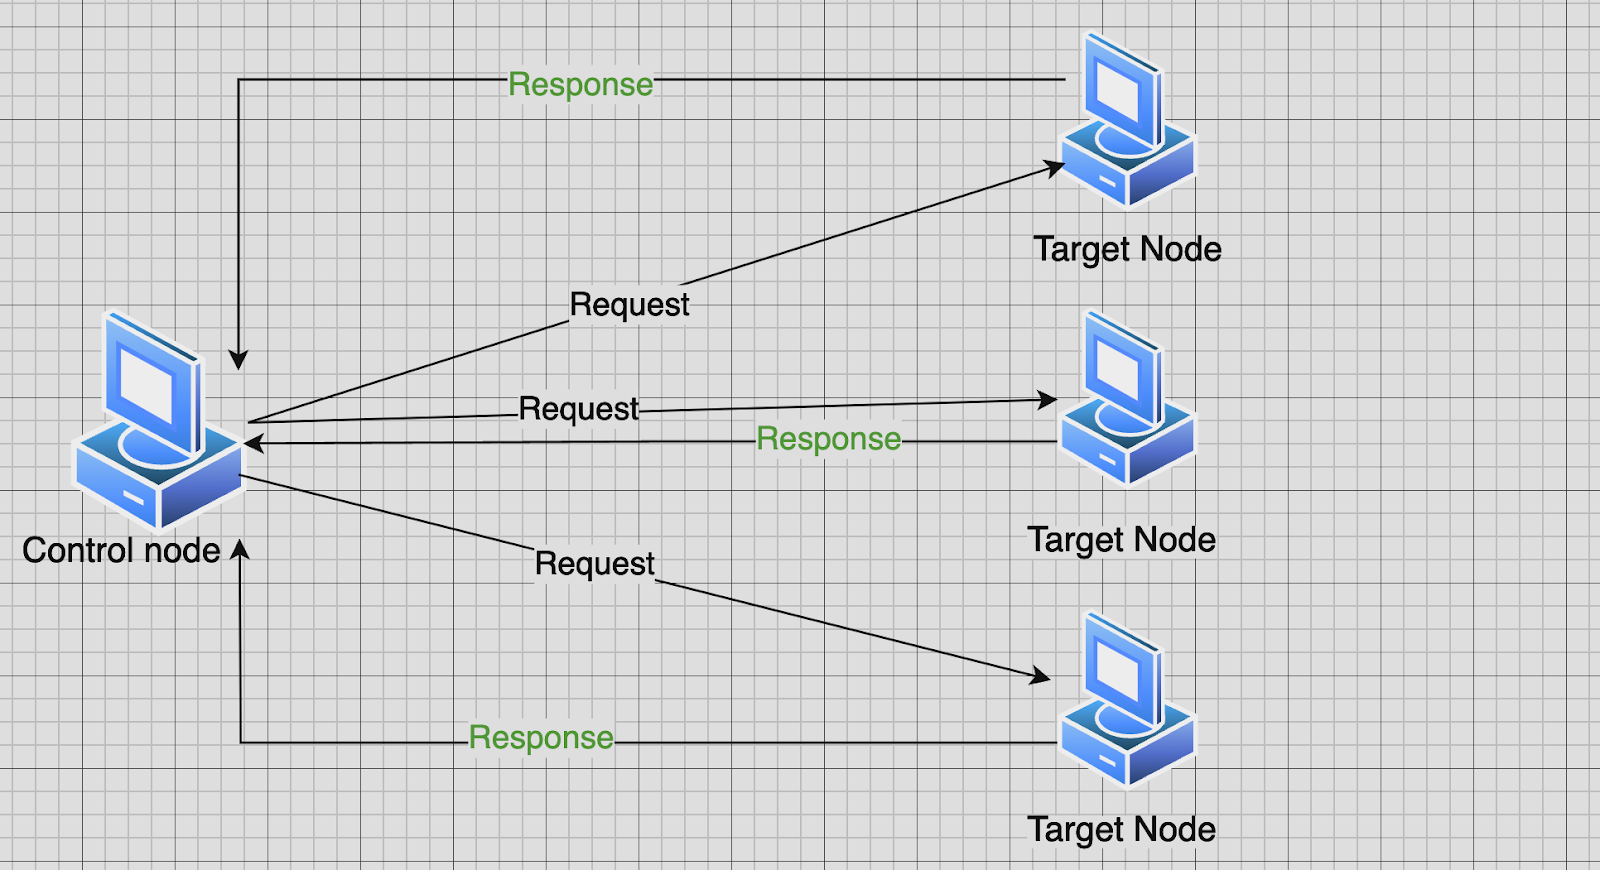
Picture 1: Illustration of how Ansible sends requests on multiple nodes
By “request”, we mean installing and managing packages, performing commands, changing file permissions, and so on using appropriate Ansible modules. To group related tasks and run multiple requests at the same time, use Ansible Playbook. We will be working with them throughout this blog. Moreover, keep in mind that Ansible is an inconsistent tool, which means that if we try to install a dependency on 2 nodes and a request is successful on one node but fails on another, the changes will be applied on the node that succeeded. To better understand Ansible, what modules are, and how they work, please refer to the official Ansible documentation. Now, let’s go step by step through each key aspect until we have a successfully configured Cassandra cluster running.
Pre-requisites
Step 1: Establish SSH connection between Control and Target nodes - We are not going to focus on this step here. I create an SSH keypair on the Control node, then send the public key to the Target node using the ssh-copy-id command.
Step 2: Install Ansible - The most obvious one, right? There are 2 ways of installing Ansible: using package installation or pip installation. I prefer the first option. Here are the installation steps for Ubuntu OS:
$ sudo apt update
$ sudo apt install software-properties-common
$ sudo add-apt-repository --yes --update ppa:ansible/ansible
$ sudo apt install ansible
If you prefer the pip installation or other OS, please refer to the official documentation page: https://docs.ansible.com/ansible/latest/installation_guide/intro_installation.html
Step 3: Create configuration files ping Target Nodes through Ansible
1. Create ansible directory, then create 2 files inside this directory: ansible.cfg and inventory
mkdir ansible && cd ansible && touch inventory && touch ansible.cfg
2. Inside the inventory file, insert the IPs of the target nodes, as simple as that. In my case, it is the following:
10.128.0.21
10.128.0.22
10.128.0.23
Inventory file content
3. Inside ansible.cfg file, insert the following piece of code:
[defaults]

inventory = inventory
private_key_file = ~/.ssh/ansible_key
ansible.cfg file content
Where inventory parameter refers to the inventory file, private_key_file parameter refers to the private SSH key path. Configure the path of private_key_file on your own to the location where your key is stored.
4. After completing the following steps, we should be able to use the Ansible ping module to test access to the target nodes. The ping module tries to establish an SSH connection to the target nodes and report SUCESS if it works. To confirm, insert the following command:
ansible all -m ping
The result should look like this:

Picture 2: Successful result of Pinging Target Nodes through Ansible
After establishing the connection, we can finally start working on our playbooks, where we will include all tasks required to install and configure Cassandra.
How to use variables in Ansible
You may ask: “Can we use variables in Ansible, and how can we configure and store them?” In Ansible, variables are configured and stored in a separate file in a different directory. This helps us configure the parameters of our playbook without modifying its code. Variables are retrieved using double curly brackets before and after the variable. Variables in curly brackets should be located inside the double quotes. Below, you can find an example of storing variables in one of our playbooks:
  - name: Install Python and Java
    apt:
      name:
      - ""
      - ""
Example of using variables in playbooks
There are a few ways to store variables in ansible, but we will focus on two most common for beginners: using vars or group_vars directories. The difference between these two methods is that while storing variables in group_vars you don't need to include or import them inside the playbook; just create your file here:
dimonkosta1801@ansible:~/ansible/group_vars$ ls
all.yaml
dimonkosta1801@ansible:~/ansible/group_vars$ pwd
/home/dimonkosta1801/ansible/group_vars
Path to all.yaml file
But why do we store our variables inside the all.yaml file, instead of, for example, pre_task_vars.yaml? It's because all.yaml stands for “all hosts”, so that we can store variables that need to be executed on all Target Nodes in one place for multiple playbooks. Throughout this guide, we will have to configure some parameters in each individual node, so this feature will become extremely helpful.
If you prefer to store variables in different files for each playbook, you will need to add an additional include_vars parameter, to which you will assign your vars file. In our case, it's pre_task_vars.yaml.
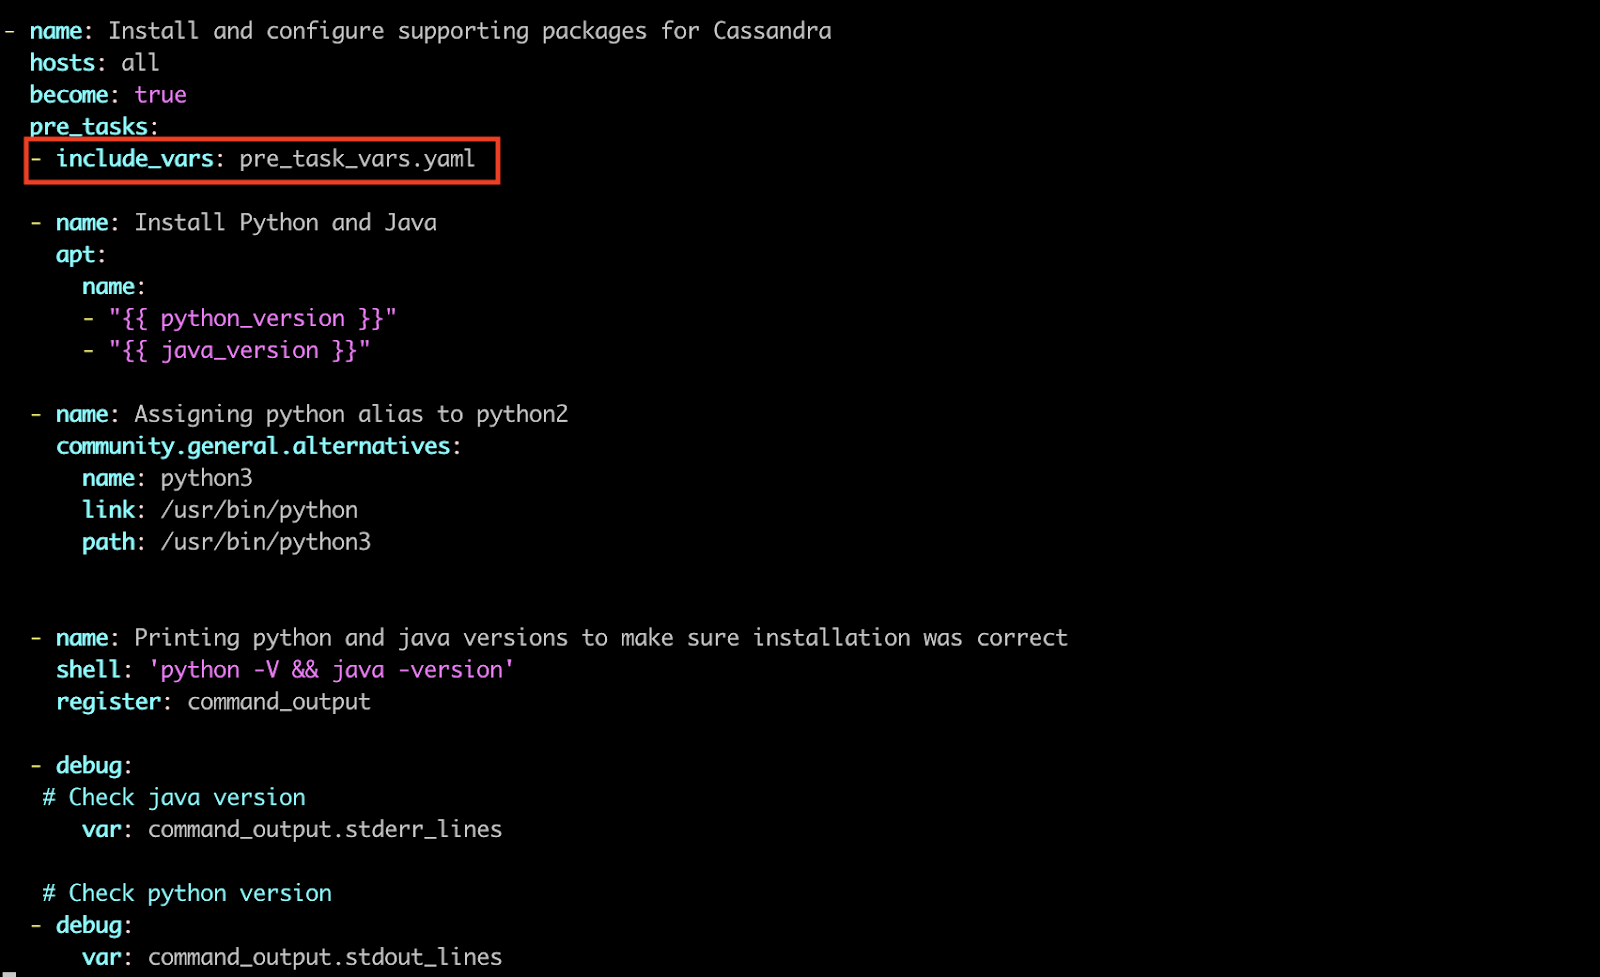
Picture 3: Adding additional include_vars parameter to our playbook
Here is where this pre_task_vars.yaml file should be stored.
dimonkosta1801@ansible:~/ansible/vars$ ls
pre_task_vars.yaml
dimonkosta1801@ansible:~/ansible/vars$ pwd
/home/dimonkosta1801/ansible/vars
path to pre_task_vars.yaml file
Be aware that if you try to store your pre_task_vars.yaml inside group_vars, your playbook will abort, as it accepts only file names with hosts or host group values.
I'm going to use group_vars during this tutorial.
Creating Pre-tasks Playbook
For easier navigation, let’s create a separate playbook for installing all necessary packages that are not directly related to Cassandra.
Before proceeding with Cassandra, we need to install Python 2.7 to access the cql shell and java jdk 1.8.0. Unfortunately, Ubuntu does not support the python package, only python2 or python3, depending on the version you want to install, so we will need to create a placeholder for python to work correctly.
Inside the ansible directory, create a file called pre-tasks.yaml. Insert the following code inside:
- name: Install and configure supporting packages for Cassandra
  hosts: all
  become: true
  tasks:

  - name: Install Python and Java
    apt:
      name:
      - ""
      - ""

  - name: Assigning python alias to python2
    community.general.alternatives:
      name: python3
      link: /usr/bin/python
      path: /usr/bin/python3


  - name: Printing python and java versions to make sure installation was correct
    shell: 'python -V && java -version'
    register: command_output

   # Check java version
  - debug:
      var: command_output.stderr_lines

   # Check python version
  - debug:
      var: command_output.stdout_lines
Pre-tasks .yaml file content
Here’s how my all.yaml file looks like this after creating the first playbook:
java_version: openjdk-8-jdk
python_version: python3
all.yaml file content after creating pre_tasks.yaml playbook
At the beginning of the playbook, we identify which hosts we are going to target in this playbook. In our case, we are targeting all hosts. The next line, become: true, will perform a play as a sudo command. If sudo requires a password in the target nodes, you can use -K to ansible ask it for you. You will see a prompt "BECOME password".
The first task in our playbook is responsible for installing appropriate packages of python and java. In the second task, we assign an alternative link to the python2 package so that we can use python keyword instead of python2. Finally, in our last task, we will use the ansible.builtin.shell module to execute a command python -V && java –version to confirm the successful execution of the previous two tasks.
Let's run our playbook to ensure that it is configured correctly. To do so, execute the following command:
ansible-playbook -i inventory pre-tasks.yaml -K
As mentioned before, -K will prompt you for a sudo password. Please note that without the -K option our playbook will abort if sudo requires password, and we specified become: true in our playbook.
The result should be similar to the screenshot below. The green "ok" result means your task is done, but Ansible didn't change anything (something like a package was already installed), and the yellow "changed" means your task was successful and Ansible was effectively acting on your system (something like ansible installed a new package).
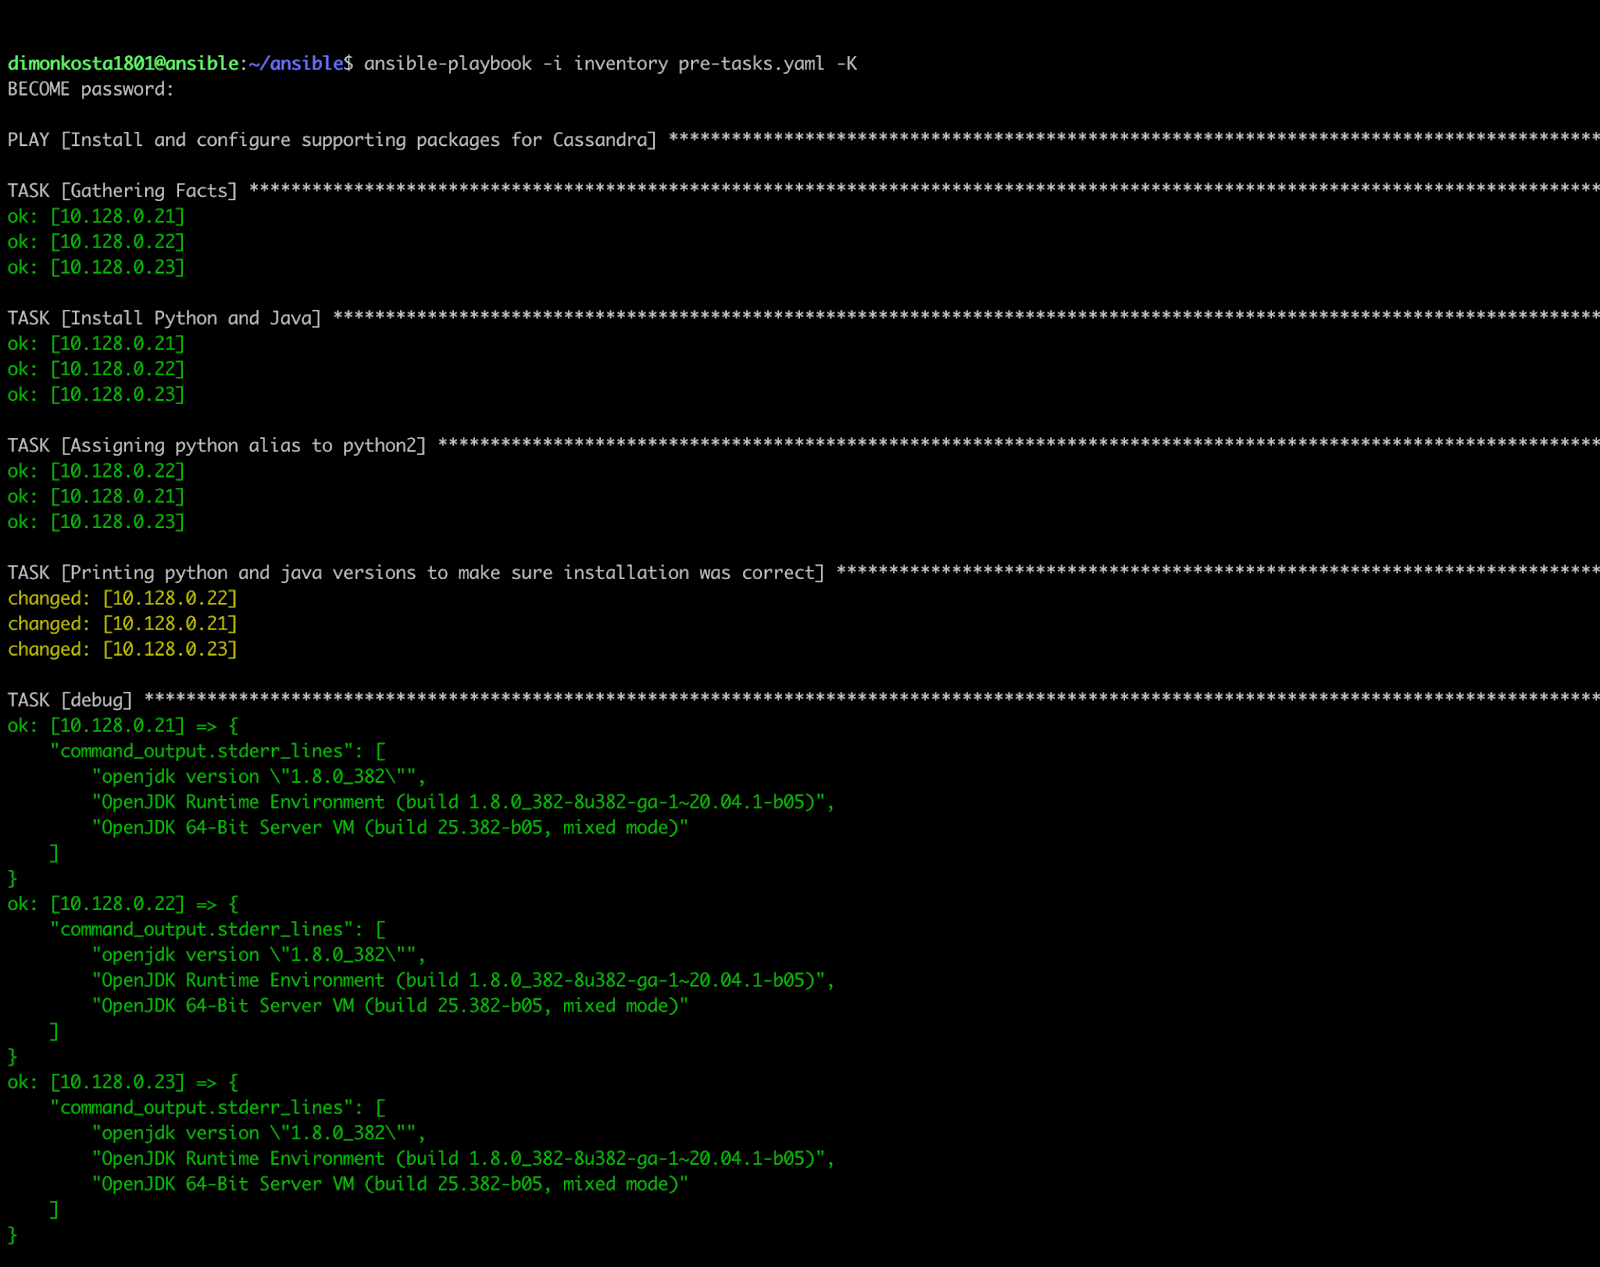
Picture 4: Successful execution of pre_task.yaml playbook
Now, let's proceed with the installation of our Cassandra database.
Creating Cassandra_installation playbook
Now, let's create a playbook for installing Cassandra. The screenshot below shows the tasks that I used to install Cassandra as a tarball:
- name: Cassandra Installation Playbook
  hosts: all
  become: true
  tasks:

  - name: "Ensure group  exists"
    ansible.builtin.group:
      name: ""
      state: present

  - name: "Create  user"
    ansible.builtin.user:
      name: ""
      group: ""
      shell: /bin/bash
      append: yes
      comment: "Cassandra User"
      state: present

  - name: Installing cassandra tarball
    ansible.builtin.get_url:
      url: https://archive.apache.org/dist/cassandra//apache-cassandra--bin.tar.gz
      dest: ""
      mode: 0755
      owner: ""
      group: ""


  - name: Extract cassandra tarball
    unarchive:
      src: "/apache-cassandra--bin.tar.gz"
      dest: ""
      remote_src: true
      owner: ""
      group: ""


  - name: Change ownership of the installation folder
    become: true
    file:
      path: "/apache-cassandra-/"
      owner: ""
      group: ""
      recurse: true
      state: directory
Cassandra_installation.yaml Playbook
Firstly, we are going to check if the cassandra group exists. If not, we are creating one. Then, we are creating the cassandra user, as in the future, we are going to make this user the Cassandra directory owner. Next, we are installing Cassandra using tarball and assigning a path where it should be located on Target Nodes. As you can see, we are also assigning this tarball to the newly created user and group.
After that, we extracted the tarball and placed it into the cassandra_destination directory. You may also have the same destination for both tarball and extracted tarball files. Remember that you should extract tarball under the /usr folder while downloading to wherever destination you want. Last but not least, we need to make sure that the Cassandra user and Cassandra group are assigned to our extracted file, as without it our Cassandra will not start up. Now, let's review all our updates.yaml file:
java_version: openjdk-8-jdk
python_version: python3

cassandra_version: 3.11.15
cassandra_destination: /usr/local
tarball_destination: /home/dimonkosta1801
cassandra_user: cassandra
cassandra_group: cassandra
all.yaml file after adding vars from Cassandra_installation.yaml Playbook
Let's run our second playbook and install Cassandra.
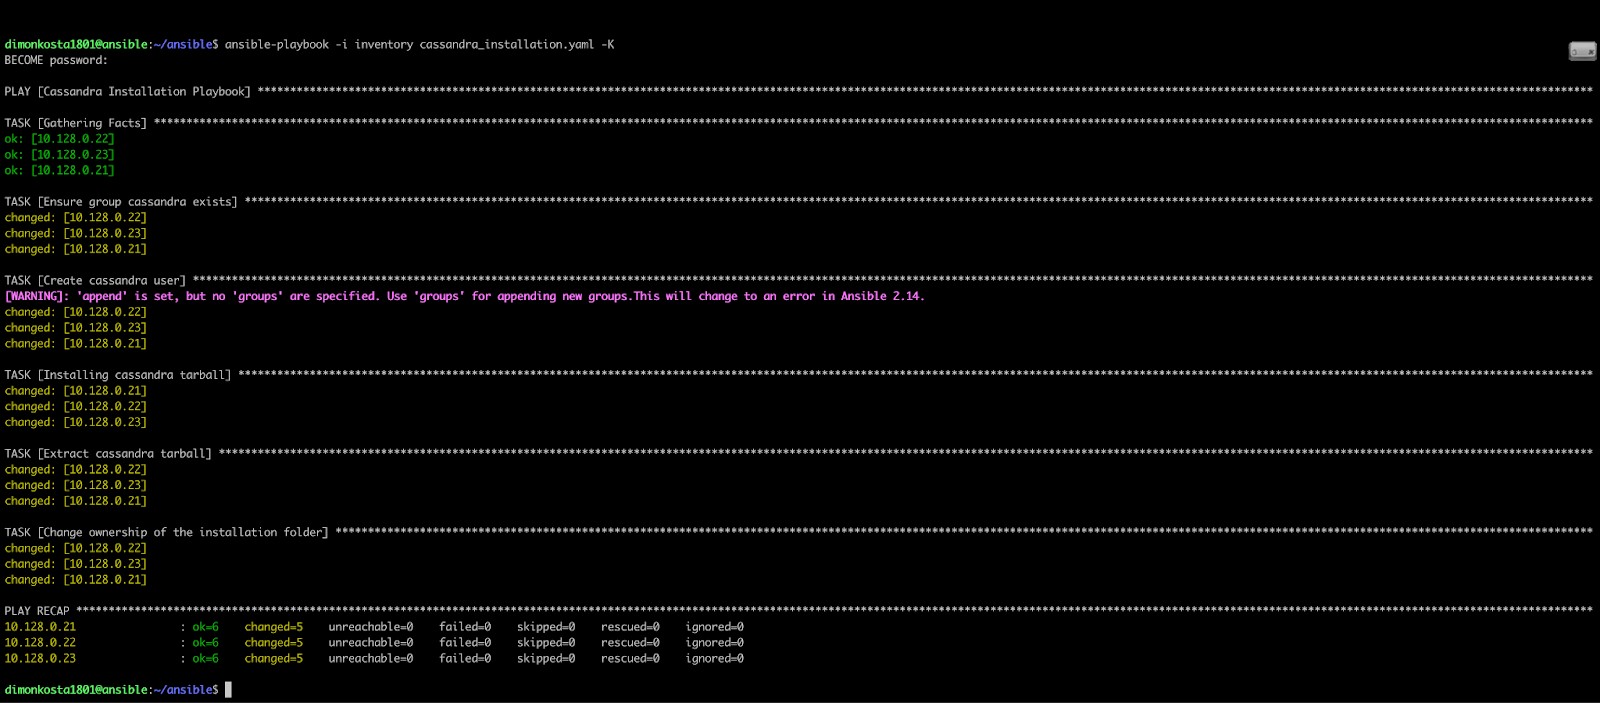
Picture 5: Result of running Cassandra_installation.yaml Playbook
After accessing our Target Nodes, we will see tarball downloaded and extracted with the right permissions and in the appropriate directories:

Picture 15: Allocation of Cassandra packages on Target Nodes
Next, we are going to configure our Cassandra database.
Configuring Cassandra Database using Jinja2 Template
Jinja2 template allows us to configure files with variable placeholders on our Control Node and then pass these files to the Target Nodes with proper configuration. On your Control Node, in the ansible directory, clone the following git repository:
git clone git@github.com:d1mkko/cassandra_configuration_files_template.git.
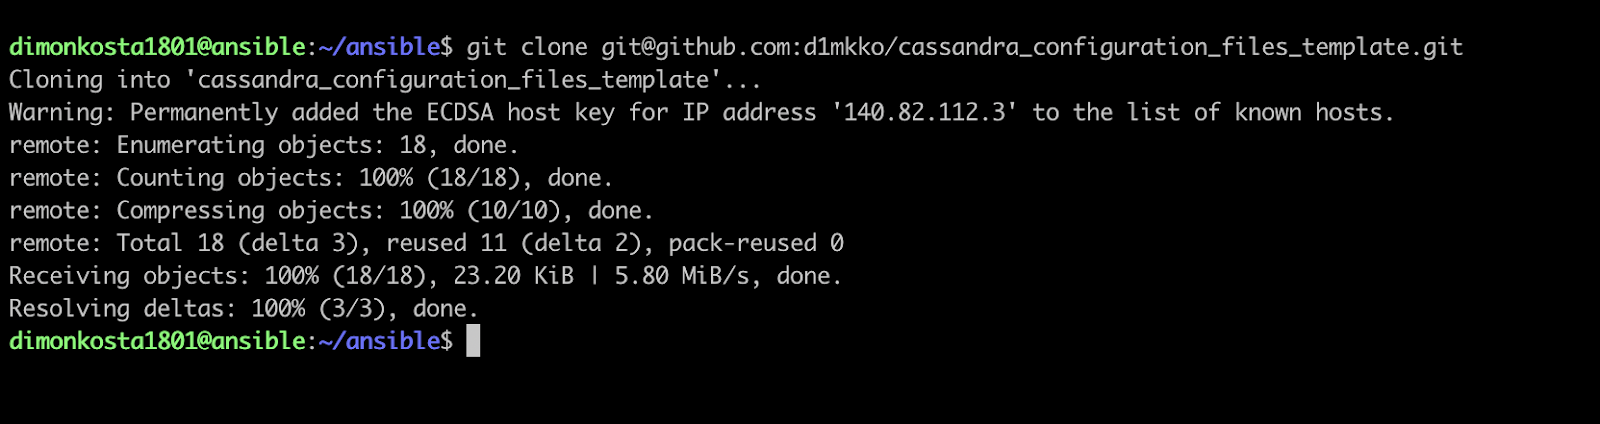
Picture 16: cloning repository
The new cassandra_configuration_files_template directory should appear:

Picture 17: cassandra_configuration_files_template content
After introducing the cloned github repo, it might be difficult to understand the location of so many files. Below is a diagram for easier navigation:
.
└── ansible
    ├── ansible.cfg
    ├── cassandra_configuration_files_template
    │   ├── README.md
    │   ├── cassandra-rackdc.properties.j2
    │   ├── dc1.yaml
    │   ├── dc2.yaml
    │   ├── dc3.yaml
    │   ├── cassandra.yaml.j2
    │   └── cassandra_config_vars.yaml
    ├── cassandra_installation.yaml
    ├── group_vars
    │   ├── all.yaml
    ├── inventory
    └── pre-tasks.yaml
Ansible folder file tree
Where:- cassandra_installation.yaml and pre-tasks.yaml - our playbooks
- cassandra_configuration_files_template - cloned github repository
- group_vars - directory to store our variables
- cassandra-rackdc.properties.j2 and cassandra.yaml.j2 - jinja2 templates
- dc1.yaml, dc2.yaml, dc3.yaml - variable files to target specific host group
Inside this directory, we have 2 key configuration files, which are configured with the jinja2 template, and 4 variable files: dc1.yaml, dc2.yaml, dc3.yaml and cassandra_config_vars.yaml. Inside dcN.yaml files, we are configuring variables for cassandra_rackdc.properties for each host separately. For example, I decided to have a 3-node cluster which will be distributed across 3 DCs. If I want to configure each data center individually, I can input the configuration inside the variable file with the appropriate dc name and store it in group_vars directory. Now, let's separate our hosts in the inventory file into different groups:
[dc1]
10.128.0.21

[dc2]
10.128.0.22

[dc3]
10.128.0.23
Splitting our hosts into different groups
As you can see, the group names are now corresponding to the variable file names. It means that variables from dc1.yaml will be applied in the dc1 group, and so on. Next, let's move our dcN.yaml files to the group_vars directory. Use the following command:
mv cassandra_configuration_files_template/dc*.yaml group_vars/
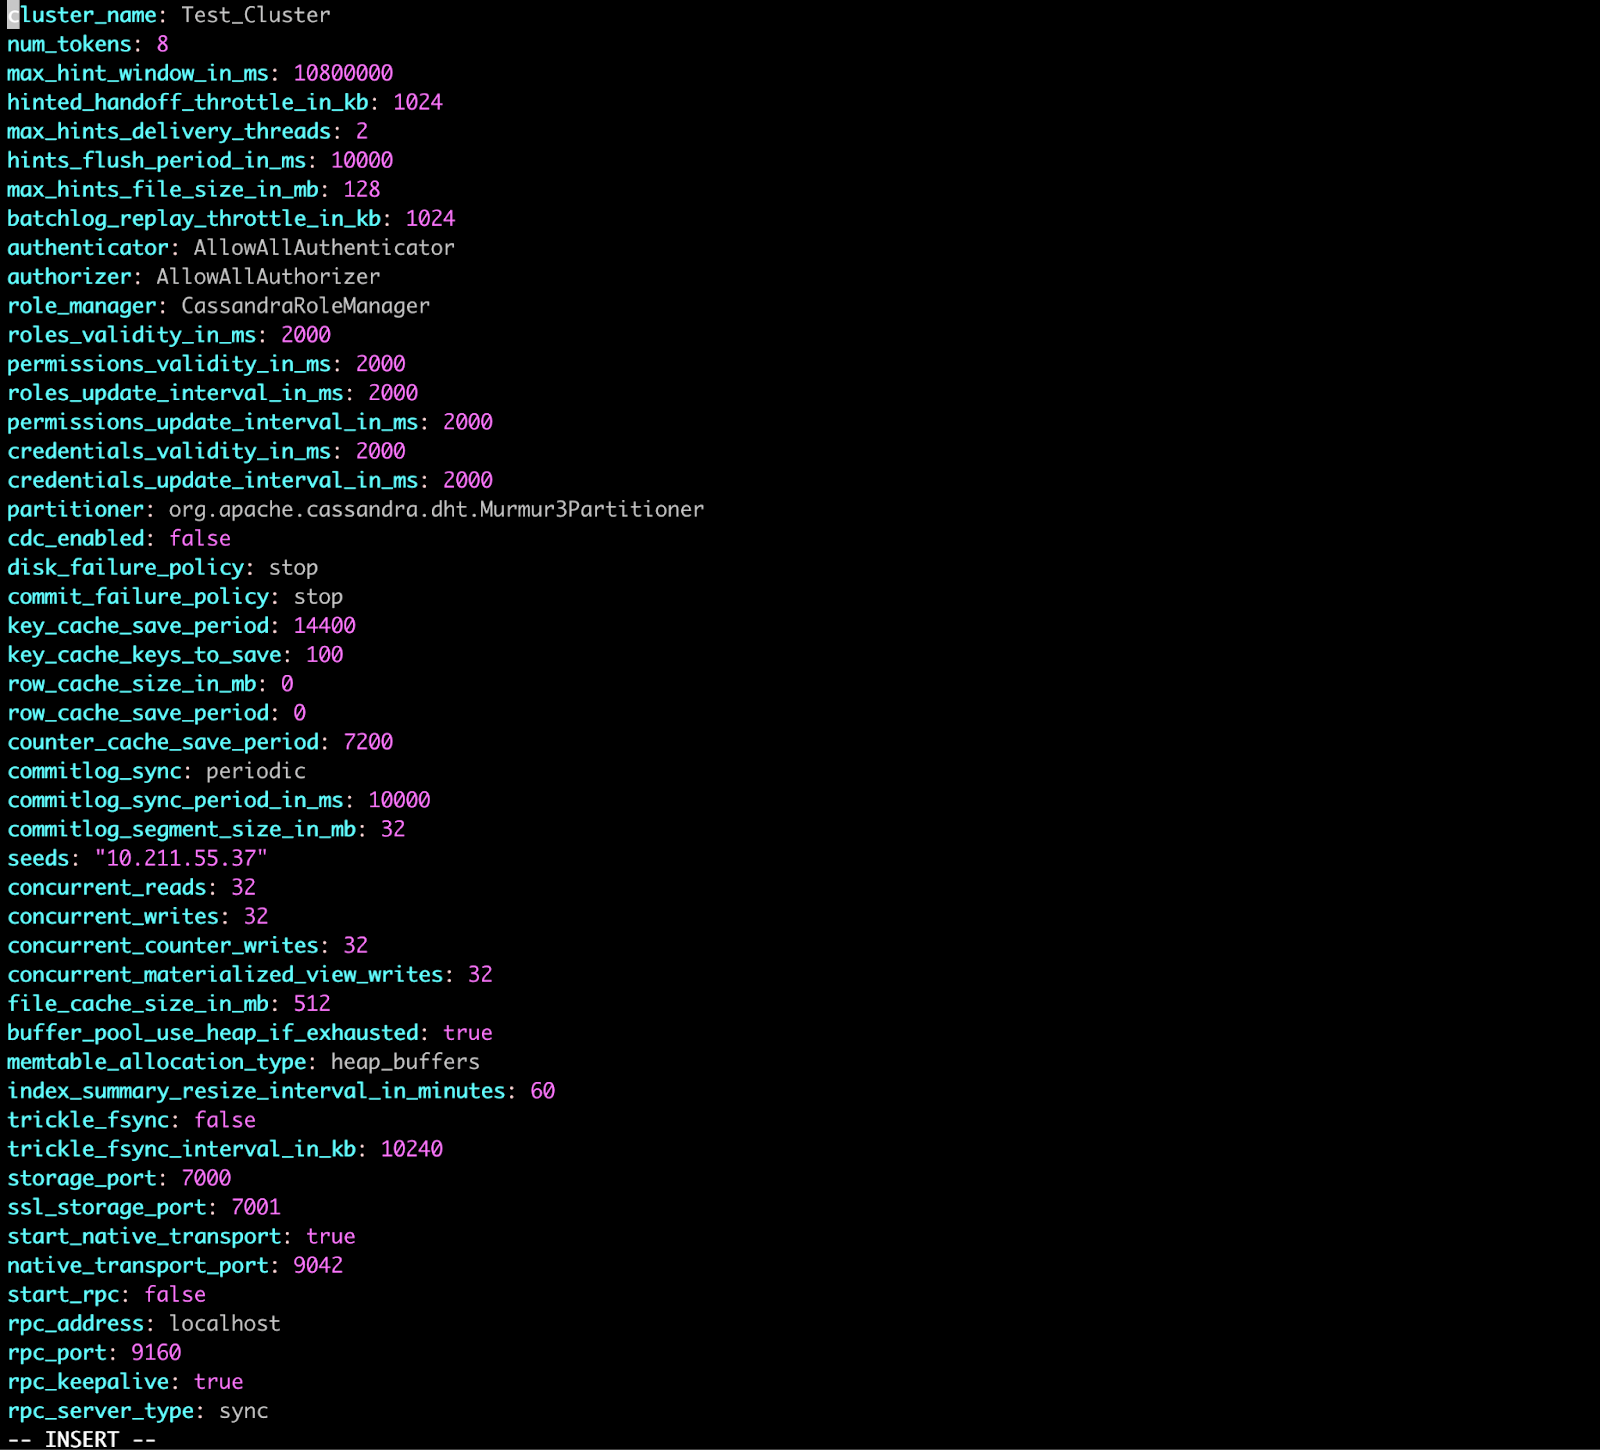
Inside the cassandra_config_vars.yaml file you will find variables that are stored in cassandra.yaml file:
Picture 20: cassandra_config_vars.yaml file
Here is a sample of how variables in cassandra.yaml.j2 file looks like. Note that for Jinja templates, double quotes are not required.
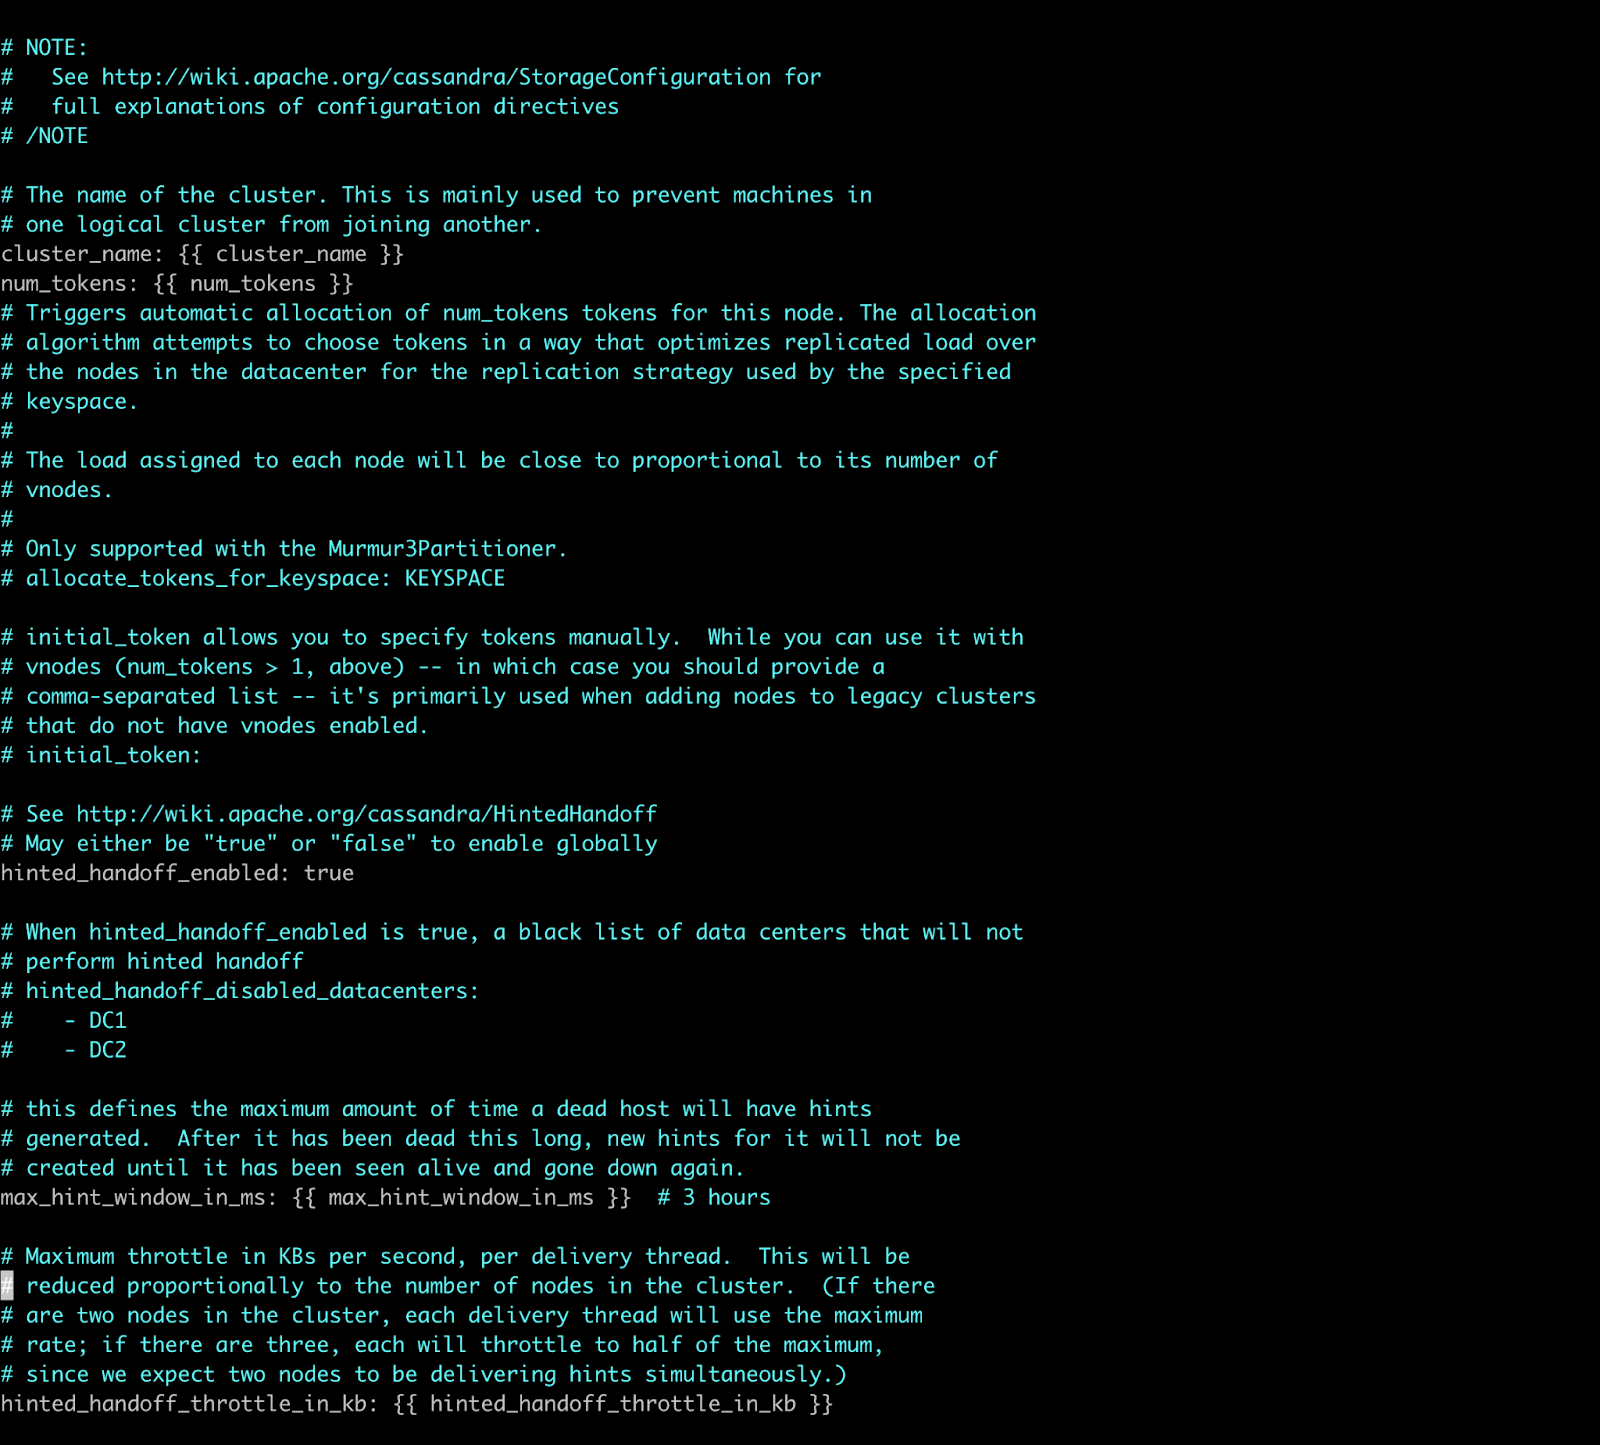
Picture 21: cassandra.yaml.j2 file
Copy and paste parameters from cassandra_config_vars.yaml to all.yaml, then configure them based on your needs. Don't forget to specify your own seed nodes, as Cassandra will not be able to bootstrap. Here is how our all.yaml looks after inserting the variables.

Picture 22: Final version of all.yaml file
After having all our files configured, we can start writing our playbook to configure and start Cassandra:
- name: Playbook for Configuring Cassandra
  hosts: all
  become: true
  tasks:

  - name: Send cassandra-rackdc.properties template file to hosts
    template:
      src: cassandra_configuration_files_template/cassandra-rackdc.properties.j2
      dest: "/apache-cassandra-/conf/cassandra-rackdc.properties"
      backup: yes
      owner: cassandra
      group: cassandra

  - name: Send cassandra.yaml template file to hosts
    template:
      src: cassandra_configuration_files_template/cassandra.yaml.j2
      dest: "/apache-cassandra-/conf/cassandra.yaml"
      backup: yes
      owner: cassandra
      group: cassandra

- name: Starting Cassandra
  hosts: all
  serial: 1
  become: true
  tasks:

  - name: Starting Cassandra
    shell:
      cmd: "su - cassandra -c '/apache-cassandra-/bin/cassandra'"
      chdir: "/apache-cassandra-"

  - name: Wait for port 9042 to become open on the host, don't start checking for 30 seconds
    ansible.builtin.wait_for:
      port: 9042
      timeout: 300
      delay: 30
cassandra.configuration.yaml playbook
In the first and second tasks, we are sending jinja2 templates to the appropriate Cassandra configuration files using a template module. This module allows sending template files to the Target Node, replacing variable placeholders by their values. Last but not least, we execute the command using the shell module to start Cassandra under Cassandra user on all nodes. For this purpose, we added a new parameter serial with value 1. It means we will perform tasks on 1 node at a time. The last task, with the name: Wait for port 9042 to become open on the host, don't start checking for 30 seconds is for Ansible to wait for 30 seconds after the current node is up and running to bootstrap the next node. After completing a playbook and ensuring all the variables are configured, let's run our playbook.
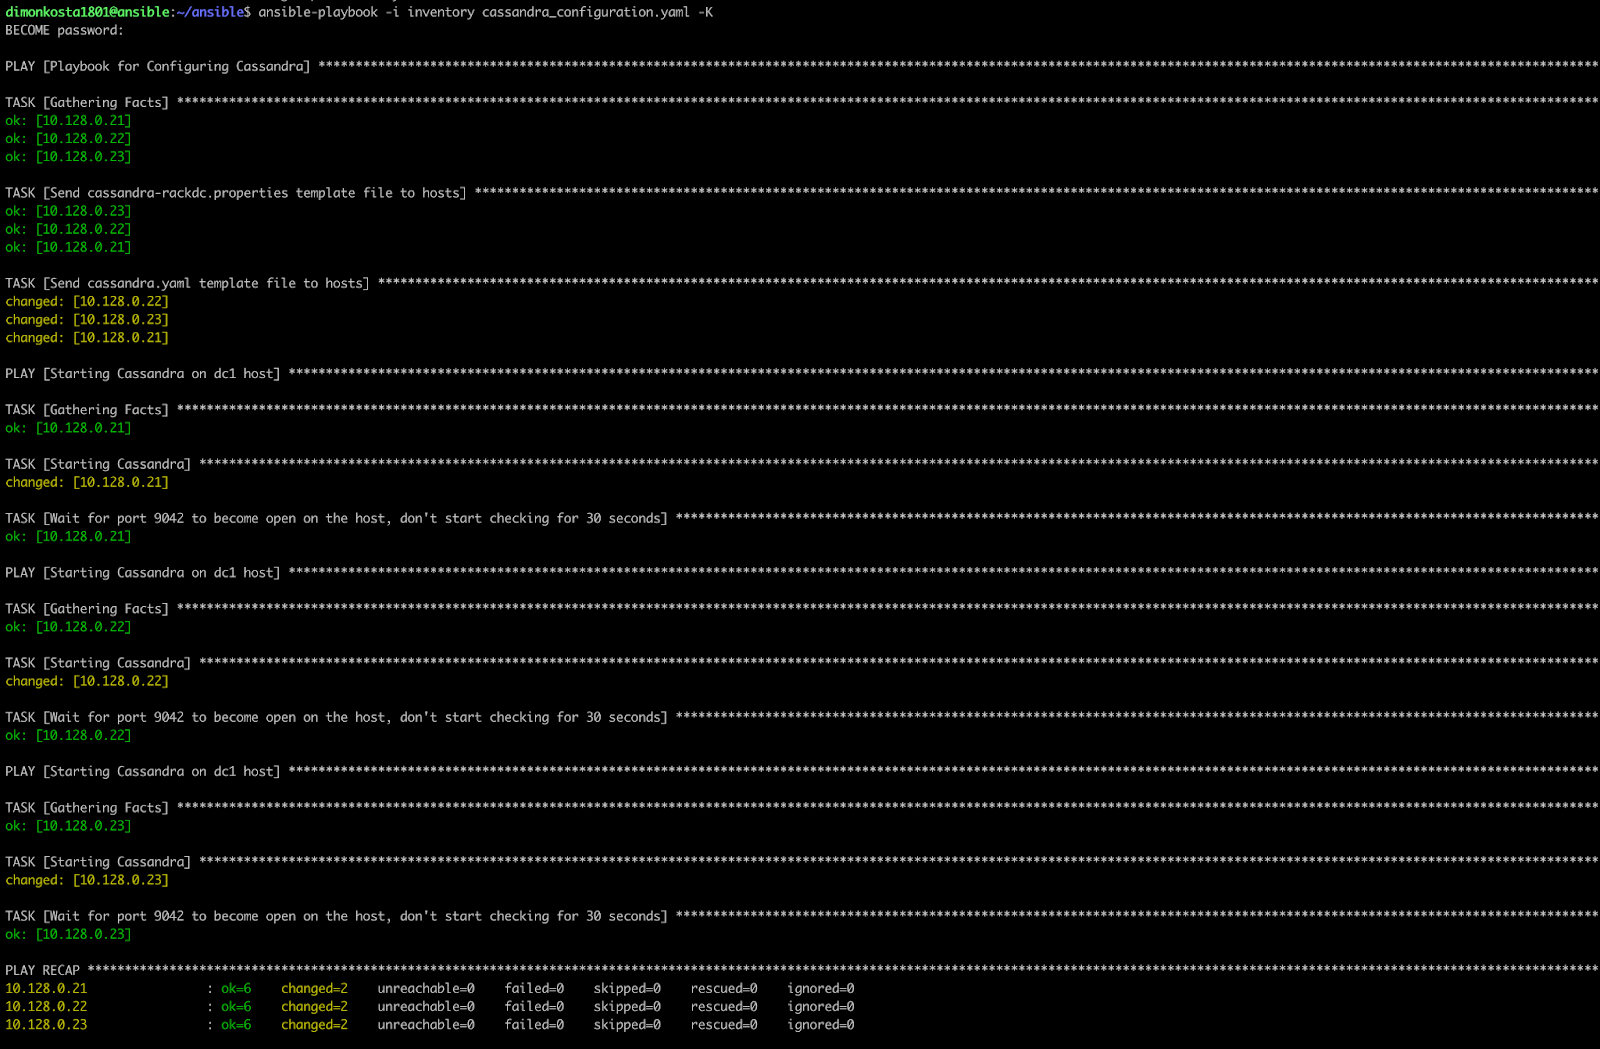
Picture 24: cassandra.configuration.yaml playbook successfully executed
After that, access target nodes and check the logs to ensure Cassandra started bootstrapping:
tail -1000f /path/to/cassandra/logs/system.log
Once bootstrapped, use the below ansible ad-hoc command to ensure nodes are up and running:
ansible <<choose_one_node_ip_address>> -m ansible.builtin.shell -a "/usr/local/apache-cassandra-3.11.15/bin/nodetool status"
The output should be similar to the screenshot below:
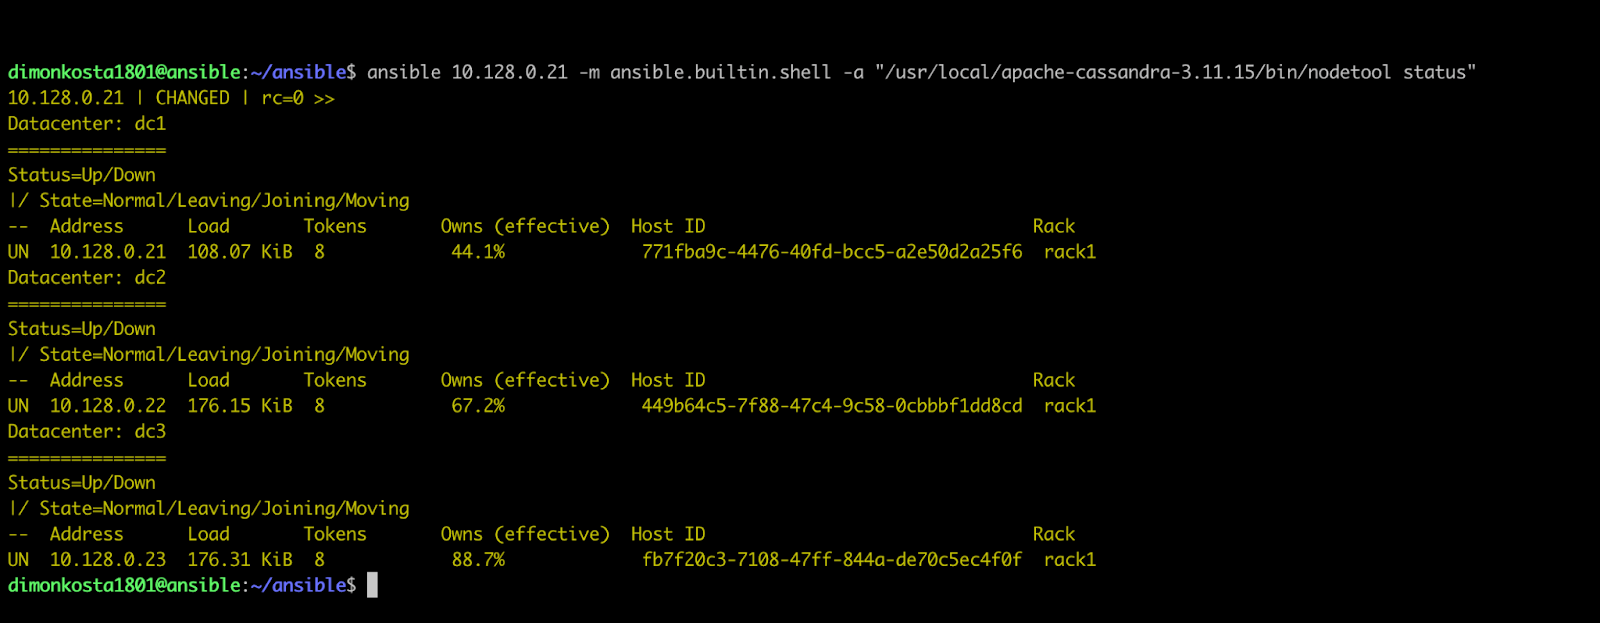
Picture 25: running nodetool status on all nodes
As you can see, we now have Cassandra configured and installed without even touching the target nodes. Knowing the basics of managing Cassandra using Ansible, you can do it simultaneously on hundreds of nodes with different settings and requirements of your choice.
It was an introductory Ansible playbook. I hope it is helpful for you to get started. I also advise you to read more about the recommended directory structure, including group vars, and how to reuse code using Ansible roles. All this information and other best practices can be found in the Ansible Documentation - Best Practices.
Cassandra Consulting Services
Ready to future-proof your Cassandra investment?