- Provision the Docker environment.
- Configure OpenLDAP.
- Initialize Vault and configure it to support LDAP and MySQL.
- Add users to ProxySQL.
1. Provision the Docker environment
I typically use docker-compose to spin up test environments, because it makes networking and container configuration easy. All files needed to set up the environment described here can be cloned from https://github.com/pythian/bastion-proxy. From the directory containing the docker-compose-vault.yaml file, start the cluster with the following statement:docker-compose -f docker-compose-vault.yaml up -d
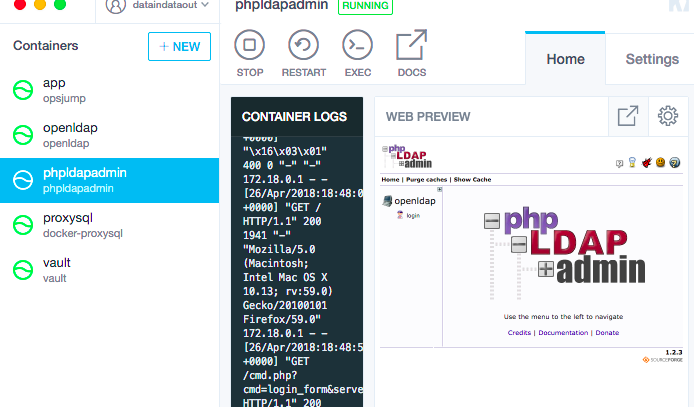
I use Kitematic for an easy-to-manage list of running containers. From Kitematic, it is easy to jump into any container by clicking the EXEC button:

Initialization scripts In the docker-compose yaml file, I have included several initialization helper scripts. If you were provisioning this kind of cluster for production, most of these things would already be set up – for example, replication would already be running and LDAP would be in place already. For this test environment, just run these four quick scripts. This one sets up replication between the primary and replica containers:
source initiate_replication.sh mysqlprimary mysqlreplica
This script is used to add the required monitor user for proxysql.
source initiate_proxysql.sh
This one installs LDAP utilities on the app container (for various reasons, this was nontrivial to add to the Docker image):
source install_ldap.sh
Finally, this script is used to initialize Vault using three generated keys:
source initiate_vault.sh
Example output:
Sealed: false
 Key Shares: 1
 Key Threshold: 1
 Unseal Progress: 0
 Unseal Nonce:
Set up MySQL authorization I am ready to add MySQL to Vault. This section is an update to a previous Vault walk-through by Derek Downey on this blog ( https://blog.pythian.com/dynamic-mysql-credentials-vault/ ), using updated syntax and plugins.
vault mount database
Example output:
Successfully mounted 'database' at 'database'!
If you are using MySQL 5.6 or earlier, use the plugin_name=mysql-legacy-database-plugin, because those earlier versions limit the username to 16 characters. More on the error you will otherwise see below. Here, root is the username and password is the password. The hostname is mysqlprimary and the port is the default 3306 .
vault write database/config/mysql \
 plugin_name=mysql-database-plugin \
 connection_url="root:password@tcp(mysqlprimary:3306)/" \
 allowed_roles="readonly"
2. Configure OpenLDAP
Configure LDAP authentication backend Next, I will configure LDAP to set up groups and users in openldap/phpldapadmin. Using Kitematic, I can click directly to the web address hosting the phpldapadmin GUI, using the upward facing arrow icon in the WEB PREVIEW section on the right:
 Or just visit this link in
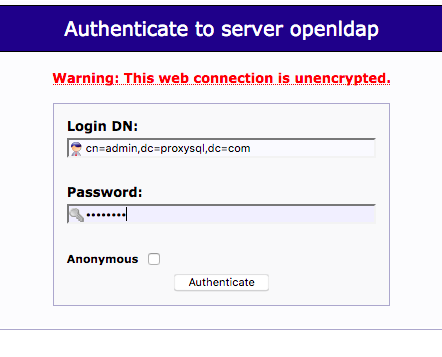
a browser: https://localhost:8080 Login is required:
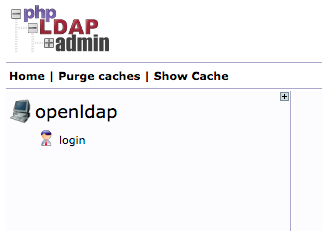
The credentials configured in the docker-compose yaml, for the openldap container, are: user = cn=admin,dc=proxysql,dc=com password = password Click login and enter these credentials:
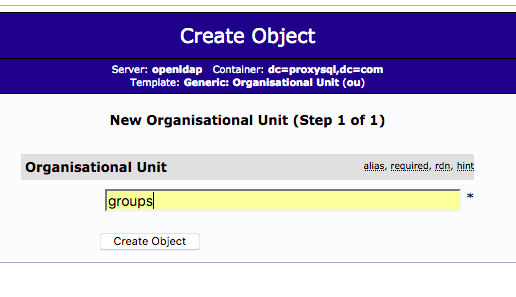
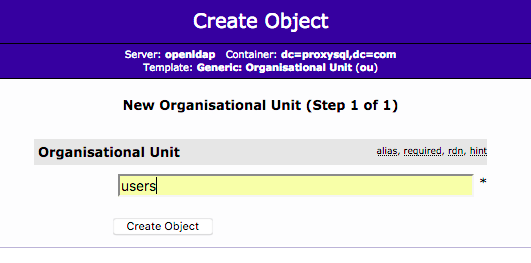
Set up groups and users:
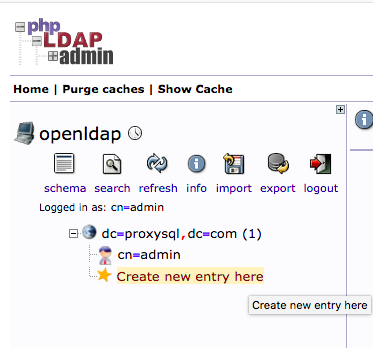
Create two Organisational Units: groups and users.
![]()
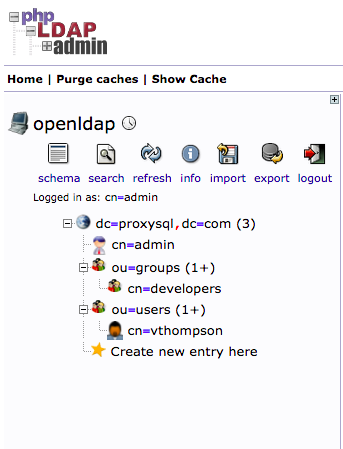
After these two OUs are created, the directory structure will look like this: 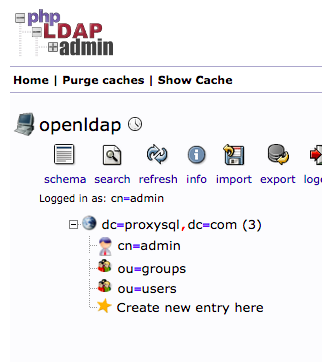
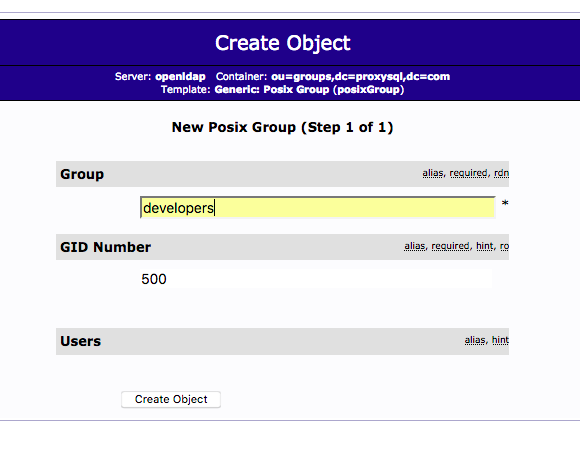
Then create a child entry under ou=groups called developers , and a child entry under ou=users called vthompson . Click on ou=groups , and then choose Create a child entry . 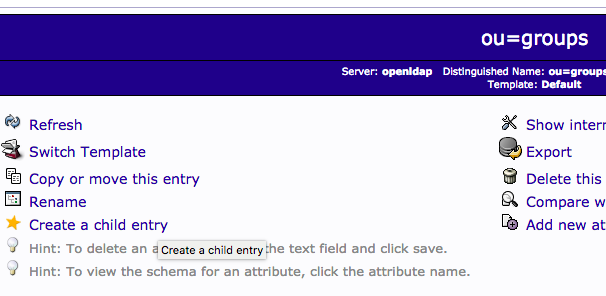
Choose Posix Group for the group=developers .
![]()
 Choose Generic: User Account for the user=vthompson.
![]()

Choose the right password type for the use. In testing, clear is fine. 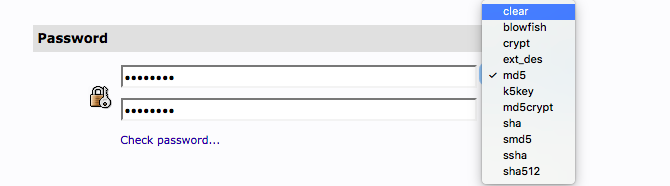
Finish the rest of the fields:
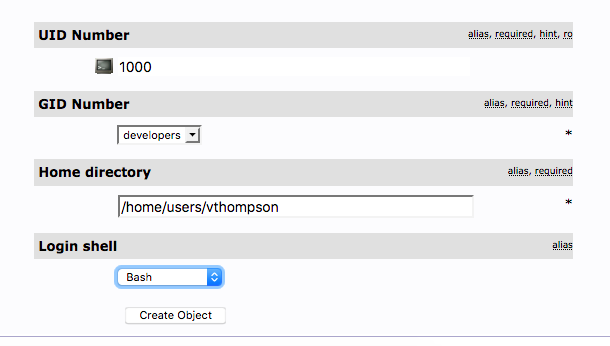
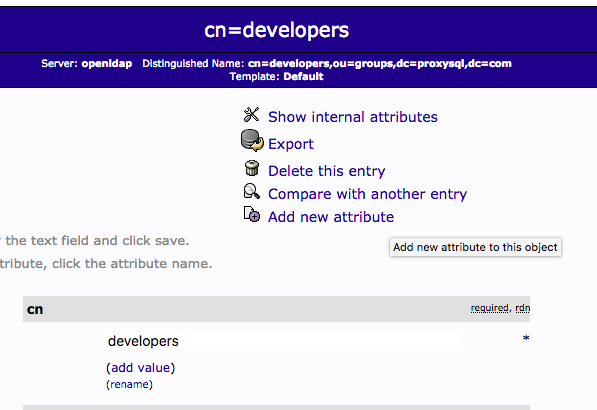
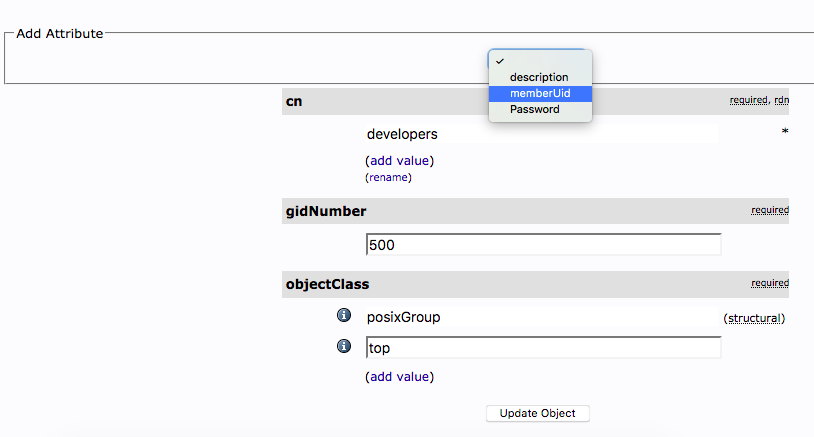
Completed entries:
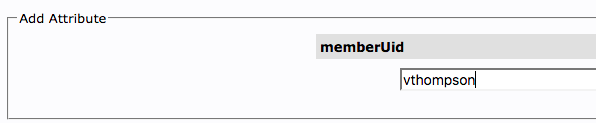
Add the memberUid attribute to the developers group:
Configure LDAP The IP address of the openldap container needs to be added to several configuration statements below. Here is a way to get the IP address from the local machine running Docker:
docker inspect --format='' openldap
Example output:
172.18.0.5
Test the user created above directly against ldap. The IP address is that found above, 172.18.0.5 ; the username is vthompson and the password is thompson .
ldapwhoami -vvv -H ldap://172.18.0.5 -D cn=vthompson,ou=users,dc=proxysql,dc=com -x -wthompson
Example output:
dn:cn=vthompson,ou=users,dc=proxysql,dc=com
 Result: Success (0)
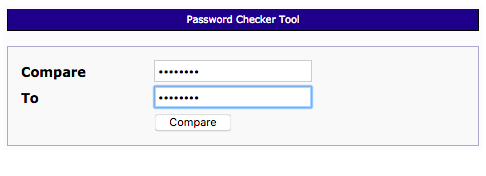
If you get a failure at this point, one of two things may have happened. You may have forgotten to add the memberUid as a new attribute (see above), or you may have entered the password in phpldapadmin incorrectly. You can test the password using the check password functionality in the GUI: 
Another way to ensure the LDAP configuration is done correctly is to test binddn against it; you should get an output of all groups and users set up in phpldapadmin. Here we are using the admin credentials.
ldapsearch -H ldap://172.18.0.5 -x -D "cn=admin,dc=proxysql,dc=com" -w password -b "dc=proxysql,dc=com"
Example output:
# extended LDIF
 #
 # LDAPv3
 # base <dc=proxysql,dc=com> with scope subtree
 # filter: (objectclass=*)
 # requesting: ALL
 #

 # proxysql.com
 dn: dc=proxysql,dc=com
 objectClass: top
 objectClass: dcObject
 objectClass: organization
 o: proxysql
 dc: proxysql

 # admin, proxysql.com
 dn: cn=admin,dc=proxysql,dc=com
 objectClass: simpleSecurityObject
 objectClass: organizationalRole
 cn: admin
 description: LDAP administrator
 userPassword:: e1NTSEF9bVI3NUhCRTl4dG1nbK0raHVCc0lGZnpINU0wVlRJK2c=

 # groups, proxysql.com
 dn: ou=groups,dc=proxysql,dc=com
 ou: groups
 objectClass: organizationalUnit
 objectClass: top

 # users, proxysql.com
 dn: ou=users,dc=proxysql,dc=com
 ou: users
 objectClass: organizationalUnit
 objectClass: top

 # developers, groups, proxysql.com
 dn: cn=developers,ou=groups,dc=proxysql,dc=com
 cn: developers
 gidNumber: 500
 objectClass: posixGroup
 objectClass: top
 memberUid: vthompson

 # vthompson, users, proxysql.com
 dn: cn=vthompson,ou=users,dc=proxysql,dc=com
 givenName: Valerie
 sn: Thompson
 cn: vthompson
 uid: vthompson
 userPassword:: dGhvbRBzb24=
 uidNumber: 1000
 gidNumber: 500
 homeDirectory: /home/users/vthompson
 loginShell: /bin/sh
 objectClass: inetOrgPerson
 objectClass: posixAccount
 objectClass: top

 # search result
 search: 2
 result: 0 Success

 # numResponses: 7
 # numEntries: 6
3. Initialize Vault and configure it to support LDAP and MySQL.
Attach LDAP to Vault Continue to do the next steps from the app container. First, set up LDAP authentication inside Vault:vault auth-enable ldap
Example output:
Successfully enabled 'ldap' at 'ldap'!
Verify LDAP was set up in Vault:
vault auth -methods
Example output:
Path Type Default TTL Max TTL Replication Behavior Description
 ldap/ ldap system system replicated
 token/ token system system replicated token based credentials
Next, write the LDAP configs to Vault. First, look at the default presets:
vault read auth/ldap/config
Example output:
Key  Value
 ---  -----
 binddn
 case_sensitive_names false
 certificate
 deny_null_bind  true
 discoverdn  false
 groupattr  cn
 groupdn
 groupfilter  (|(memberUid=)(member=)(uniqueMember=))
 insecure_tls  false
 starttls  false
 tls_max_version  tls12
 tls_min_version  tls12
 upndomain
 url  ldap://127.0.0.1
 userattr  cn
 userdn
Then write the appropriate configs. The groupfilter shown is particular to openldap.
vault write auth/ldap/config \
 url="ldap://172.18.0.5" \
 binddn="cn=admin,dc=proxysql,dc=com" \
 bindpass="password" \
 userdn="ou=users,dc=proxysql,dc=com" \
 userattr="uid" \
 groupdn="ou=groups,dc=proxysql,dc=com" \
 groupattr="cn" \
 groupfilter="(|(memberUid=)(member=)(uniqueMember=))" \
 insecure_tls=true
Example output:
Success! Data written to: auth/ldap/config
Now look at settings again after writing configs:
vault read auth/ldap/config
Example output:
Key  Value
 ---  -----
 binddn  cn=admin,dc=proxysql,dc=com
 case_sensitive_names false
 certificate
 deny_null_bind  true
 discoverdn  false
 groupattr  cn
 groupdn  ou=groups,dc=proxysql,dc=com
 groupfilter  (|(memberUid=)(member=)(uniqueMember=))
 insecure_tls  true
 starttls  false
 tls_max_version  tls12
 tls_min_version  tls12
 upndomain
 url  ldap://172.18.0.5
 userattr  uid
 userdn  ou=users,dc=proxysql,dc=com
Now test LDAP authentication against Vault. It is important to do this in a new connection to the app container, because the connection being used to do the above configuration has the root token authenticated. Until policies are mapped in a later command below, this command will report “* user is not a member of any authorized group.” That is okay for now.
vault auth -method=ldap username=vthompson
 [thompson]
Example output:
Error making API request.
 URL: PUT https://vault:9200/v1/auth/ldap/login/vthompson
 Code: 400. Errors:
 * user is not a member of any authorized group
Map LDAP groups to roles and policies Create a mysql readonly role with a default expiration. In this case, MySQL is the database, but a variety of database connections are supported. This section is done back in the root-authenticated app container connection.
vault write database/roles/readonly \
 db_name=mysql \
 creation_statements="CREATE USER 'Authenticating Vault against LDAP for accessing MySQL through ProxySQL'@'%' IDENTIFIED BY '';GRANT SELECT ON *.* TO 'Authenticating Vault against LDAP for accessing MySQL through ProxySQL'@'%';" \
 default_ttl="1h" \
 max_ttl="24h"
Example output:
Success! Data written to: database/roles/readonly
View the vault policies:
vault policies
Example output:
default
 root
The following hcl configuration file was pre-loaded into the app container in the docker-compose file. Take a look at the contents:
# cat mysqlread.hcl
 path "database/creds/readonly" {
 policy = "read"
 capabilities = ["list", "read"]
 }
Use this file to create and apply this to the mysql read-only role created above.
vault policy-write mysqlread mysqlread.hcl
Example output:
Policy 'mysqlread' written.
And set the mapping:
vault write auth/ldap/groups/developers policies=mysqlread
Example output:
Success! Data written to: auth/ldap/groups/developers
Use token to connect Here, the test is as the created user, not root, so go back to the connection to the app container that is not root-authenticated, or open a new connection to the app container.
vault auth -method=ldap username=vthompson
 [thompson]
Example output:
Successfully authenticated! You are now logged in.
 The token below is already saved in the session. You do not
 need to "vault auth" again with the token.
 token: e17233fc-a30b-717e-20f5-d5faa293ad61
 token_duration: 2764799
 token_policies: [default mysqlread]
When LDAP is authenticated as above, there will be a token in the session. Use this to get a MySQL credential from the path associated with the read-only policy granted above. Again, do this as the created user, not root.
vault read database/creds/readonly
Example output:
Key  Value
 ---  -----
 lease_id  database/creds/readonly/e0ece849-d53d-7ab8-8502-ff1533a61b74
 lease_duration  12h0m0s
 lease_renewable true
 password  A1a-7y7zzr463qqzr34u
 username  v-ldap-vthom-readonly-ux9rx9z3pr
Note: If your setup uses MySQL 5.6 or earlier, the default username generated by Vault will be too long to fit in the data field. For example:
* Error 1470: String 'v-ldap-vthom-readonly-ux9rx9z3pr' is too long for user name (should be no longer than 16)
To fix this, change the plugin used when setting up MySQL authorization above to “mysql-legacy-database-plugin.” Test database access directly from the app container with username/password returned from that output. The name of the container running MySQL is mysqlprimary .
mysql -hmysqlprimary -uv-ldap-vthom-readonly-ux9rx9z3pr -cA1a-7y7zzr463qqzr34u
At this point, Vault is serving temporary MySQL user accounts, authenticated by LDAP. I also wanted to test ProxySQL functionality, so I added this temporary MySQL user to ProxySQL. I did this manually for testing, but in any production scenario, this part would be automated with a wrapper script.
4. Add users to ProxySQL.
Connect ProxySQL If ProxySQL were supported as a database connection from Vault, then I would use a direct connection to it. I did some experimentation to force the authorization step to write to ProxySQL; the primary blocker was lack of support for transactions in ProxySQL. I understand there may have been further work on this since my tests. Here, I will add the user manually to ProxySQL. From the proxysql container, login as admin:mysql -u admin -padmin -h 127.0.0.1 -P6032
Then add the user provided by Vault above. Remember ProxySQL requires writing to runtime and disk:
insert into mysql_users (username,password) values ("v-ldap-vthom-readonly-ux9rx9z3pr","A1a-7y7zzr463qqzr34u");
 LOAD MYSQL USERS TO RUNTIME;
 SAVE MYSQL USERS TO DISK;
To allow tracking user activity through ProxySQL, enable proxysql query logging:
MySQL Database Consulting
Looking to optimize your MySQL use?
Share this
Share this
Configuring MySQL in a Docker Container
Using Docker to visualize MySQL performance schema