Update, 7 March 2014:
I don't often suggest this, but: stop reading this post! Oracle has (finally, yay!) released VM templates for EBS 12.2.3 that can be imported to Virtualbox directly! If you want an EBS 12.2 sandbox in Virtualbox, you don't need to follow the instructions in my blog post. Instead, review these two documents:
Oracle VM Virtual Appliances Available for E-Business Suite Release 12.2.3 (Steven Chan's blog)
and
Note 1620448.1: Oracle VM Virtual Appliances for Oracle E-Business Suite Deployment Guide, Release 12.2.3Section 2 of the My Oracle Support note should have all of the information you need to import the appliances into Virtualbox. It's all far less complicated: no rescue boot, no mkinitrd, no config file tweaking. Just download, unpack, import, and go!
Last year, I wrote a blog post about installing Oracle E-Business Suite 12.1.3 in Virtualbox using templates designed for Oracle VM Server. It was a surprisingly popular post, and I enjoyed engaging with a lot of enthusiastic readers in the comments. With minimal OS configuration, no installer to run, and automated scripts provided by Oracle to create the instance, the appeal of having an "out-of-the-box" EBS Vision instance was huge, especially for non-Apps DBAs. The ability to deploy these templates in Virtualbox increases their accessibility for EBS technology enthusiasts who lack access to OVM server.
Well, the EBS 12.2 OVM templates are out, so it's time to get busy with the new stuff! With a few small tweaks, easily illustrated in this blog post, you can have a working E-Business Suite 12.2.2 sandbox running in Virtualbox, without building your own servers from ground up, running an installer, or applying any patches.
What's different this time?
If you're familiar with the 12.1.3 version of these instructions, you'll notice a few differences in this post:
- No need to download a new kernel to replace the Xen kernel used by OVM. The kernel you need is already included; you just need to tell the server how to load it. This simplifies our lives quite a bit.
- We're building a single-node Vision instance this time, instead of multi-node. This was a pretty common request from readers of the 12.1.3 post, and I wanted to reduce the amount of VM resources I was using on my personal lab machine.
- The resource footprint of the VM has changed significantly, particularly the memory requirements. The introduction of WebLogic Server (WLS) to the E-Business Suite techstack, along with the duplicated apps tier filesystem required to support online patching, have bulked up an already-hefty Vision instance.
- You'll notice the "One hour of work!" tagline is missing from this post. It's probably still pretty close, since the long-running steps are hands-off, but I didn't use a stopwatch this time.
Finally, of course, you'll find that in general, the EBS 12.2 tech stack is a much different animal than 12.1. :)
Caveats
You really should not follow this guide if...
... you are an Apps DBA. Release 12.2 is very new. If you take this "shortcut," you are depriving yourself of a lot of learning opportunities: new install processes, patching practice, etc.
... you have an underpowered test system (< 2CPU, < 8GB RAM). The specs I'm using for this blog post are the bare minimum. You might be tempted to cut corners, but you'll be setting yourself up for pain later on.
... you don't know your license status. The OVM templates (and EBS software in general) are not "free to install, free to learn" content like you'll find on OTN. Tread carefully, and know what your support contract permits you to do!
... you need support from anyone (not even me, I can only point the way). OVM templates were not designed for use in VirtualBox, and furthermore, these templates were designed to be used in a multi-node (1 db tier, 1 app tier). This single-node Vision instance in VirtualBox is a double-Frankenstein job. Set your expectations accordingly.
... you have an OVM server at your disposal. Seriously, why jump through these hoops if you don't have to?
Okay, let's recap! No Apps DBAs, no underpowered test systems, no overpowered test systems, no support, no guarantees that it'll even work. Now that I've eliminated 90% of my potential audience, let's plow forward, shall we?
Ingredients
You will need:
- Oracle VirtualBox
- Lots of disk space. Final footprint will be about 325GB, but the intermediary file conversion steps require a lot of space. You should be fine with a 1 TB drive.
- 8GB of memory. Minimum. WLS is a beast, baby! Rawr!
- The previous requirement means that your host system needs to be capable of addressing that much memory, so a 32-bit host OS will not work here.
- 2 CPU cores, minimum. This will be slow enough as it is, why add the additional delay of db and app tier fighting each other for a single CPU core?
- OEL 5.x install media to act as a rescue boot disk. We don't need to download a new kernel, but we still need to boot in rescue mode to tinker a little bit.
- An understanding of some basic Linux systems administration tasks.
- Familiarity with configuring storage and network options in Virtualbox.
- Not strictly required, but a review of Note 1590941.1 would be a good idea. Most of the content is obviously set in an Oracle VM Server context, but there's some useful information there about extracting the templates and using the configuration scripts.
- Patience! Long downloads, file conversions...you're looking at hours of waiting for things to complete.
Configuration steps
When following these instructions, note that some of the commands and output may appear to be truncated. Even if you don't see a scrollbar, scroll right to get the rest of the content. Once I figure out a less awkward presentation method, I'll update.
- Download the templates
Connect to Oracle’s Software Delivery Cloud and download the files listed under Oracle VM Templates for Oracle E-Business Suite Release 12.2.2 Media Pack for x86 (64 bit)".For this exercise, you'll need to download "Oracle E-Business Suite Release 12.2.2 Application Tier Install X86 (64 bit), Parts 1-3 (Part numbers V41235-01 - V41237-01)" and "Oracle E-Business Suite Release 12.2.2 Vision Demo Database Tier Install X86 (64 bit), Parts 1-4 (Part numbers V41171-01 - V41173-01)." I also recommend clicking the “View Digest ” button near the top of the download page, and running md5sum on each of the downloaded zip files to make sure the checksums match that list."If you want to confirm that you're in the right place, Steven Chan's post announcing the templates has a screenshot of the Edelivery page. - Extract the templates
Note: If you’re using Windows and don’t have a Unix-like shell environment like Cygwin available, you may have to translate some of these steps to their Windows-y equivalents. Since we’re just concatenating and uncompressing files, I will assume you can do that. :-)- Unzip all the files you just downloaded (
unzip 'V41*.zip'). This will produce two sets of files: OVM_OL5U9_X86_64_EBIZ12.2_VIS_DB_PVM.tgz.* (database tier template) and OVM_OL5U9_X86_64_EBIZ12.2_APPS_PVM.tgz.* (apps tier template). - Concatenate and uncompress the two sets of files:
 zathras:EBS122OVMTempl  time cat OVM_OL5U9_X86_64_EBIZ12.2_APPS_PVM.tgz* | tar xvz -C /Volumes/Epsilon3/EBS\ Software/EBS122OVMTempl
x OVM_OL5U9_X86_64_EBIZ12.2_APPS_PVM/
x OVM_OL5U9_X86_64_EBIZ12.2_APPS_PVM/vm.cfg
x OVM_OL5U9_X86_64_EBIZ12.2_APPS_PVM/EBS.img
x OVM_OL5U9_X86_64_EBIZ12.2_APPS_PVM/System.img

real	150m42.754s
user	12m38.850s
sys	6m37.271s

zathras:EBS122OVMTempl jpiwowar$ time cat OVM_OL5U9_X86_64_EBIZ12.2_VIS_DB_PVM.tgz.* | tar xvz -C '/Volumes/Epsilon3/EBS Software/EBS122OVMTempl'
x OVM_OL5U9_X86_64_EBIZ12.2_VIS_DB_PVM/
x OVM_OL5U9_X86_64_EBIZ12.2_VIS_DB_PVM/vm.cfg
x OVM_OL5U9_X86_64_EBIZ12.2_VIS_DB_PVM/EBS.img
x OVM_OL5U9_X86_64_EBIZ12.2_VIS_DB_PVM/System.img

real	154m40.689s
user	14m33.270s
sys	6m42.356s
- Unzip all the files you just downloaded (
- Convert the disk image files to VDI format
Use the vboxmanage command-line utility to convert the database System.img file and the EBS.img files from both tiers to VDI format. You'll note that the final size of the apps tier VDI file is much smaller than its source. This is expected; the VDI files are dynamic, and only contain about 50GB of data despite having a max size of 250GB. Also note that we're only converting the images we need; since this will be a single-node instance, we don't need the apps tier System.img file.
zathras:OVM_OL5U9_X86_64_EBIZ12.2_VIS_DB_PVM jpiwowar$ vboxmanage convertfromraw System.img /Volumes/Europa/OVM122/app/DBRoot.vdi; vboxmanage convertfromraw EBS.img /Volumes/Europa/OVM122/app/DBData.vdi
Converting from raw image file="System.img" to file="/Volumes/Europa/OVM122/app/DBRoot.vdi"...
Creating dynamic image with size 36284923904 bytes (34604MB)...
Converting from raw image file="EBS.img" to file="/Volumes/Europa/OVM122/app/DBData.vdi"...
Creating dynamic image with size 268435456000 bytes (256000MB)...

zathras:OVM_OL5U9_X86_64_EBIZ12.2_APPS_PVM jpiwowar$ vboxmanage convertfromraw EBS.img /Volumes/Europa/OVM122/app/AppSoftware.vdi
Converting from raw image file="EBS.img" to file="/Volumes/Europa/OVM122/app/AppSoftware.vdi"...
Creating dynamic image with size 268435456000 bytes (256000MB)... - Configure your VirtualBox VM
Since we're doing a single-node Vision install, we only need one VM. Here are the specs:- OS: Oracle Linux, 64-bit
- CPUs: 2
- Memory: 8GB (more if you have it available)
- Device boot order: CD-ROM, Hard Disk
- Storage: Attach Linux installation ISO to CD/DVD drive on the IDE controller and attach the three vdi files to the SATA controller, in the following order: DBRoot.vdi, DBData.vdi, AppSoftware.vdi
- Network: At least one network interface, either Host-only or Bridged. If you choose Host-only, I recommend adding a second interface that uses NAT, so you can reach external (non-host) networks from your VM. If you use Bridged networking you don't need this second interface.
The screenshot below shows the final configuration of my VM:

- Boot VM in rescue mode from the install CD (round 1)
Enter “linux rescue” at the the boot: prompt to enter rescue mode: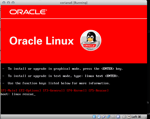
Select the keyboard and language preferences that suit you, and select "No" when asked about configuring network interfaces. We don't need them at this stage.
Select "Continue" at the "Rescue" screen to look for a Linux installation.
If you attached your disks properly, you will get a "Duplicate Labels" warning. This is because both the Vision database and Apps software disks have the same LVM label (EBS). We will fix that in the next step. For now, keep going by selecting the "Reboot" option. DO NOT ACTUALLY RESTART YOUR VM FROM THE VIRTUALBOX MENU, JUST HIT 'ENTER'. You'll find that the "reboot button" does not in fact, reboot the VM. Take a moment to savor the irony, then move on.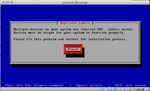
Select OK when you get the sad news about not finding a Linux installation: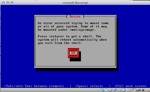
Now we can fix our pesky disk label problem, as shown below. Once complete, exit to reboot the VM so we can continue with the real work.When finished please exit from the shell and your system will reboot.
sh-3.2# e2label /dev/sdb1
EBS
sh-3.2# e2label /dev/sdc1
EBS
sh-3.2# e2label /dev/sdc1 EBSAPPS
sh-3.2# e2label /dev/sdc1
EBSAPPS
sh-3.2# exit - Boot VM in rescue mode from the install CD (round 2)
Follow the same steps as above to boot in rescue mode. This time, the rescue boot should find a Linux installation, and give you the option to mount it. This is where we'll make some adjustments to configure the server to use the correct kernel and mount both disks.- First, switch the root volume from from the rescue system to the OVM template
Your system is mounted under the /mnt/sysimage directory.
When finished please exit from the shell and your system will reboot.

sh-3.2# chroot /mnt/sysimage - Then, adjust /etc/fstab to include a mount point for the Apps tier filesystem. Make sure you set the last field in the EBS and EBSAPPS lines to '0' to avoid the possibility of a lengthy fsck of those volumes during boot.
sh-3.2# df -h
Filesystem            Size  Used Avail Use% Mounted on
/dev/sda2              18G  2.2G   15G  14% /
/dev/sda1              99M   51M   44M  54% /boot
/dev/sdb1             247G  184G   50G  79% /u01

sh-3.2# cat /etc/fstab
LABEL=/                 /                       ext3    defaults        1 1
LABEL=/boot             /boot                   ext3    defaults        1 2
tmpfs                   /dev/shm                tmpfs   defaults        0 0
devpts                  /dev/pts                devpts  gid=5,mode=620  0 0
sysfs                   /sys                    sysfs   defaults        0 0
proc                    /proc                   proc    defaults        0 0
LABEL=SWAP-VM           swap                    swap    defaults        0 0
LABEL=EBS               /u01                    ext3    defaults        1 2
sh-3.2# cp /etc/fstab /etc/fstab.bak
sh-3.2# vi /etc/fstab
"/etc/fstab" 9L, 684C written
sh-3.2# cat /etc/fstab
LABEL=/                 /                       ext3    defaults        1 1
LABEL=/boot             /boot                   ext3    defaults        1 2
tmpfs                   /dev/shm                tmpfs   defaults        0 0
devpts                  /dev/pts                devpts  gid=5,mode=620  0 0
sysfs                   /sys                    sysfs   defaults        0 0
proc                    /proc                   proc    defaults        0 0
LABEL=SWAP-VM           swap                    swap    defaults        0 0
LABEL=EBS               /u01                    ext3    defaults        1 0
LABEL=EBSAPPS           /u02                    ext3    defaults        1 0
sh-3.2# mkdir /u02
sh-3.2# mount /u02
sh-3.2# df -h
Filesystem            Size  Used Avail Use% Mounted on
/dev/sda2              18G  2.2G   15G  14% /
/dev/sda1              99M   51M   44M  54% /boot
/dev/sdb1             247G  184G   50G  79% /u01
/dev/sdc1 247G 53G 182G 23% /u02 - Finally, run mkinitrd make the system use the already-installed non-Xen kernel (make sure you get the whole command here, it may be truncated on the page).
sh-3.2# mkinitrd -v -f /boot/initrd-2.6.39-300.17.2.el5uek.img 2.6.39-300.17.2.el5uek
Creating initramfs
Modulefile is /etc/modprobe.conf
Looking for deps of module ehci-hcd
Looking for deps of module ohci-hcd
Looking for deps of module uhci-hcd
Looking for deps of module ext3: mbcache jbd
Looking for deps of module mbcache
Looking for deps of module jbd
Found root device sda2 for LABEL=/
Looking for driver for device sda2
Looking for deps of module pci:v00008086d00002829sv00000000sd00000000bc01sc06i01: libahci ahci libahci ahci
Looking for deps of module libahci
Looking for deps of module ahci: libahci
Looking for deps of module iscsi_tcp: scsi_transport_iscsi libiscsi libiscsi_tcp
Looking for deps of module scsi_transport_iscsi
Looking for deps of module libiscsi: scsi_transport_iscsi
Looking for deps of module libiscsi_tcp: scsi_transport_iscsi libiscsi
Looking for deps of module sr_mod: cdrom
Looking for deps of module cdrom
Looking for deps of module sd_mod: crc-t10dif
Looking for deps of module crc-t10dif
Looking for driver for device sda3
Looking for deps of module pci:v00008086d00002829sv00000000sd00000000bc01sc06i01: libahci ahci libahci ahci
Looking for deps of module xenblk: xen-blkfront
Looking for deps of module xen-blkfront
Looking for deps of module ide-disk
Looking for deps of module dm-mem-cache
Looking for deps of module dm-region_hash: dm-mod dm-log dm-region-hash
Looking for deps of module dm-mod
Looking for deps of module dm-log: dm-mod
Looking for deps of module dm-region-hash: dm-mod dm-log
Looking for deps of module dm-message
Looking for deps of module dm-raid45
Using modules:   /lib/modules/2.6.39-300.17.2.el5uek/kernel/fs/mbcache.ko /lib/modules/2.6.39-300.17.2.el5uek/kernel/fs/jbd/jbd.ko /lib/modules/2.6.39-300.17.2.el5uek/kernel/fs/ext3/ext3.ko /lib/modules/2.6.39-300.17.2.el5uek/kernel/drivers/ata/libahci.ko /lib/modules/2.6.39-300.17.2.el5uek/kernel/drivers/ata/ahci.ko /lib/modules/2.6.39-300.17.2.el5uek/kernel/drivers/scsi/scsi_transport_iscsi.ko /lib/modules/2.6.39-300.17.2.el5uek/kernel/drivers/scsi/libiscsi.ko /lib/modules/2.6.39-300.17.2.el5uek/kernel/drivers/scsi/libiscsi_tcp.ko /lib/modules/2.6.39-300.17.2.el5uek/kernel/drivers/scsi/iscsi_tcp.ko /lib/modules/2.6.39-300.17.2.el5uek/kernel/drivers/cdrom/cdrom.ko /lib/modules/2.6.39-300.17.2.el5uek/kernel/drivers/scsi/sr_mod.ko /lib/modules/2.6.39-300.17.2.el5uek/kernel/lib/crc-t10dif.ko /lib/modules/2.6.39-300.17.2.el5uek/kernel/drivers/scsi/sd_mod.ko /lib/modules/2.6.39-300.17.2.el5uek/kernel/drivers/block/xen-blkfront.ko /lib/modules/2.6.39-300.17.2.el5uek/kernel/drivers/md/dm-mod.ko /lib/modules/2.6.39-300.17.2.el5uek/kernel/drivers/md/dm-log.ko /lib/modules/2.6.39-300.17.2.el5uek/kernel/drivers/md/dm-region-hash.ko
/sbin/nash -> /tmp/initrd.qO1496/bin/nash
/sbin/insmod.static -> /tmp/initrd.qO1496/bin/insmod
/etc/udev/rules.d/05-udev-early.rules -> /tmp/initrd.qO1496/etc/udev/rules.d/05-udev-early.rules
/sbin/firmware_helper.static -> /tmp/initrd.qO1496/sbin/firmware_helper
/sbin/udevd.static -> /tmp/initrd.qO1496/sbin/udevd
copy from `/lib/modules/2.6.39-300.17.2.el5uek/kernel/fs/mbcache.ko' [elf64-x86-64] to `/tmp/initrd.qO1496/lib/mbcache.ko' [elf64-x86-64]
copy from `/lib/modules/2.6.39-300.17.2.el5uek/kernel/fs/jbd/jbd.ko' [elf64-x86-64] to `/tmp/initrd.qO1496/lib/jbd.ko' [elf64-x86-64]
copy from `/lib/modules/2.6.39-300.17.2.el5uek/kernel/fs/ext3/ext3.ko' [elf64-x86-64] to `/tmp/initrd.qO1496/lib/ext3.ko' [elf64-x86-64]
copy from `/lib/modules/2.6.39-300.17.2.el5uek/kernel/drivers/ata/libahci.ko' [elf64-x86-64] to `/tmp/initrd.qO1496/lib/libahci.ko' [elf64-x86-64]
copy from `/lib/modules/2.6.39-300.17.2.el5uek/kernel/drivers/ata/ahci.ko' [elf64-x86-64] to `/tmp/initrd.qO1496/lib/ahci.ko' [elf64-x86-64]
copy from `/lib/modules/2.6.39-300.17.2.el5uek/kernel/drivers/scsi/scsi_transport_iscsi.ko' [elf64-x86-64] to `/tmp/initrd.qO1496/lib/scsi_transport_iscsi.ko' [elf64-x86-64]
copy from `/lib/modules/2.6.39-300.17.2.el5uek/kernel/drivers/scsi/libiscsi.ko' [elf64-x86-64] to `/tmp/initrd.qO1496/lib/libiscsi.ko' [elf64-x86-64]
copy from `/lib/modules/2.6.39-300.17.2.el5uek/kernel/drivers/scsi/libiscsi_tcp.ko' [elf64-x86-64] to `/tmp/initrd.qO1496/lib/libiscsi_tcp.ko' [elf64-x86-64]
copy from `/lib/modules/2.6.39-300.17.2.el5uek/kernel/drivers/scsi/iscsi_tcp.ko' [elf64-x86-64] to `/tmp/initrd.qO1496/lib/iscsi_tcp.ko' [elf64-x86-64]
copy from `/lib/modules/2.6.39-300.17.2.el5uek/kernel/drivers/cdrom/cdrom.ko' [elf64-x86-64] to `/tmp/initrd.qO1496/lib/cdrom.ko' [elf64-x86-64]
copy from `/lib/modules/2.6.39-300.17.2.el5uek/kernel/drivers/scsi/sr_mod.ko' [elf64-x86-64] to `/tmp/initrd.qO1496/lib/sr_mod.ko' [elf64-x86-64]
copy from `/lib/modules/2.6.39-300.17.2.el5uek/kernel/lib/crc-t10dif.ko' [elf64-x86-64] to `/tmp/initrd.qO1496/lib/crc-t10dif.ko' [elf64-x86-64]
copy from `/lib/modules/2.6.39-300.17.2.el5uek/kernel/drivers/scsi/sd_mod.ko' [elf64-x86-64] to `/tmp/initrd.qO1496/lib/sd_mod.ko' [elf64-x86-64]
copy from `/lib/modules/2.6.39-300.17.2.el5uek/kernel/drivers/block/xen-blkfront.ko' [elf64-x86-64] to `/tmp/initrd.qO1496/lib/xen-blkfront.ko' [elf64-x86-64]
copy from `/lib/modules/2.6.39-300.17.2.el5uek/kernel/drivers/md/dm-mod.ko' [elf64-x86-64] to `/tmp/initrd.qO1496/lib/dm-mod.ko' [elf64-x86-64]
copy from `/lib/modules/2.6.39-300.17.2.el5uek/kernel/drivers/md/dm-log.ko' [elf64-x86-64] to `/tmp/initrd.qO1496/lib/dm-log.ko' [elf64-x86-64]
copy from `/lib/modules/2.6.39-300.17.2.el5uek/kernel/drivers/md/dm-region-hash.ko' [elf64-x86-64] to `/tmp/initrd.qO1496/lib/dm-region-hash.ko' [elf64-x86-64]
/sbin/dmraid.static -> /tmp/initrd.qO1496/bin/dmraid
/sbin/kpartx.static -> /tmp/initrd.qO1496/bin/kpartx
Adding module mbcache
Adding module jbd
Adding module ext3
Adding module libahci
Adding module ahci
Adding module scsi_transport_iscsi
Adding module libiscsi
Adding module libiscsi_tcp
Adding module iscsi_tcp
Adding module cdrom
Adding module sr_mod
Adding module crc-t10dif
Adding module sd_mod
Adding module xen-blkfront
Adding module dm-mod
Adding module dm-log
Adding module dm-region-hash
sh-3.2#
- First, switch the root volume from from the rescue system to the OVM template
- Remove the rescue DVD from the VM (menu navigation: Devices->CD/DVD Devices->Remove disk from virtual drive) and exit to reboot the VM. Otherwise, it'll boot from the CD again. If you get a warning about the the drive being in use, choose the "force unmount" option; this won't hurt anything.
sh-3.2# exit
exit
sh-3.2# exit - Network configuration
When the VM reboots, it will run a script included with the OVM template that performs one-time configuration of the network and sets up the 12.2 Vision database. Make sure you choose an IP address which is compatible with your VM's primary network interface. In my case, that's the host-only network vboxnet0, 192.168.56.0/255.255.255.0.IMPORTANT: Before you enter any network configuration info, now would be an excellent time to take a snapshot of your VM (menu navigation: Machine->Take Snapshot). Once network configuration completes, the script will roll directly into configuring the database tier, and if anything breaks during that process, you might have to re-extract and re-convert the template files again. That's not a recipe for fun times. No, I totally didn't (re)-learn this the hard way, why do you ask? ;-)Answer the questions presented by the network configuration script. Unless you're doing something a bit weird, your answers should be similar to mine. Remember the IP, domain, and hostname you choose; you'll need them later.
                Welcome to Oracle Linux Oracle Linux Server release 5.9
                Press 'I' to enter interactive startup.
Starting udev: [  OK  ]
Loading default keymap (us): [  OK  ]
[ Some startup output snipped to improve readability.]
Starting oraclevm-template...
Regenerating SSH host keys.
Stopping sshd: [  OK  ]
Generating SSH1 RSA host key: [  OK  ]
Generating SSH2 RSA host key: [  OK  ]
Generating SSH2 DSA host key: [  OK  ]
Starting sshd: [  OK  ]
=======================================
Configuring Oracle E-Business Suite...
=======================================
=======================================
        Configuring the Network...
=======================================
Configuring the Network Interactively

Configuring network interface.
  Network device: eth0
  Hardware address: 08:00:27:75:30:B6

  Do you want to enable dynamic IP configuration (DHCP) (Y|n)?n

  Enter static IP address: 192.168.56.58
  Enter netmask: [255.255.255.0] [enter to take default]
  Enter gateway: 192.168.56.1
  Enter DNS server: 8.8.8.8

  Shutting down interface eth0:  [  OK  ]
  Shutting down interface eth1:  [  OK  ]
  Shutting down loopback interface:  [  OK  ]

  Configuring network settings.
    IP configuration: Static IP address

  Bringing up loopback interface:  [  OK  ]
  Bringing up interface eth0:  [  OK  ]
  Bringing up interface eth1:
  Determining IP information for eth1... done.
  [  OK  ]

  Enter hostname (e.g, host.example.com): coriana6.local.org

  Network configuration changed successfully.
      IP configuration: Static IP address
      IP address:       192.168.56.58
      Netmask:          255.255.255.0
      Gateway:          10.0.3.2
      DNS server:       10.0.3.2
      Hostname:         coriana6.local.org
  =======================================
          Disabling the Linux Firewall...
======================================= - Configuration of db tier
After network configuration completes, the template deployment script will invoke Rapid Clone to configure the database tier. All you need to supply at the beginning is the desired SID for the database. Remember that for later, too. :-) When RapidClone completes, you will be prompted to select new passwords for the root and oracle users.==================================================
Prepare the Pairs File for Database Tier Clone...
===================================================
ORACLE_SID is not set in the Pairs File
Enter the Oracle Database SID :VIS122
==========================================================
Adding User oracle
==========================================================
==========================================================
Starting DB Tier configuration
==========================================================
Parameters Used for this Configuration...
The Pairs File :/u01/scripts/inst_db_pairs.txt
The Source context file used :/u01/install/11.2.0/appsutil/clone/context/db/CTXORIG.xml
The Target context file :/u01/install/11.2.0/appsutil/VIS122_coriana6.xml
==========================================================
The Configuration Used to Create this VM...
The Oracle E-Business Suite DBSID : VIS122
The Oracle E-Business Suite DB HostName : %HOSTNAME_NODOMAIN%
The Oracle E-Business Suite DB Domain Name :%DOMAIN%
The Oracle E-Business Suite DB TNS Port :1521
==========================================================
==========================================================
Cloning the DB Tier Context File
==========================================================
Copyright (c) 2011 Oracle Corporation
Redwood Shores, California, USA
Oracle E-Business Suite Rapid Clone
Version 12.2
adclonectx Version 120.30.12020000.4
Running:
/u01/install/11.2.0/appsutil/clone/bin/../jre/bin/java -Xmx600M -classpath /u01/install/11.2.0/appsutil/clone/bin/../jlib/ojdbc5.jar:/u01/install/11.2.0/appsutil/clone/bin/../jlib/xmlparserv2.jar:/u01/install/11.2.0/appsutil/clone/bin/../jlib/java oracle.apps.ad.context.CloneContext -e /u01/install/11.2.0/appsutil/clone/context/db/CTXORIG.xml -pairsfile /u01/scripts/inst_db_pairs.txt -out /u01/install/11.2.0/appsutil/VIS122_coriana6.xml -noprompt
Log file located at /u01/install/11.2.0/appsutil/log/CloneContext_1219031841.log
Report file located at /u01/install/11.2.0/appsutil/temp/portpool.lst
Complete port information available at /u01/install/11.2.0/appsutil/temp/portpool.lst
Creating the new Database Context file from :
/u01/install/11.2.0/appsutil/clone/context/db/adxdbctx.tmp
The new database context file has been created :
/u01/install/11.2.0/appsutil/VIS122_coriana6.xml
Log file located at /u01/install/11.2.0/appsutil/log/CloneContext_1219031841.log
contextfile=/u01/install/11.2.0/appsutil/VIS122_coriana6.xml
Check Clone Context logfile /u01/install/11.2.0/appsutil/log/CloneContext_1219031841.log for details.
Executing adcfgclone.pl on the Database Tier
Copyright (c) 2011 Oracle Corporation
Redwood Shores, California, USA
Oracle E-Business Suite Rapid Clone
Version 12.2
adcfgclone Version 120.63.12020000.22
stty: standard input: Inappropriate ioctl for device
Enter the APPS password :
stty: standard input: Inappropriate ioctl for device
Running Rapid Clone with command:
Running:
perl /u01/install/11.2.0/appsutil/clone/bin/adclone.pl java=/u01/install/11.2.0/appsutil/clone/bin/../jre mode=apply stage=/u01/install/11.2.0/appsutil/clone component=dbTier method=CUSTOM dbctxtg=/u01/install/11.2.0/appsutil/VIS122_coriana6.xml showProgress contextValidated=false
Beginning database tier Apply - Thu Dec 19 03:18:45 2013
/u01/install/11.2.0/appsutil/clone/bin/../jre/bin/java -Xmx600M -DCONTEXT_VALIDATED=false -Doracle.installer.oui_loc=/u01/install/11.2.0/oui -classpath /u01/install/11.2.0/appsutil/clone/jlib/xmlparserv2.jar:/u01/install/11.2.0/appsutil/clone/jlib/ojdbc6.jar:/u01/install/11.2.0/appsutil/clone/jlib/java:/u01/install/11.2.0/appsutil/clone/jlib/oui/OraInstaller.jar:/u01/install/11.2.0/appsutil/clone/jlib/oui/ewt3.jar:/u01/install/11.2.0/appsutil/clone/jlib/oui/share.jar:/u01/install/11.2.0/appsutil/clone/jlib/oui/srvm.jar:/u01/install/11.2.0/appsutil/clone/jlib/ojmisc.jar oracle.apps.ad.clone.ApplyDBTier -e /u01/install/11.2.0/appsutil/VIS122_coriana6.xml -stage /u01/install/11.2.0/appsutil/clone -showProgress
APPS Password : Log file located at /u01/install/11.2.0/appsutil/log/VIS122_coriana6/ApplyDBTier_12190318.log
| 0% completed
Log file located at /u01/install/11.2.0/appsutil/log/VIS122_coriana6/ApplyDBTier_12190318.log
Completed Apply...
Thu Dec 19 03:29:35 2013
Starting database listener for VIS122:
Running:
/u01/install/11.2.0/appsutil/scripts/VIS122_coriana6/addlnctl.sh start VIS122
Logfile: /u01/install/11.2.0/appsutil/log/VIS122_coriana6/addlnctl.txt
You are running addlnctl.sh version 120.4
Starting listener process VIS122 ...
Listener VIS122 has already been started.
addlnctl.sh: exiting with status 0
addlnctl.sh: check the logfile /u01/install/11.2.0/appsutil/log/VIS122_coriana6/addlnctl.txt for more information ...
Cloning the DB Tier Completed Successfully
Logfile: /u01/install/11.2.0/appsutil/log/VIS122_coriana6/addlnctl.txt
You are running addlnctl.sh version 120.4
Shutting down listener process VIS122 ...
LSNRCTL for Linux: Version 11.2.0.3.0 - Production on 19-DEC-2013 03:29:35
Copyright (c) 1991, 2011, Oracle. All rights reserved.
Connecting to (DESCRIPTION=(ADDRESS=(PROTOCOL=TCP)(HOST=coriana6.local.org)(PORT=1521)))
The command completed successfully
addlnctl.sh: exiting with status 0
addlnctl.sh: check the logfile /u01/install/11.2.0/appsutil/log/VIS122_coriana6/addlnctl.txt for more information ...
You are running addbctl.sh version 120.1
Shutting down database VIS122 ...
SQL*Plus: Release 11.2.0.3.0 Production on Thu Dec 19 03:29:35 2013
Copyright (c) 1982, 2011, Oracle. All rights reserved.
Connected.
Database closed.
Database dismounted.
ORACLE instance shut down.
Disconnected from Oracle Database 11g Enterprise Edition Release 11.2.0.3.0 - 64bit Production
With the Partitioning, OLAP, Data Mining and Real Application Testing options
addbctl.sh: exiting with status 0
==========================================================
Enabling the DB Service Startup on Boot
==========================================================
==========================================================
Starting the Oracle E-Business Suite DB Tier Services
==========================================================
Logfile: /u01/install/11.2.0/appsutil/log/VIS122_coriana6/addlnctl.txt
You are running addlnctl.sh version 120.4
Starting listener process VIS122 ...
LSNRCTL for Linux: Version 11.2.0.3.0 - Production on 19-DEC-2013 03:29:44
Copyright (c) 1991, 2011, Oracle. All rights reserved.
Starting /u01/install/11.2.0/bin/tnslsnr: please wait...
TNSLSNR for Linux: Version 11.2.0.3.0 - Production
System parameter file is /u01/install/11.2.0/network/admin/VIS122_coriana6/listener.ora
Log messages written to /u01/install/11.2.0/admin/VIS122_coriana6/diag/tnslsnr/coriana6/vis122/alert/log.xml
Listening on: (DESCRIPTION=(ADDRESS=(PROTOCOL=tcp)(HOST=coriana6.local.org)(PORT=1521)))
Connecting to (DESCRIPTION=(ADDRESS=(PROTOCOL=TCP)(HOST=coriana6.local.org)(PORT=1521)))
STATUS of the LISTENER
------------------------
Alias VIS122
Version TNSLSNR for Linux: Version 11.2.0.3.0 - Production
Start Date 19-DEC-2013 03:29:45
Uptime 0 days 0 hr. 0 min. 0 sec
Trace Level off
Security ON: Local OS Authentication
SNMP OFF
Listener Parameter File /u01/install/11.2.0/network/admin/VIS122_coriana6/listener.ora
Listener Log File /u01/install/11.2.0/admin/VIS122_coriana6/diag/tnslsnr/coriana6/vis122/alert/log.xml
Listening Endpoints Summary...
(DESCRIPTION=(ADDRESS=(PROTOCOL=tcp)(HOST=coriana6.local.org)(PORT=1521)))
Services Summary...
Service "VIS122" has 1 instance(s).
Instance "VIS122", status UNKNOWN, has 1 handler(s) for this service...
The command completed successfully
addlnctl.sh: exiting with status 0
addlnctl.sh: check the logfile /u01/install/11.2.0/appsutil/log/VIS122_coriana6/addlnctl.txt for more information ...
You are running addbctl.sh version 120.1
Starting the database VIS122 ...
SQL*Plus: Release 11.2.0.3.0 Production on Thu Dec 19 03:29:45 2013
Copyright (c) 1982, 2011, Oracle. All rights reserved.
Connected to an idle instance.
ORACLE instance started.
Total System Global Area 2137886720 bytes
Fixed Size 2230072 bytes
Variable Size 452987080 bytes
Database Buffers 1660944384 bytes
Redo Buffers 21725184 bytes
Database mounted.
Database opened.
Disconnected from Oracle Database 11g Enterprise Edition Release 11.2.0.3.0 - 64bit Production
With the Partitioning, OLAP, Data Mining and Real Application Testing options
addbctl.sh: exiting with status 0
==========================================================
Changing passwords for the default users
==========================================================
Changing password for user oracle.
New UNIX password:
BAD PASSWORD: it is based on a dictionary word
Retype new UNIX password:
passwd: all authentication tokens updated successfully.
Changing password for user root.
New UNIX password:
BAD PASSWORD: it is based on your username
Retype new UNIX password:
passwd: all authentication tokens updated successfully.
=====================INSTALLATION SUMMARY============
The Oracle E-Business Suite DB HostName : coriana6.local.org
The Base Installation Directory : /u01/install
The Oracle Home Location : /u01/install/11.2.0
The Oracle E-Business Suite Data File Dir : /u01/install/data
The Oracle E-Business Suite DBSID : VIS122
The Oracle E-Business Suite DB TNS Port : 1521
==========================================================
Will continue in 10 seconds, or press any key to continue...
Template configuration disabled.
[ OK ] - Prepare the server for apps configuration
Before we can run the configuration script to configure the apps tier of the instance, we need to make a few adjustments. Please note: most of these steps will not be necessary if you're trying to create a two-node instance; they're only required because we're trying to cram two nodes into one server.- Log in as root and adjust permissions on the ping executable. Otherwise, you may encounter issues with concurrent manager startup. This would probably not be necessary if we were using the Apps tier template's root disk.
coriana6.local.org login: root
Password:
Last login: Wed Oct 16 03:42:27 on tty1
[root@coriana6 ~]# ls -l /bin/ping
-rwxr-xr-x 1 root root 37312 Jul  2  2009 /bin/ping
[root@coriana6 ~]# chmod u+s /bin/ping - Next, we need to change the configuration scripts and associated files to use the new mount point for the apps tier filesystems (/u01 is expected by default), and to disable the network configuration steps (since we aren't running the script on a new server, we don't need it):
[root@coriana6 ~]# cd /u02/install/scripts
[root@coriana6 scripts]# ls
apps_pairs.txt  config.sh    inst_apps_pairs.txt  stopapps.sh
cleanup.sh      ebizapps.rc  startapps.sh
[root@coriana6 scripts]# perl -pi.old -e 's/u01/u02/g' *
[root@coriana6 scripts]# perl -pi.nonet -e 's/ovm_configure_network/echo "Skip ovm_configure_network"/g' config.sh
[root@coriana6 scripts]# diff config.sh config.sh.nonet
79c79
 # Call ovm_configure_network function which is part of JeOS function library
115c115
      ovm_configure_network
130c130
         ovm_configure_network "$IP_ADDR" "$NET_MASK" "$GATEWAY" "$DNS_HOST" "$HOST_NAME"
- Log in as root and adjust permissions on the ping executable. Otherwise, you may encounter issues with concurrent manager startup. This would probably not be necessary if we were using the Apps tier template's root disk.
- Execute the apps tier config script
Now, we're finally ready to go! Execute the config.sh script (still connected as root), and answer the prompts with the values from the configuration of the database tier. I've left the output from my configuration run completely intact as a reference, but the only user inputs required are at the beginning of the process.Please note: Execution of this script will take quite a long time. It took at least an hour on my modest test system. Rapid Clone has to configure both the Run and Patch filesystems, and starts up the application services at the end. There is significant overhead involved in the multiple stops and starts of the WLS components during this process. This would not be as painful on a properly-sized system of course.
[root@coriana6 scripts]# ./config.sh
=======================================
Configuring Oracle E-Business Suite...
=======================================
=======================================
      Configuring the Network...
=======================================
Configuring the Network Interactively
Skip ovm_configure_network
=======================================
      Disabling the Linux Firewall...
=======================================
==========================================================
              Adding User oracle
==========================================================
./config.sh: line 165: [: missing `]'
==================================================
 Prepare the Pairs File for Application Tier Clone...
===================================================
==================================================
 Checking if the FQDN is > 30 chars...
===================================================

The FQDN is less than 30 characters. Proceeding with the configuration
Database Tier Information is not set in the Pairs File
Prompting the user for Database Tier Information

Enter the Database Tier Host Name (without the domain) :coriana6

Enter the Database Tier Domain Name :local.org

Enter the Oracle Database SID :VIS122

Enter the TNS Listener Port Number :1521
==========================================================
              Starting Apps Tier configuration
==========================================================
Parameters Used for this Configuration...
The Pairs File :/u02/install/scripts/inst_apps_pairs.txt
The Source context file used  :/u02/install/fs1/EBSapps/comn/clone/context/apps/CTXORIG.xml
The Target context file       :/u02/install/fs1/inst/apps/VIS122_coriana6/appl/admin/VIS122_coriana6.xml
==========================================================
              Checking for the DB Host and Database
==========================================================

Pinging the Database Host coriana6.local.org...

The Database Host coriana6.local.org seem to be up
Proceeding with rest of the configuration...
Connected to Database VIS122 on coriana6...
==========================================================
      Configuring the VM as a new Application Tier Node
==========================================================
==========================================================
      Configuring the Application Tier File System (fs1)
==========================================================
==========================================================
      Cloning the Application Tier Context File
==========================================================
 Executing the command su oracle -c echo apps|./adclonectx.pl contextfile=/u02/install/fs1/EBSapps/comn/clone/context/apps/CTXORIG.xml pairsfile=/u02/install/scripts/inst_apps_pairs.txt outfile=/u02/install/fs1/inst/apps/VIS122_coriana6/appl/admin/VIS122_coriana6.xml nopromptmsg

                     Copyright (c) 2011 Oracle Corporation
                        Redwood Shores, California, USA

                        Oracle E-Business Suite Rapid Clone

                                 Version 12.2

                      adclonectx Version 120.30.12020000.4

Running:
/u02/install/fs1/EBSapps/comn/clone/bin/../jre/bin/java -Xmx600M -classpath /u02/install/fs1/EBSapps/comn/clone/bin/../jlib/ojdbc5.jar:/u02/install/fs1/EBSapps/comn/clone/bin/../jlib/xmlparserv2.jar:/u02/install/fs1/EBSapps/comn/clone/bin/../jlib/java oracle.apps.ad.context.CloneContext  -e /u02/install/fs1/EBSapps/comn/clone/context/apps/CTXORIG.xml -pairsfile /u02/install/scripts/inst_apps_pairs.txt -out /u02/install/fs1/inst/apps/VIS122_coriana6/appl/admin/VIS122_coriana6.xml -noprompt

Log file located at /u02/install/fs1/inst/apps/VIS122_coriana6/appl/admin/log/CloneContext_1219072110.log

Target System Base Directory set to /u02/install

Target System Current File System Base set to /u02/install/fs1

Target System Other File System Base set to /u02/install/fs2

Target System Fusion Middleware Home set to /u02/install/fs1/FMW_Home

Target System Web Oracle Home set to /u02/install/fs1/FMW_Home/webtier

Target System Appl TOP set to /u02/install/fs1/EBSapps/appl

Target System COMMON TOP set to /u02/install/fs1/EBSapps/comn

Target System Instance Top set to /u02/install/fs1/inst/apps/VIS122_coriana6
Report file located at /u02/install/fs1/inst/apps/VIS122_coriana6/admin/out/portpool.lst
Complete port information available at /u02/install/fs1/inst/apps/VIS122_coriana6/admin/out/portpool.lst

Creating the new APPL_TOP Context file from :
  /u02/install/fs1/EBSapps/comn/clone/context/apps/adxmlctx.tmp

The new APPL_TOP context file has been created :
  /u02/install/fs1/inst/apps/VIS122_coriana6/appl/admin/VIS122_coriana6.xml

Log file located at /u02/install/fs1/inst/apps/VIS122_coriana6/appl/admin/log/CloneContext_1219072110.log
contextfile=/u02/install/fs1/inst/apps/VIS122_coriana6/appl/admin/VIS122_coriana6.xml
Check Clone Context logfile /u02/install/fs1/inst/apps/VIS122_coriana6/appl/admin/log/CloneContext_1219072110.log for details.
 Executing the command perl adcfgclone.pl appsTier /u02/install/fs1/inst/apps/VIS122_coriana6/appl/admin/VIS122_coriana6.xml

                     Copyright (c) 2011 Oracle Corporation
                        Redwood Shores, California, USA

                        Oracle E-Business Suite Rapid Clone

                                 Version 12.2

                      adcfgclone Version 120.63.12020000.22
stty: standard input: Inappropriate ioctl for device

Enter the APPS password :
stty: standard input: Inappropriate ioctl for device
Running:
/u02/install/fs1/EBSapps/comn/clone/bin/../jre/bin/java -Xmx600M -classpath /u02/install/fs1/EBSapps/comn/clone/jlib/obfuscatepassword.jar:/u02/install/fs1/EBSapps/comn/clone/jlib/ojmisc.jar:/u02/install/fs1/EBSapps/comn/clone/jlib/java:/u02/install/fs1/EBSapps/comn/clone/jlib/emCfg.jar oracle.apps.ad.clone.util.OPWrapper -encryptpwd /u02/install/fs1/EBSapps/comn/clone/bin/../FMW/tempinfoApps.txt
stty: standard input: Inappropriate ioctl for device

Enter the Weblogic AdminServer password :
stty: standard input: Inappropriate ioctl for device
Running:
/u02/install/fs1/EBSapps/comn/clone/bin/../jre/bin/java -Xmx600M -classpath /u02/install/fs1/EBSapps/comn/clone/jlib/obfuscatepassword.jar:/u02/install/fs1/EBSapps/comn/clone/jlib/ojmisc.jar:/u02/install/fs1/EBSapps/comn/clone/jlib/java:/u02/install/fs1/EBSapps/comn/clone/jlib/emCfg.jar oracle.apps.ad.clone.util.OPWrapper /u02/install/fs1/EBSapps/comn/clone/bin/../FMW/tempinfo.txt
Running:
/u02/install/fs1/EBSapps/comn/clone/bin/../jre/bin/java -Xmx600M -classpath /u02/install/fs1/EBSapps/comn/clone/jlib/obfuscatepassword.jar:/u02/install/fs1/EBSapps/comn/clone/jlib/ojmisc.jar:/u02/install/fs1/EBSapps/comn/clone/jlib/java:/u02/install/fs1/EBSapps/comn/clone/jlib/emCfg.jar oracle.apps.ad.clone.util.OPWrapper /u02/install/fs1/EBSapps/comn/clone/bin/../FMW/EBSDataSource

Running Rapid Clone with command:
Running:
perl /u02/install/fs1/EBSapps/comn/clone/bin/adclone.pl java=/u02/install/fs1/EBSapps/comn/clone/bin/../jre mode=apply stage=/u02/install/fs1/EBSapps/comn/clone component=appsTier method=CUSTOM appctxtg=/u02/install/fs1/inst/apps/VIS122_coriana6/appl/admin/VIS122_coriana6.xml showProgress contextValidated=false

FMW Pre-requisite check log file location : /u02/install/fs1/EBSapps/comn/clone/FMW/logs/prereqcheck.log

Running: /u02/install/fs1/EBSapps/comn/clone/FMW/t2pjdk/bin/java -classpath /u02/install/fs1/EBSapps/comn/clone/prereq/webtier/Scripts/ext/jlib/engine.jar:/u02/install/fs1/EBSapps/comn/clone/prereq/webtier/oui/jlib/OraPrereq.jar:/u02/install/fs1/EBSapps/comn/clone/prereq/webtier/oui/jlib/OraPrereqChecks.jar:/u02/install/fs1/EBSapps/comn/clone/prereq/webtier/oui/jlib/OraInstaller.jar:/u02/install/fs1/EBSapps/comn/clone/prereq/webtier/oui/jlib/OraInstallerNet.jar:/u02/install/fs1/EBSapps/comn/clone/prereq/webtier/oui/jlib/srvm.jar:/u02/install/fs1/EBSapps/comn/clone/prereq/webtier/Scripts/ext/jlib/ojdl.jar:/u02/install/fs1/EBSapps/comn/clone/prereq/webtier/Scripts/ext/jlib/ojdl2.jar:/u02/install/fs1/EBSapps/comn/clone/prereq/webtier/Scripts/ext/jlib/ojdl-log4j.jar:/u02/install/fs1/EBSapps/comn/clone/prereq/webtier/oui/jlib/xmlparserv2.jar:/u02/install/fs1/EBSapps/comn/clone/prereq/webtier/oui/jlib/share.jar:/u02/install/fs1/EBSapps/comn/clone/jlib/java oracle.apps.ad.clone.util.FMWOracleHomePreReqCheck -prereqCheckFMW -e /u02/install/fs1/inst/apps/VIS122_coriana6/appl/admin/VIS122_coriana6.xml -stage /u02/install/fs1/EBSapps/comn/clone -log /u02/install/fs1/EBSapps/comn/clone/FMW/logs/prereqcheck.log

Beginning application tier Apply - Thu Dec 19 07:21:38 2013

/u02/install/fs1/EBSapps/comn/clone/bin/../jre/bin/java -Xmx600M -DCONTEXT_VALIDATED=false -Doracle.installer.oui_loc=/oui -classpath /u02/install/fs1/EBSapps/comn/clone/jlib/xmlparserv2.jar:/u02/install/fs1/EBSapps/comn/clone/jlib/ojdbc6.jar:/u02/install/fs1/EBSapps/comn/clone/jlib/java:/u02/install/fs1/EBSapps/comn/clone/jlib/oui/OraInstaller.jar:/u02/install/fs1/EBSapps/comn/clone/jlib/oui/ewt3.jar:/u02/install/fs1/EBSapps/comn/clone/jlib/oui/share.jar:/u02/install/fs1/FMW_Home/webtier/../Oracle_EBS-app1/oui/jlib/srvm.jar:/u02/install/fs1/EBSapps/comn/clone/jlib/ojmisc.jar:/u02/install/fs1/FMW_Home/wlserver_10.3/server/lib/weblogic.jar:/u02/install/fs1/EBSapps/comn/clone/jlib/obfuscatepassword.jar  oracle.apps.ad.clone.ApplyAppsTier -e /u02/install/fs1/inst/apps/VIS122_coriana6/appl/admin/VIS122_coriana6.xml -stage /u02/install/fs1/EBSapps/comn/clone    -showProgress -nopromptmsg
Log file located at /u02/install/fs1/inst/apps/VIS122_coriana6/admin/log/ApplyAppsTier_12190721.log
  -      0% completed
Log file located at /u02/install/fs1/inst/apps/VIS122_coriana6/admin/log/ApplyAppsTier_12190721.log
  \    100% completed

Completed Apply...
Thu Dec 19 07:49:40 2013

 Executing command: /u02/install/fs1/EBSapps/10.1.2/bin/sqlplus @/u02/install/fs1/EBSapps/appl/ad/12.0.0/patch/115/sql/truncate_ad_nodes_config_status.sql

Do you want to startup the Application Services for VIS122? (y/n) [n] :
Services not started

==========================================================
      Configuring the Application Tier File System (fs2)
==========================================================
Copying the Application Tier File System from fs1 to fs2
Executing the command su oracle -c perl adcfgclone.pl appsTier

                     Copyright (c) 2011 Oracle Corporation
                        Redwood Shores, California, USA

                        Oracle E-Business Suite Rapid Clone

                                 Version 12.2

                      adcfgclone Version 120.63.12020000.22
stty: standard input: Inappropriate ioctl for device

Enter the APPS password :
stty: standard input: Inappropriate ioctl for device
Running:
/u02/install/fs2/EBSapps/comn/clone/bin/../jre/bin/java -Xmx600M -classpath /u02/install/fs2/EBSapps/comn/clone/jlib/obfuscatepassword.jar:/u02/install/fs2/EBSapps/comn/clone/jlib/ojmisc.jar:/u02/install/fs2/EBSapps/comn/clone/jlib/java:/u02/install/fs2/EBSapps/comn/clone/jlib/emCfg.jar oracle.apps.ad.clone.util.OPWrapper -encryptpwd /u02/install/fs2/EBSapps/comn/clone/bin/../FMW/tempinfoApps.txt
stty: standard input: Inappropriate ioctl for device

Enter the Weblogic AdminServer password :
stty: standard input: Inappropriate ioctl for device
Running:
/u02/install/fs2/EBSapps/comn/clone/bin/../jre/bin/java -Xmx600M -classpath /u02/install/fs2/EBSapps/comn/clone/jlib/obfuscatepassword.jar:/u02/install/fs2/EBSapps/comn/clone/jlib/ojmisc.jar:/u02/install/fs2/EBSapps/comn/clone/jlib/java:/u02/install/fs2/EBSapps/comn/clone/jlib/emCfg.jar oracle.apps.ad.clone.util.OPWrapper /u02/install/fs2/EBSapps/comn/clone/bin/../FMW/tempinfo.txt
Running:
/u02/install/fs2/EBSapps/comn/clone/bin/../jre/bin/java -Xmx600M -classpath /u02/install/fs2/EBSapps/comn/clone/jlib/obfuscatepassword.jar:/u02/install/fs2/EBSapps/comn/clone/jlib/ojmisc.jar:/u02/install/fs2/EBSapps/comn/clone/jlib/java:/u02/install/fs2/EBSapps/comn/clone/jlib/emCfg.jar oracle.apps.ad.clone.util.OPWrapper /u02/install/fs2/EBSapps/comn/clone/bin/../FMW/EBSDataSource

Do you want to add a node (yes/no) [no] :

Running:
/u02/install/fs2/EBSapps/comn/clone/bin/../jre/bin/java -Xmx600M -cp /u02/install/fs2/EBSapps/comn/clone/jlib/java:/u02/install/fs2/EBSapps/comn/clone/jlib/xmlparserv2.jar:/u02/install/fs2/EBSapps/comn/clone/jlib/ojdbc5.jar:/u02/install/fs2/EBSapps/comn/clone/jlib/obfuscatepassword.jar:/u02/install/fs2/EBSapps/comn/clone/jlib/ojmisc.jar:/u02/install/fs2/EBSapps/comn/clone/jlib/java:/u02/install/fs2/EBSapps/comn/clone/jlib/emCfg.jar oracle.apps.ad.context.CloneContext -e /u02/install/fs2/EBSapps/comn/clone/bin/../context/apps/CTXORIG.xml -validate -pairsfile /tmp/adpairsfile_26497.lst -stage /u02/install/fs2/EBSapps/comn/clone  2> /tmp/adcfgclone_26497.err; echo $? > /tmp/adcfgclone_26497.res

Log file located at /u02/install/fs2/EBSapps/comn/clone/bin/CloneContext_1219075100.log

Target System File Edition type [run] :
Enter the full path of Run File System Context file :
Provide the values required for creation of the new APPL_TOP Context file.

Target System Fusion Middleware Home set to /u02/install/fs2/FMW_Home

Target System Web Oracle Home set to /u02/install/fs2/FMW_Home/webtier

Target System Appl TOP set to /u02/install/fs2/EBSapps/appl

Target System COMMON TOP set to /u02/install/fs2/EBSapps/comn

Target System Instance Top set to /u02/install/fs2/inst/apps/VIS122_coriana6

Target System Port Pool [0-99] :
Checking the port pool 1
done: Port Pool 1 is free
Report file located at /u02/install/fs2/inst/apps/VIS122_coriana6/admin/out/portpool.lst
Complete port information available at /u02/install/fs2/inst/apps/VIS122_coriana6/admin/out/portpool.lst

UTL_FILE_DIR on database tier consists of the following directories.

1. /usr/tmp
2. /usr/tmp
3. /u01/install/11.2.0/appsutil/outbound/VIS122_coriana6
4. /usr/tmp
Choose a value which will be set as APPLPTMP value on the target node [1] : RC-00208: Error: Not a valid number

UTL_FILE_DIR on database tier consists of the following directories.

1. /usr/tmp
2. /usr/tmp
3. /u01/install/11.2.0/appsutil/outbound/VIS122_coriana6
4. /usr/tmp
Choose a value which will be set as APPLPTMP value on the target node [1] : RC-00200: Error: Exception occurred while taking input from user

Creating the new APPL_TOP Context file from :
  /u02/install/fs2/EBSapps/comn/clone/context/apps/adxmlctx.tmp

The new APPL_TOP context file has been created :
  /u02/install/fs2/inst/apps/VIS122_coriana6/appl/admin/VIS122_coriana6.xml

Log file located at /u02/install/fs2/EBSapps/comn/clone/bin/CloneContext_1219075100.log
Check Clone Context logfile /u02/install/fs2/EBSapps/comn/clone/bin/CloneContext_1219075100.log for details.

Running Rapid Clone with command:
Running:
perl /u02/install/fs2/EBSapps/comn/clone/bin/adclone.pl java=/u02/install/fs2/EBSapps/comn/clone/bin/../jre mode=apply stage=/u02/install/fs2/EBSapps/comn/clone component=appsTier method=CUSTOM appctxtg=/u02/install/fs2/inst/apps/VIS122_coriana6/appl/admin/VIS122_coriana6.xml showProgress contextValidated=true

FMW Pre-requisite check log file location : /u02/install/fs2/EBSapps/comn/clone/FMW/logs/prereqcheck.log

Running: /u02/install/fs2/EBSapps/comn/clone/FMW/t2pjdk/bin/java -classpath /u02/install/fs2/EBSapps/comn/clone/prereq/webtier/Scripts/ext/jlib/engine.jar:/u02/install/fs2/EBSapps/comn/clone/prereq/webtier/oui/jlib/OraPrereq.jar:/u02/install/fs2/EBSapps/comn/clone/prereq/webtier/oui/jlib/OraPrereqChecks.jar:/u02/install/fs2/EBSapps/comn/clone/prereq/webtier/oui/jlib/OraInstaller.jar:/u02/install/fs2/EBSapps/comn/clone/prereq/webtier/oui/jlib/OraInstallerNet.jar:/u02/install/fs2/EBSapps/comn/clone/prereq/webtier/oui/jlib/srvm.jar:/u02/install/fs2/EBSapps/comn/clone/prereq/webtier/Scripts/ext/jlib/ojdl.jar:/u02/install/fs2/EBSapps/comn/clone/prereq/webtier/Scripts/ext/jlib/ojdl2.jar:/u02/install/fs2/EBSapps/comn/clone/prereq/webtier/Scripts/ext/jlib/ojdl-log4j.jar:/u02/install/fs2/EBSapps/comn/clone/prereq/webtier/oui/jlib/xmlparserv2.jar:/u02/install/fs2/EBSapps/comn/clone/prereq/webtier/oui/jlib/share.jar:/u02/install/fs2/EBSapps/comn/clone/jlib/java oracle.apps.ad.clone.util.FMWOracleHomePreReqCheck -prereqCheckFMW -e /u02/install/fs2/inst/apps/VIS122_coriana6/appl/admin/VIS122_coriana6.xml -stage /u02/install/fs2/EBSapps/comn/clone -log /u02/install/fs2/EBSapps/comn/clone/FMW/logs/prereqcheck.log

Beginning application tier Apply - Thu Dec 19 07:51:20 2013

/u02/install/fs2/EBSapps/comn/clone/bin/../jre/bin/java -Xmx600M -DCONTEXT_VALIDATED=true -Doracle.installer.oui_loc=/oui -classpath /u02/install/fs2/EBSapps/comn/clone/jlib/xmlparserv2.jar:/u02/install/fs2/EBSapps/comn/clone/jlib/ojdbc6.jar:/u02/install/fs2/EBSapps/comn/clone/jlib/java:/u02/install/fs2/EBSapps/comn/clone/jlib/oui/OraInstaller.jar:/u02/install/fs2/EBSapps/comn/clone/jlib/oui/ewt3.jar:/u02/install/fs2/EBSapps/comn/clone/jlib/oui/share.jar:/u02/install/fs2/FMW_Home/webtier/../Oracle_EBS-app1/oui/jlib/srvm.jar:/u02/install/fs2/EBSapps/comn/clone/jlib/ojmisc.jar:/u02/install/fs2/FMW_Home/wlserver_10.3/server/lib/weblogic.jar:/u02/install/fs2/EBSapps/comn/clone/jlib/obfuscatepassword.jar  oracle.apps.ad.clone.ApplyAppsTier -e /u02/install/fs2/inst/apps/VIS122_coriana6/appl/admin/VIS122_coriana6.xml -stage /u02/install/fs2/EBSapps/comn/clone    -showProgress -nopromptmsg
Log file located at /u02/install/fs2/inst/apps/VIS122_coriana6/admin/log/ApplyAppsTier_12190751.log
  |    100% completed

Completed Apply...
Thu Dec 19 08:15:33 2013

Looking for incomplete CLONE record in ad_adop_session_patches table

The CLONE record status is no rows selected

Updating incomplete CLONE record to COMPLETED
==========================================================
      Enabling the Apps Tier Service Startup on Boot
==========================================================
==========================================================
      Enabling the NFS service for shared file system setup
==========================================================
==========================================================
      Starting the Oracle E-Business Suite Application tier Services
==========================================================
Starting the Oracle E-Business Suite Application Tier Services
You are running adstrtal.sh version 120.24.12020000.7

The logfile for this session is located at /u02/install/fs1/inst/apps/VIS122_coriana6/logs/appl/admin/log/adstrtal.log

Executing service control script:
/u02/install/fs1/inst/apps/VIS122_coriana6/admin/scripts/jtffmctl.sh start
Timeout specified in context file: 100 second(s)

script returned:
****************************************************

You are running jtffmctl.sh version 120.3.12020000.4

Validating Fulfillment patch level via /u02/install/fs1/EBSapps/comn/java/classes
Fulfillment patch level validated.
Starting Fulfillment Server for VIS122 on port 9300 ...

jtffmctl.sh: exiting with status 0

.end std out.

.end err out.

****************************************************

Executing service control script:
/u02/install/fs1/inst/apps/VIS122_coriana6/admin/scripts/adopmnctl.sh start
Timeout specified in context file: 100 second(s)

script returned:
****************************************************

You are running adopmnctl.sh version 120.0.12020000.2

Starting Oracle Process Manager (OPMN) ...

adopmnctl.sh: exiting with status 0

adopmnctl.sh: check the logfile /u02/install/fs1/inst/apps/VIS122_coriana6/logs/appl/admin/log/adopmnctl.txt for more information ...

.end std out.

.end err out.

****************************************************

Executing service control script:
/u02/install/fs1/inst/apps/VIS122_coriana6/admin/scripts/adapcctl.sh start
Timeout specified in context file: 100 second(s)

script returned:
****************************************************

You are running adapcctl.sh version 120.0.12020000.2

Starting OPMN managed Oracle HTTP Server (OHS) instance ...
opmnctl start: opmn is already running.
opmnctl startproc: starting opmn managed processes...

adapcctl.sh: exiting with status 0

adapcctl.sh: check the logfile /u02/install/fs1/inst/apps/VIS122_coriana6/logs/appl/admin/log/adapcctl.txt for more information ...

.end std out.

.end err out.

****************************************************

Executing service control script:
/u02/install/fs1/inst/apps/VIS122_coriana6/admin/scripts/adnodemgrctl.sh start -nopromptmsg
Timeout specified in context file: 100 second(s)

script returned:
****************************************************

You are running adnodemgrctl.sh version 120.11.12020000.4

Calling txkChkEBSDependecies.pl to perform dependency checks for oacore
Perl script txkChkEBSDependecies.pl got executed successfully

Starting the Node Manager...
NMProcess:
NMProcess: Dec 19, 2013 8:17:48 AM weblogic.nodemanager.server.NMServerConfig initDomainsMap
NMProcess: INFO: Loading domains file: /u02/install/fs1/FMW_Home/wlserver_10.3/common/nodemanager/nmHome1/nodemanager.domains
NMProcess:
NMProcess: Dec 19, 2013 8:17:48 AM weblogic.nodemanager.server.NMServer
NMProcess: WARNING: Node manager configuration properties file '/u02/install/fs1/FMW_Home/wlserver_10.3/common/nodemanager/nmHome1/nodemanager.properties' not found. Using default settings.
NMProcess:
NMProcess: Dec 19, 2013 8:17:48 AM weblogic.nodemanager.server.NMServer
NMProcess: INFO: Saving node manager configuration properties to '/u02/install/fs1/FMW_Home/wlserver_10.3/common/nodemanager/nmHome1/nodemanager.properties'
Refer /u02/install/fs1/inst/apps/VIS122_coriana6/logs/appl/admin/log/adnodemgrctl.txt for details

adnodemgrctl.sh: exiting with status 0

adnodemgrctl.sh: check the logfile /u02/install/fs1/inst/apps/VIS122_coriana6/logs/appl/admin/log/adnodemgrctl.txt for more information ...

.end std out.
*** ALL THE FOLLOWING FILES ARE REQUIRED FOR RESOLVING RUNTIME ERRORS
*** Log File = /u02/install/fs1/inst/apps/VIS122_coriana6/logs/appl/rgf/TXK/txkChkEBSDependecies_Thu_Dec_19_08_17_07_2013/txkChkEBSDependecies_Thu_Dec_19_08_17_07_2013.log

.end err out.

****************************************************

Executing service control script:
/u02/install/fs1/inst/apps/VIS122_coriana6/admin/scripts/adalnctl.sh start
Timeout specified in context file: 100 second(s)

script returned:
****************************************************

adalnctl.sh version 120.3.12020000.2

Checking for FNDFS executable.
Starting listener process APPS_VIS122.

adalnctl.sh: exiting with status 0

adalnctl.sh: check the logfile /u02/install/fs1/inst/apps/VIS122_coriana6/logs/appl/admin/log/adalnctl.txt for more information ...

.end std out.

.end err out.

****************************************************

Executing service control script:
/u02/install/fs1/inst/apps/VIS122_coriana6/admin/scripts/adcmctl.sh start
Timeout specified in context file: 1000 second(s)

script returned:
****************************************************

You are running adcmctl.sh version 120.19.12020000.3

Starting concurrent manager for VIS122 ...
Starting VIS122_1219@VIS122 Internal Concurrent Manager
Default printer is noprint

adcmctl.sh: exiting with status 0

adcmctl.sh: check the logfile /u02/install/fs1/inst/apps/VIS122_coriana6/logs/appl/admin/log/adcmctl.txt for more information ...

.end std out.

.end err out.

****************************************************

Executing service control script:
/u02/install/fs1/inst/apps/VIS122_coriana6/admin/scripts/adadminsrvctl.sh start -nopromptmsg
Timeout specified in context file: 1000 second(s)

script returned:
****************************************************

You are running adadminsrvctl.sh version 120.10.12020000.4

Starting WLS Admin Server...
Refer /u02/install/fs1/inst/apps/VIS122_coriana6/logs/appl/admin/log/adadminsrvctl.txt for details

adadminsrvctl.sh: exiting with status 0

adadminsrvctl.sh: check the logfile /u02/install/fs1/inst/apps/VIS122_coriana6/logs/appl/admin/log/adadminsrvctl.txt for more information ...

.end std out.

.end err out.

****************************************************

Executing service control script:
/u02/install/fs1/inst/apps/VIS122_coriana6/admin/scripts/admanagedsrvctl.sh start forms_server1 -nopromptmsg
Timeout specified in context file: -1 second(s)

script returned:
****************************************************

You are running admanagedsrvctl.sh version 120.14.12020000.6

Starting forms_server1...

admanagedsrvctl.sh: exiting with status 0

admanagedsrvctl.sh: check the logfile /u02/install/fs1/inst/apps/VIS122_coriana6/logs/appl/admin/log/adformsctl.txt for more information ...

.end std out.

.end err out.

****************************************************

Executing service control script:
/u02/install/fs1/inst/apps/VIS122_coriana6/admin/scripts/admanagedsrvctl.sh start oafm_server1 -nopromptmsg
Timeout specified in context file: -1 second(s)

script returned:
****************************************************

You are running admanagedsrvctl.sh version 120.14.12020000.6

Starting oafm_server1...

admanagedsrvctl.sh: exiting with status 0

admanagedsrvctl.sh: check the logfile /u02/install/fs1/inst/apps/VIS122_coriana6/logs/appl/admin/log/adoafmctl.txt for more information ...

.end std out.

.end err out.

****************************************************

Executing service control script:
/u02/install/fs1/inst/apps/VIS122_coriana6/admin/scripts/admanagedsrvctl.sh start forms-c4ws_server1 -nopromptmsg
Timeout specified in context file: -1 second(s)

script returned:
****************************************************

You are running admanagedsrvctl.sh version 120.14.12020000.6

Starting forms-c4ws_server1...

admanagedsrvctl.sh: exiting with status 0

admanagedsrvctl.sh: check the logfile /u02/install/fs1/inst/apps/VIS122_coriana6/logs/appl/admin/log/adforms-c4wsctl.txt for more information ...

.end std out.

.end err out.

****************************************************

Executing service control script:
/u02/install/fs1/inst/apps/VIS122_coriana6/admin/scripts/admanagedsrvctl.sh start oacore_server1 -nopromptmsg
Timeout specified in context file: -1 second(s)

script returned:
****************************************************

You are running admanagedsrvctl.sh version 120.14.12020000.6

Starting oacore_server1...

admanagedsrvctl.sh: exiting with status 0

admanagedsrvctl.sh: check the logfile /u02/install/fs1/inst/apps/VIS122_coriana6/logs/appl/admin/log/adoacorectl.txt for more information ...

.end std out.

.end err out.

****************************************************

All enabled services for this node are started.

adstrtal.sh: Exiting with status 0

adstrtal.sh: check the logfile /u02/install/fs1/inst/apps/VIS122_coriana6/logs/appl/admin/log/adstrtal.log for more information ... - At the end of the install, you'll get another opportunity to change the oracle and root passwords (remember, these scripts were designed to run on separate servers), and an install summary:
 ==========================================================
      Change Passwords for the Default Users
==========================================================
Changing password for user oracle.
New UNIX password:
BAD PASSWORD: it is based on a dictionary word
Retype new UNIX password:
passwd: all authentication tokens updated successfully.
Changing password for user root.
New UNIX password:
BAD PASSWORD: it is based on a dictionary word
Retype new UNIX password:
passwd: all authentication tokens updated successfully.
===================INSTALLATION SUMMARY=============================
Oracle E-Business Suite Installation Top Level Directory : /u02/install
Oracle E-Business Suite Context File : /u02/install/fs1/inst/apps/VIS122_coriana6/appl/admin/VIS122_coriana6.xml
Oracle E-Business Suite Login Page : https://coriana6.local.org:8000/OA_HTML/AppsLogin
Oracle E-Business Suite Database Tier Host : coriana6.local.org
Oracle E-Business Suite Database SID : VIS122
Oracle E-Business Suite TNS_PORT : 1521
==================================================================

Will continue in 60 seconds, or press any key to continue...


Now what?
Now the real fun begins! If you have added your VM's IP and hostname to the local hosts file on your host machine, you can access your Vision instance at the URL listed after "Oracle E-Business Suite Login Page" at the end of the Apps tier Rapic Clone run. The default password for the admin user (SYSADMIN) is the same as it always is.
A few more things to note:
- Use the
startapps.shandstopapps.shscripts in/u02/install/scripts/to (wait for it...) start and stop the Apps. Note that these scripts expect to be run by user oracle, not root. Also, these scripts have default passwords for the apps and weblogic users hard-coded in them, so if you change those passwords, you'll need to update the scripts. Or you can just use the normal service start/stop scripts, but these wrapper scripts sure are convenient. ;) - Similarly, you'll find start/stop scripts for database services in
/u01/scripts(startdb.shandstopdb.sh). These also need to be run as oracle. - Since this is a single-node system with both tiers owned by oracle, keeping your OS environment straight might take some practice. Try to remember to do database and apps work in separate sessions. To set the environment for the apps tier, use the script /u02/install/EBSapps.env (in most cases, you will want to set the "run" environment, e.g. "
. /u02/install/EBSapps.env run" ). To set the environment for the database tier, invoke the /u01/install/11.2.0/SID_hostname.env file (e.g. ". /u01/install/11.2.0/VIS122_coriana6.env"). If you're still learning Linux/Unix, please remember that you need to invoke these scripts with a leading "dot+space" as in the preceding examples, or the environment variable values will not be exported to your session. - The first time you try to log into your instance after starting it up, it will be probably be painfully slow. Subsequent logins and similar operations will merely be slow.
- The first time I visited the login page and the initial Navigator page for the Vision instance, I had a few "Unable to load" errors for some components on the page. I found that a refresh of the page resolved these issues. I had similar issues upon launching Forms. It takes time for some of these things to be cached, and the default timeout values on the server might not be configured for workstation-grade test systems.
- The WLS EM Console, if you need it, will be on port 7001 of your instance (e.g. https://coriana6.local.org:7001/em). Log in with user 'weblogic', with the password in the startapps.sh script.
- The WLS Admin console for your instance is also on port 7001, at the following URL: https://your_host.your_domain:7001/console (e.g. https://coriana6.local.org:7001/console). Log in to this interface with the 'weblogic' user, too.
- In general, unless you find issues with services not starting up cleanly, you probably won't need the WLS URLs very much. Unless you're an Apps DBA, and hopefully you're not, because I said at the very beginning that this post is not for Apps DBAs. ;-)
- Oh, and the 12.2.3 patchset has just been released, so if you'd like some patching practice... ;-)
I want to do something slightly different!
Maybe all of this just isn't weird enough, and you would like to either:
- Install the Production OVM templates instead of the Vision templates (Hi John!), or
- Deploy the Vision templates in a two-node configuration
In either case, you should be able to find your way based on the instructions in this post. The only "magic" happening here is rescue boot and mkinitrd command to allow the use of the non-Xen kernel. After that, most of the steps should be more or less the same. In the first case listed above (production database templates), the only thing that changes is which database templates you download: parts V41175-V41177 instead of parts V41171-V41173. While I haven't checked, presumably the network and db tier configuration script is going to be the same. In the second case (two-node configuration), you won't need to worry about changing disk labels or altering /etc/fstab, but you will have to convert the Apps root disk to a VDI file, and do the mkinitrd steps twice. Also, when allocating resources for the two-node instance, I recommend a minimum of 6GB of memory for the app tier and 2GB for the database tier. Please note that I haven't tried either approach; these are just educated guesses based on doc review and looking at the configuration scripts. If you're successful with either of these alternative deployments, I'd love to hear about it in the comments!
Ok, we're done! You can now give yourself (or an ORACLENERD you care about) the gift of an EBS 12.2.2 Vision instance, just in time for the holidays! Start downloading now, though, if you want to be ready by Christmas. ;)
Good luck, and happy playing!
Oracle Database Consulting Services
Ready to optimize your Oracle Database for the future?
Share this
Share this