Overview
Here's a scenario we've seen in many businesses; your SQL Server database has grown to the point that performance has degraded significantly, and your business no longer meets the intended RTO (recovery time objective). In this case, your database likely contains historical read-only data that is rarely or never queried by your OLTP (online transactional processing) application. Still, you probably need to keep this read-only data "somewhere" and "just in case it's needed." This could be for infrequent data querying/auditing purposes or in case it's needed for analytics and reporting. While you need to be able to retrieve the data, the performance of retrieving the read-only historical data by the OLTP application is no longer critical.Time to take action
So, it's time to archive this old data somewhere and purge it from the OLTP database. The benefits of doing so are huge, and will positively impact the production environment in terms of backups/restores, database maintenance and OLTP application performance. It may even free up some storage space. The best scenario would be to partition the OLTP tables containing the read-only data and partition-align the indexes. This way you can copy the historical data "somewhere" and quickly switch partitions and remove it from the table. However, this isn't always possible. To avoid affecting performance, you may need to create a process that will copy data to the new location and slowly delete the same data from the source. It's not surprising that copying your historical data to the cloud is a viable solution. There are a couple of ways you might consider doing that.Option one
The first intuitive option for copying SQL Server OLTP data to the cloud is a relational database in the cloud, such as Amazon RDS for SQL Server. As the first step of your data archival process you would copy data to RDS then delete the data you copied from your production OLTP. This would ensure that your OLTP production database is being "cleaned up" as quickly as possible while you can still easily copy your relational data back if needed. That part could be done by an SSIS (SQL Server Integration Services) package or another ETL (extract, transform, load) tool along with some T-SQL code or stored procedures.Option two
However, there's a cheaper option for storing read-only archived data that will also allow your business to use that data for fast analytics and reporting. This option is storing the data on AWS S3 buckets, partitioned, in Parquet files. Parquet format ensures that the data is compressed and also keeps the structure of the data in the file. If you wish to later query the data from the Parquet files, you can use Glue to map the files to Glue tables then query those tables using Athena.Read-only data solution
In this post we're demonstrating how to copy read-only data stored entirely in an SQL Server RDS database, into S3 Blob storage, partitioned by an IDENTITY or another SEQUENTIAL column. We also show how to map the files pertaining to a table into a Glue table and how to read the data using Athena. Most of the examples out there show how to partition data onto S3 buckets by date. We're choosing to show how to partition by a sequential numeric column. You can modify the way you partition the data according to your needs in the job script (Python), as shown below. For a full understanding of the setup and prerequisites, follow instructions here: https://dev.to/amree/exporting-data-from-rds-to-s3-using-aws-glue-mai. In the following example, we're assuming you already have an RDS database with all the data to be copied to S3. Also, that you've set up all the security and permissions, as well as the network settings and VPC (Virtual Private Cloud). The way we'll set it up, the jobs will always copy any data newly appended since the last execution from the RDS database to the S3 buckets (delta copy). The full process includes the following steps:- Create a Glue database for this project.
- Create a connection to the RDS SQL Server source database.
- Create a connection to the destination S3 bucket.
- Create and run a crawler that will map the RDS tables to Glue tables in the Glue database.
- Create and run a job that will copy the data from RDS table to S3 bucket folder, partitioned by a numeric key (in Parquet format).
- Create and run a crawler that will map an existing S3 folder to a Glue table.
- Query the above Glue table from Athena, using SQL.
1. Create a Glue database for this project
In the AWS Console choose Services --> Glue: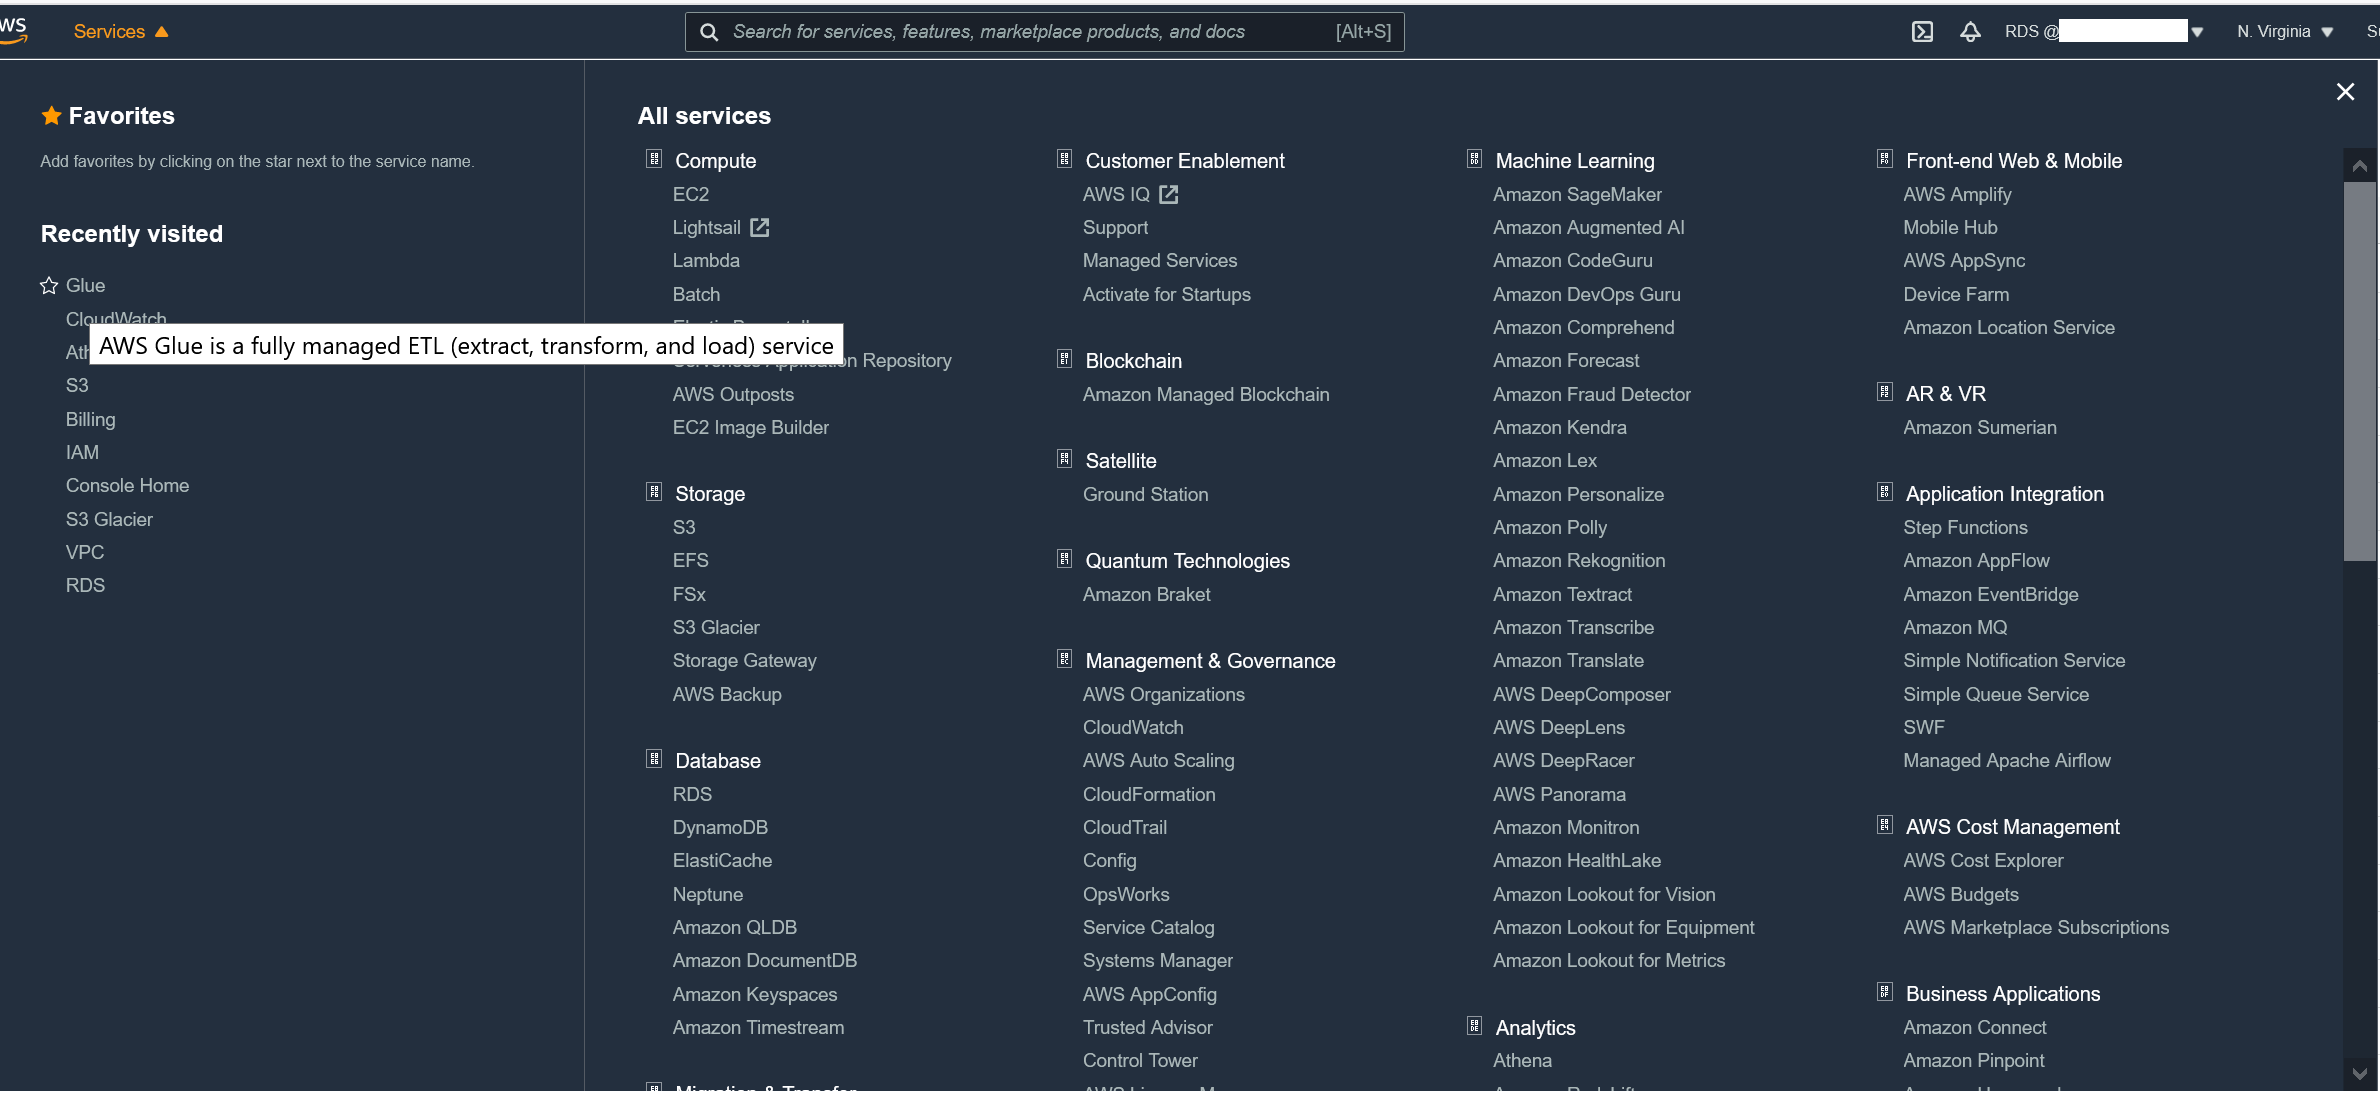 When Glue opens, on the left pane click on databases and "Add database":
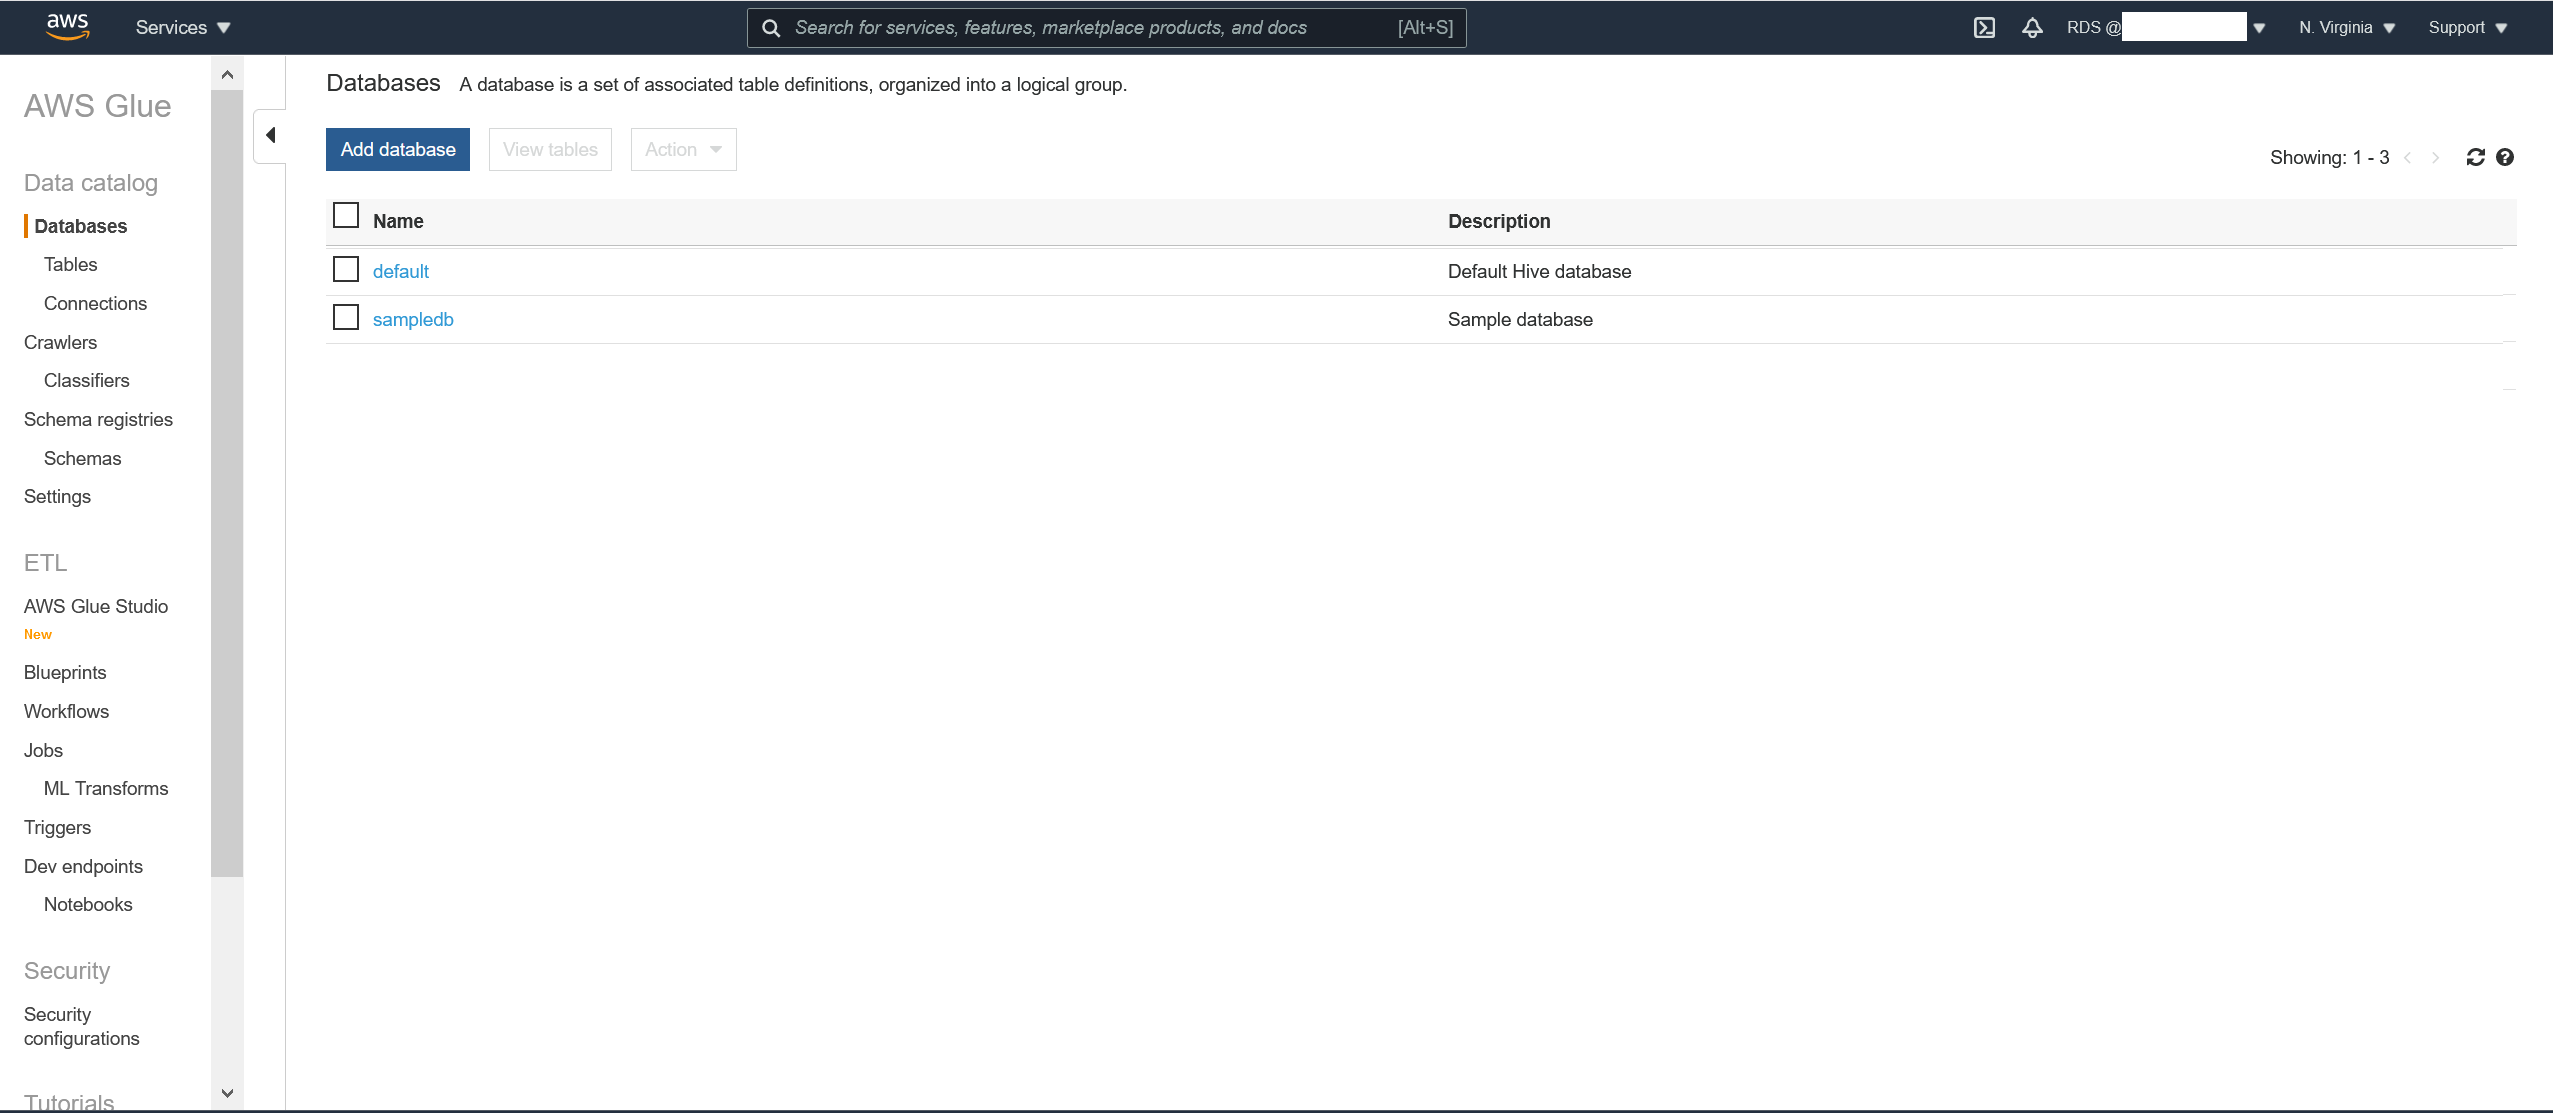
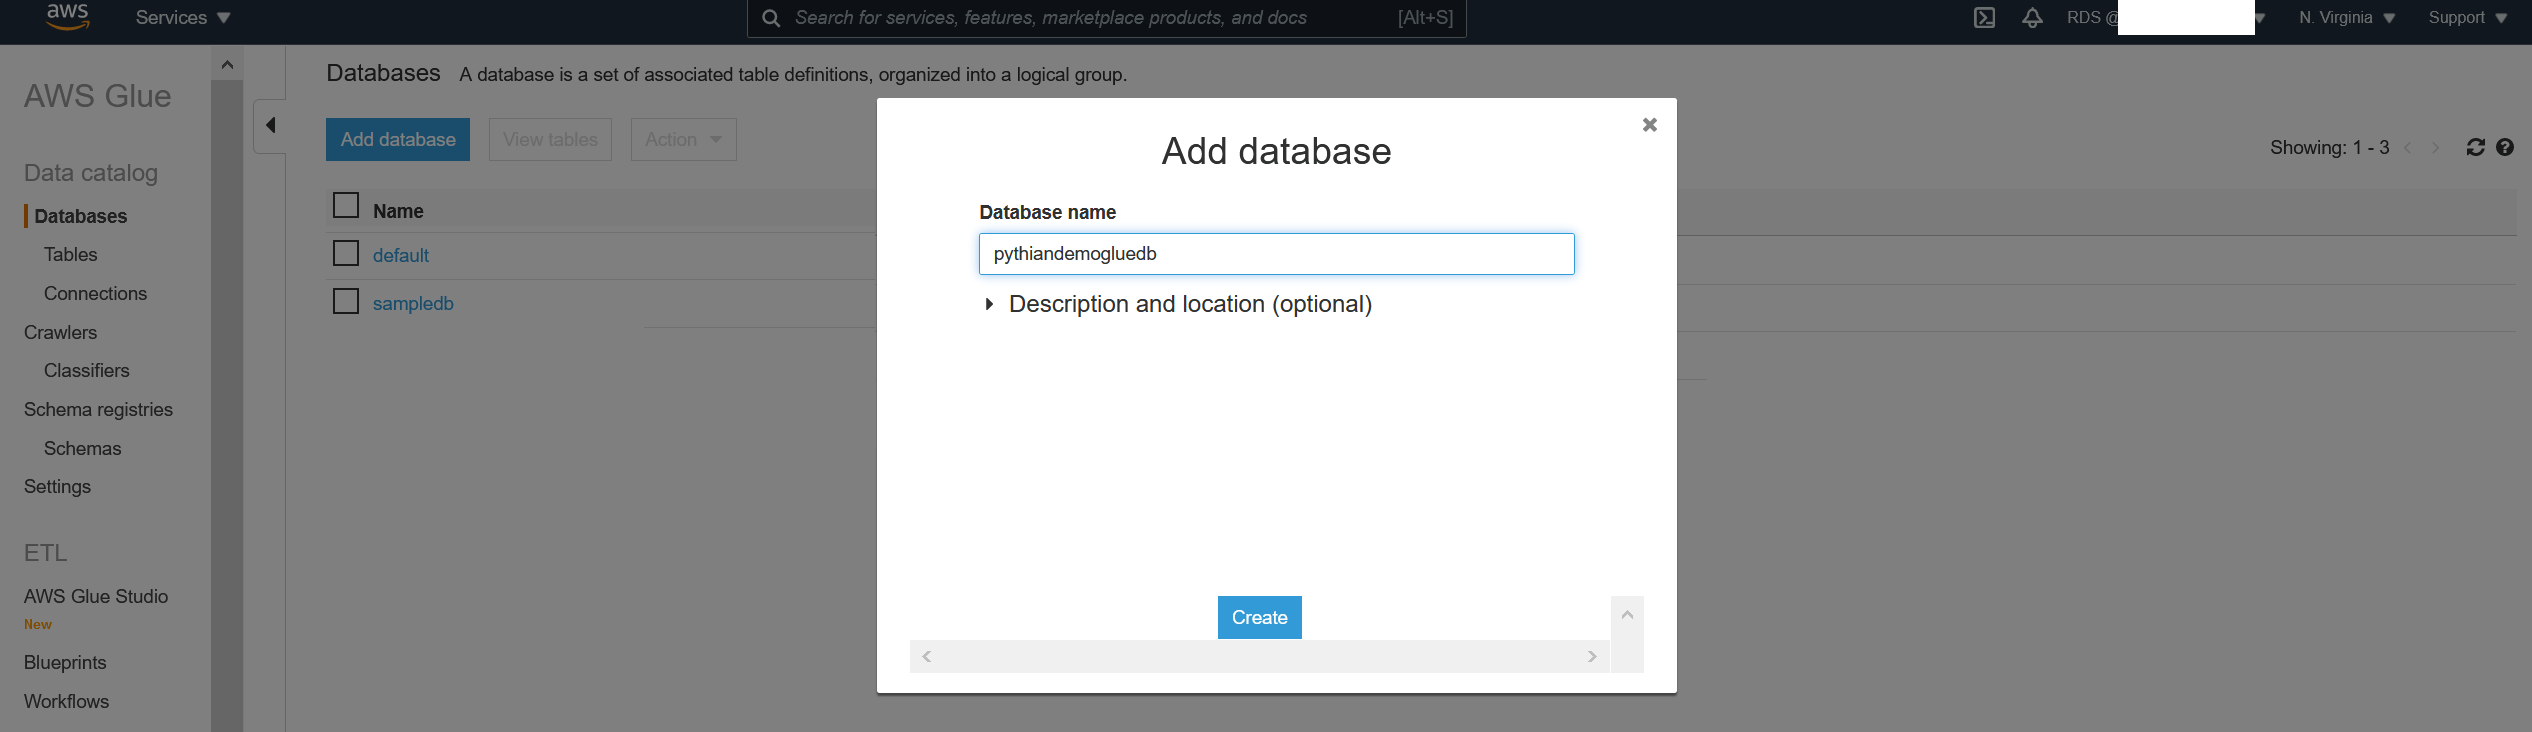
 We'll now add the Glue database:
 Once you click "Create," the database will appear in the list. Congratulations! You've created a Glue database for your project.
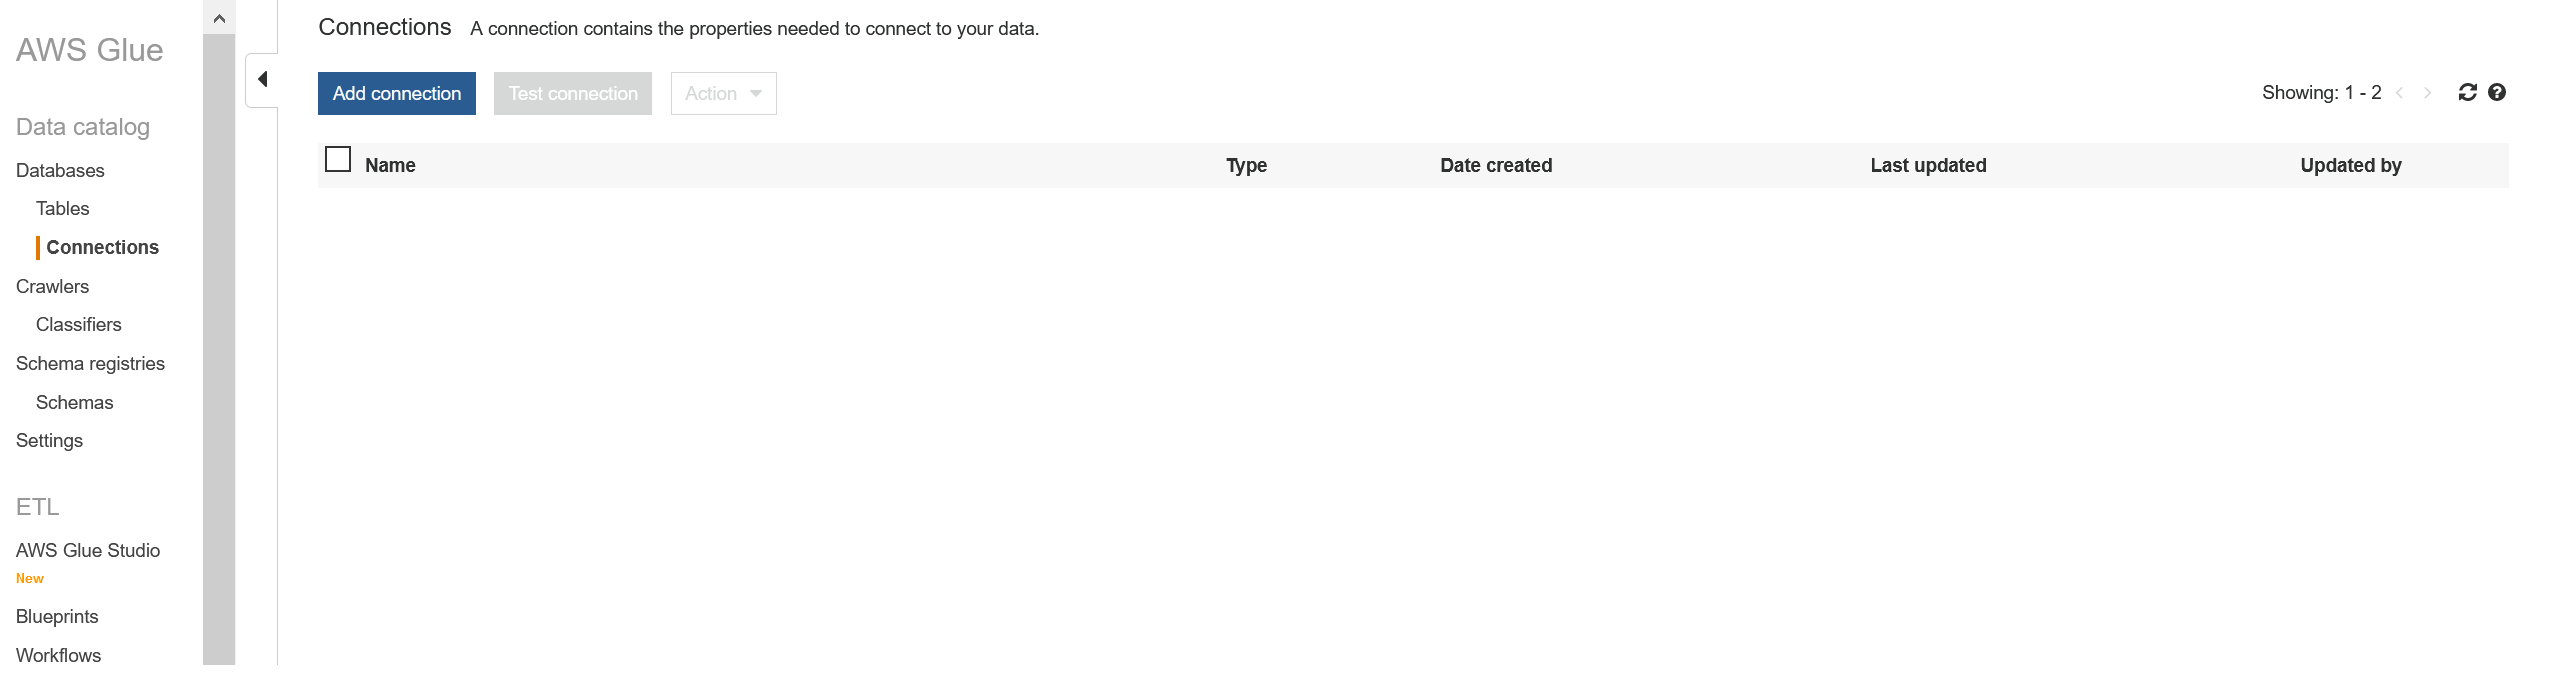
2. Create a connection to the RDS SQL Server source database
On the left pane click on "Connections":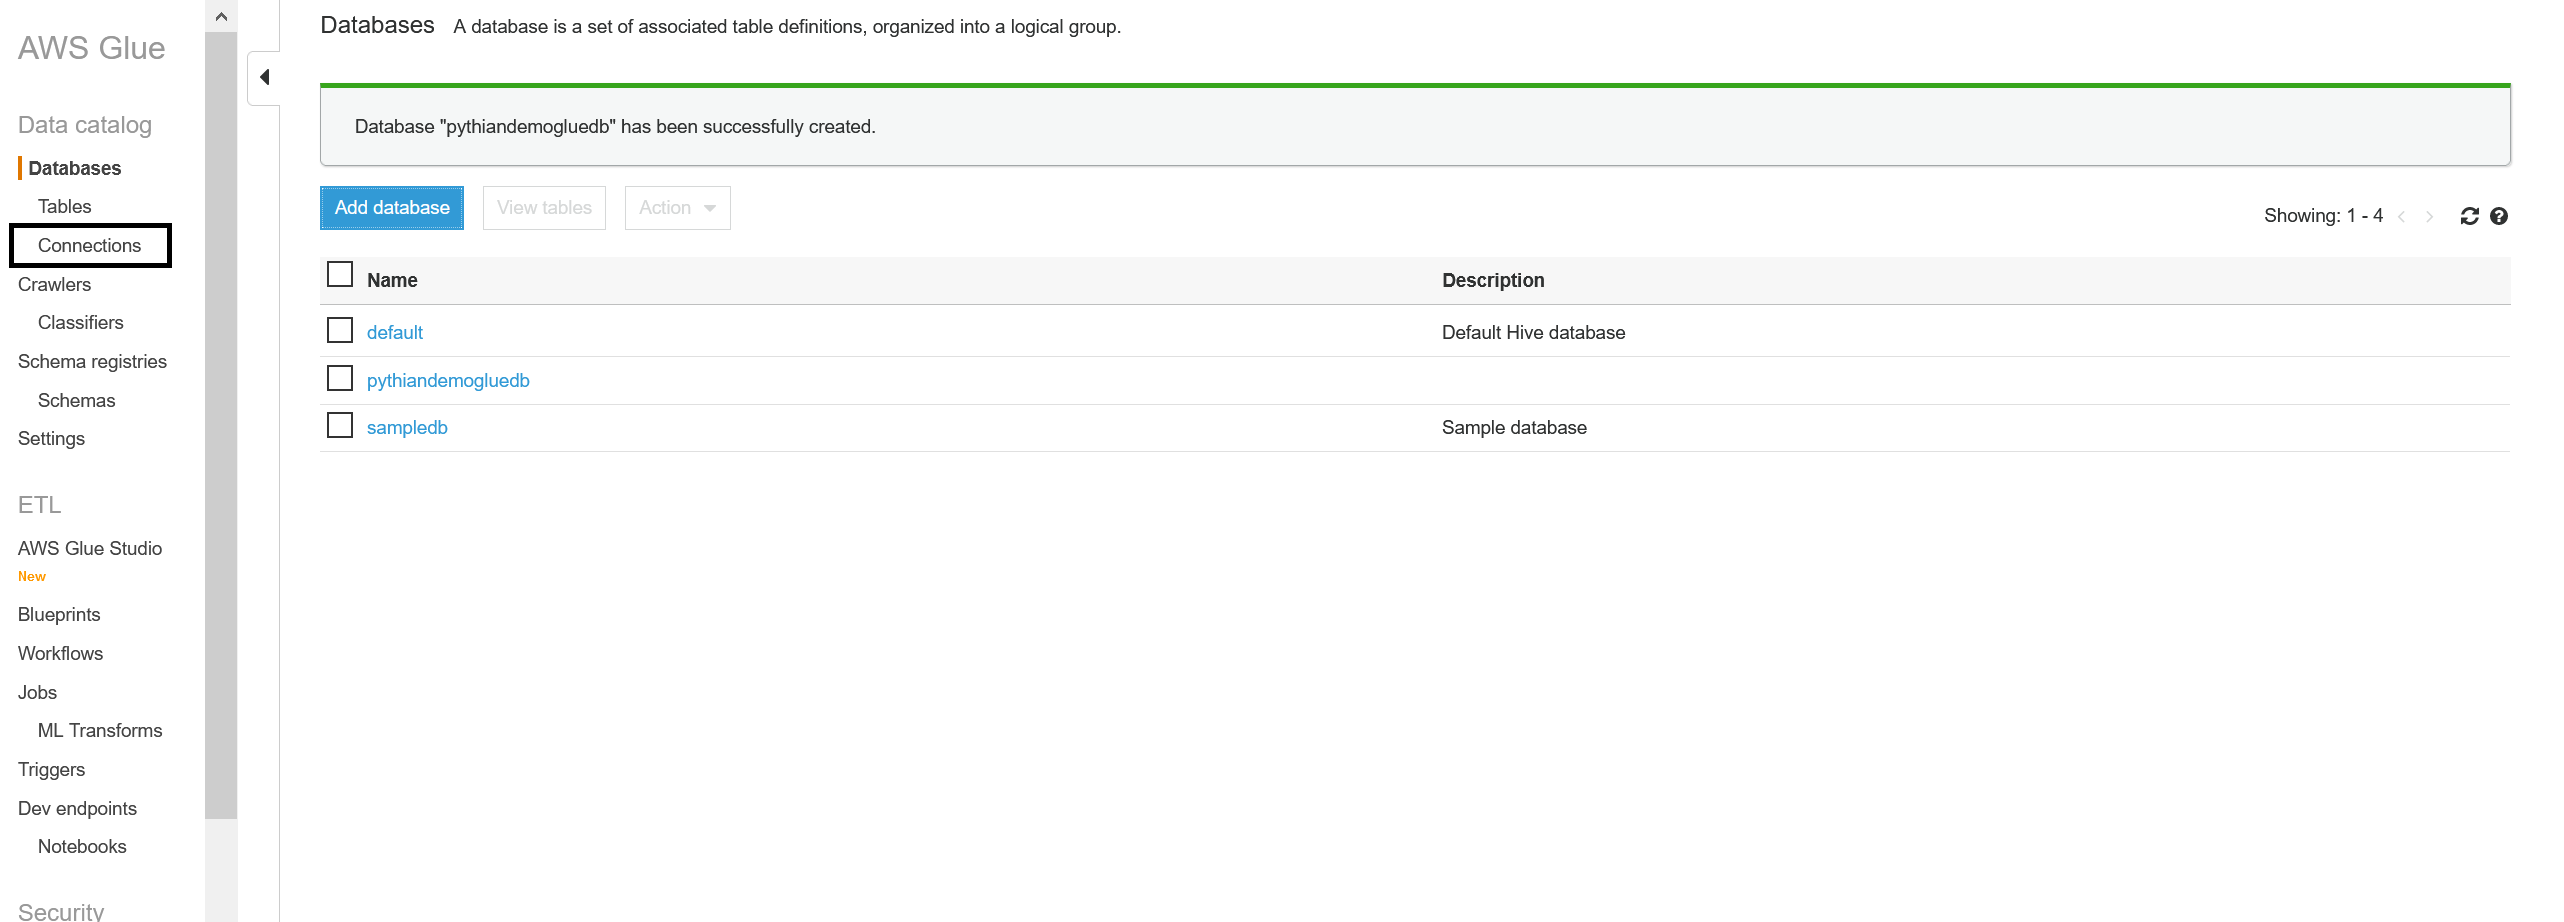 And "Add connection":
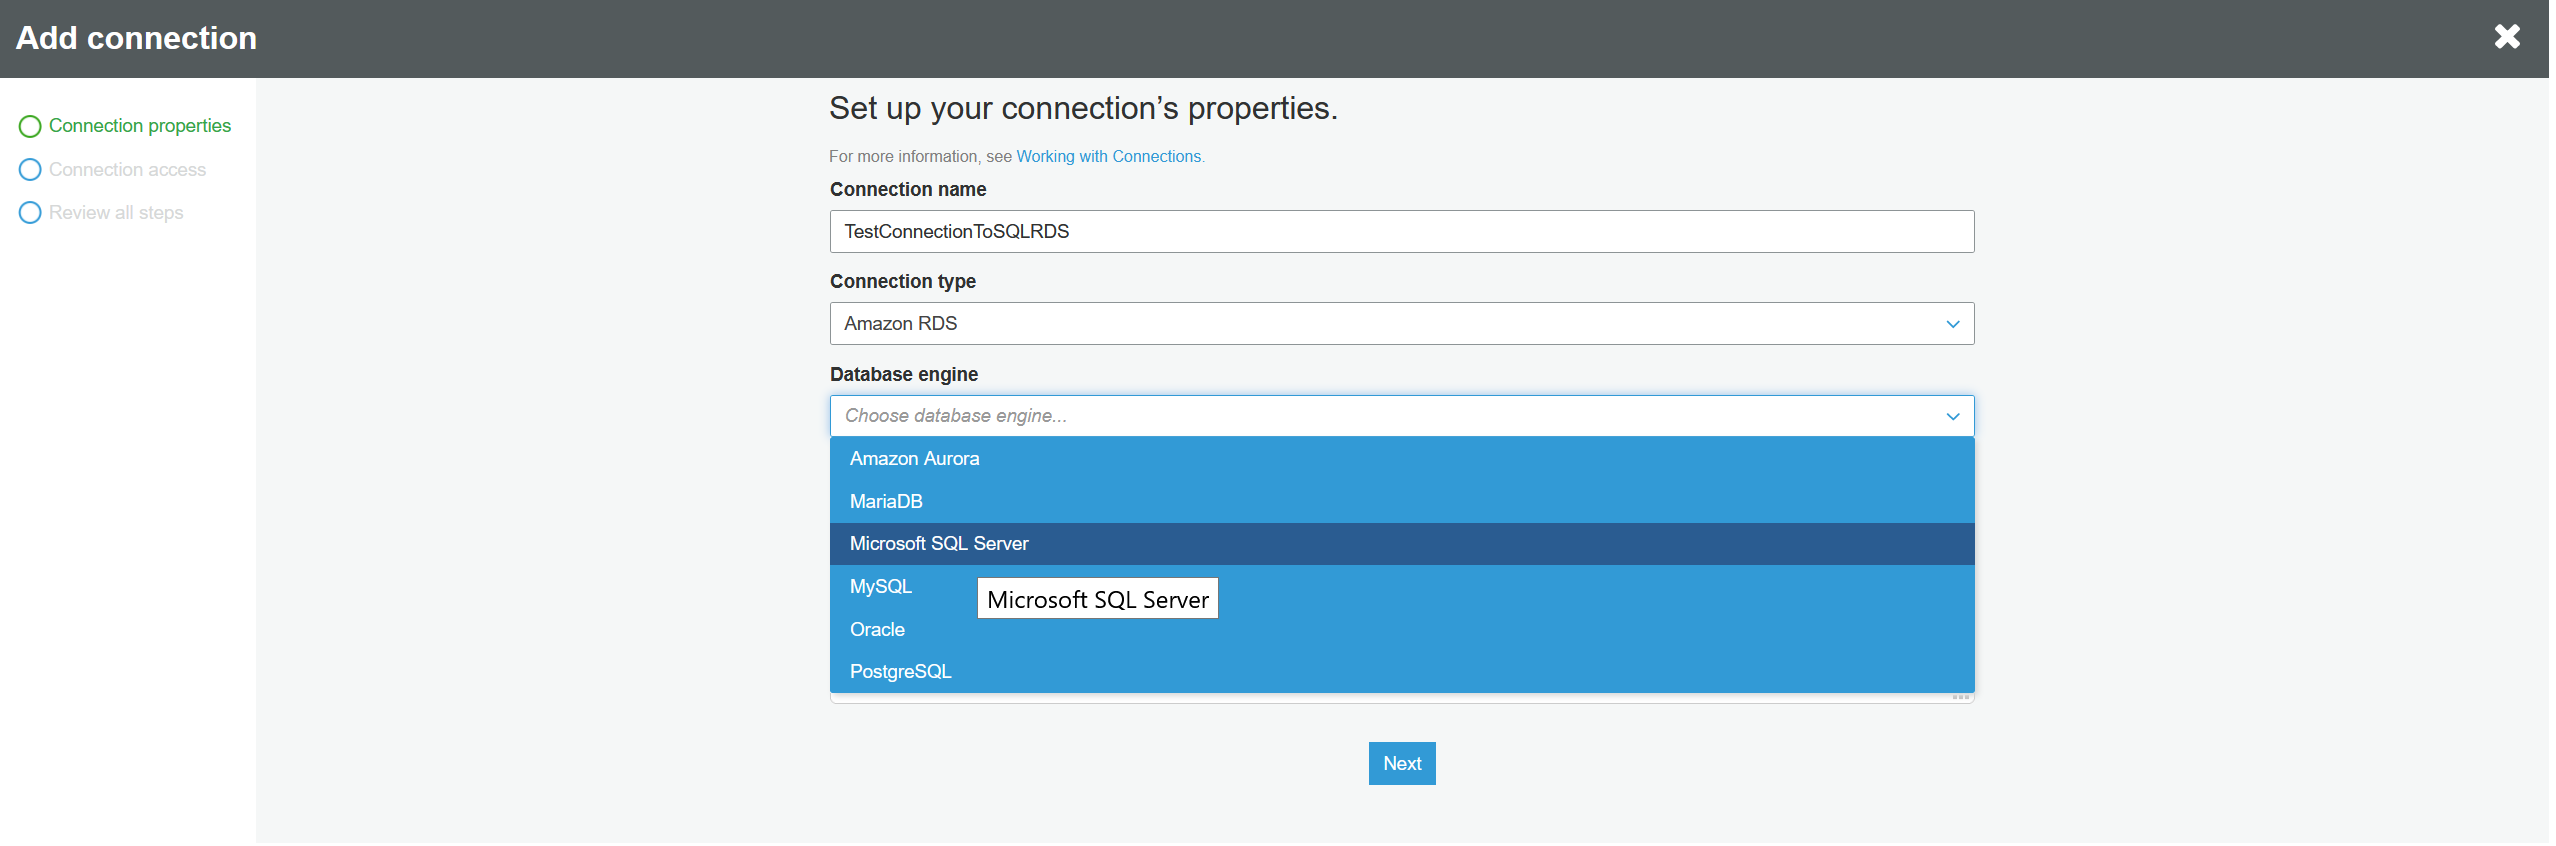
 Add the RDS connection name. For "Connection type" choose "Amazon RDS" and for "Database engine" choose "Microsoft SQL Server" then click "Next":
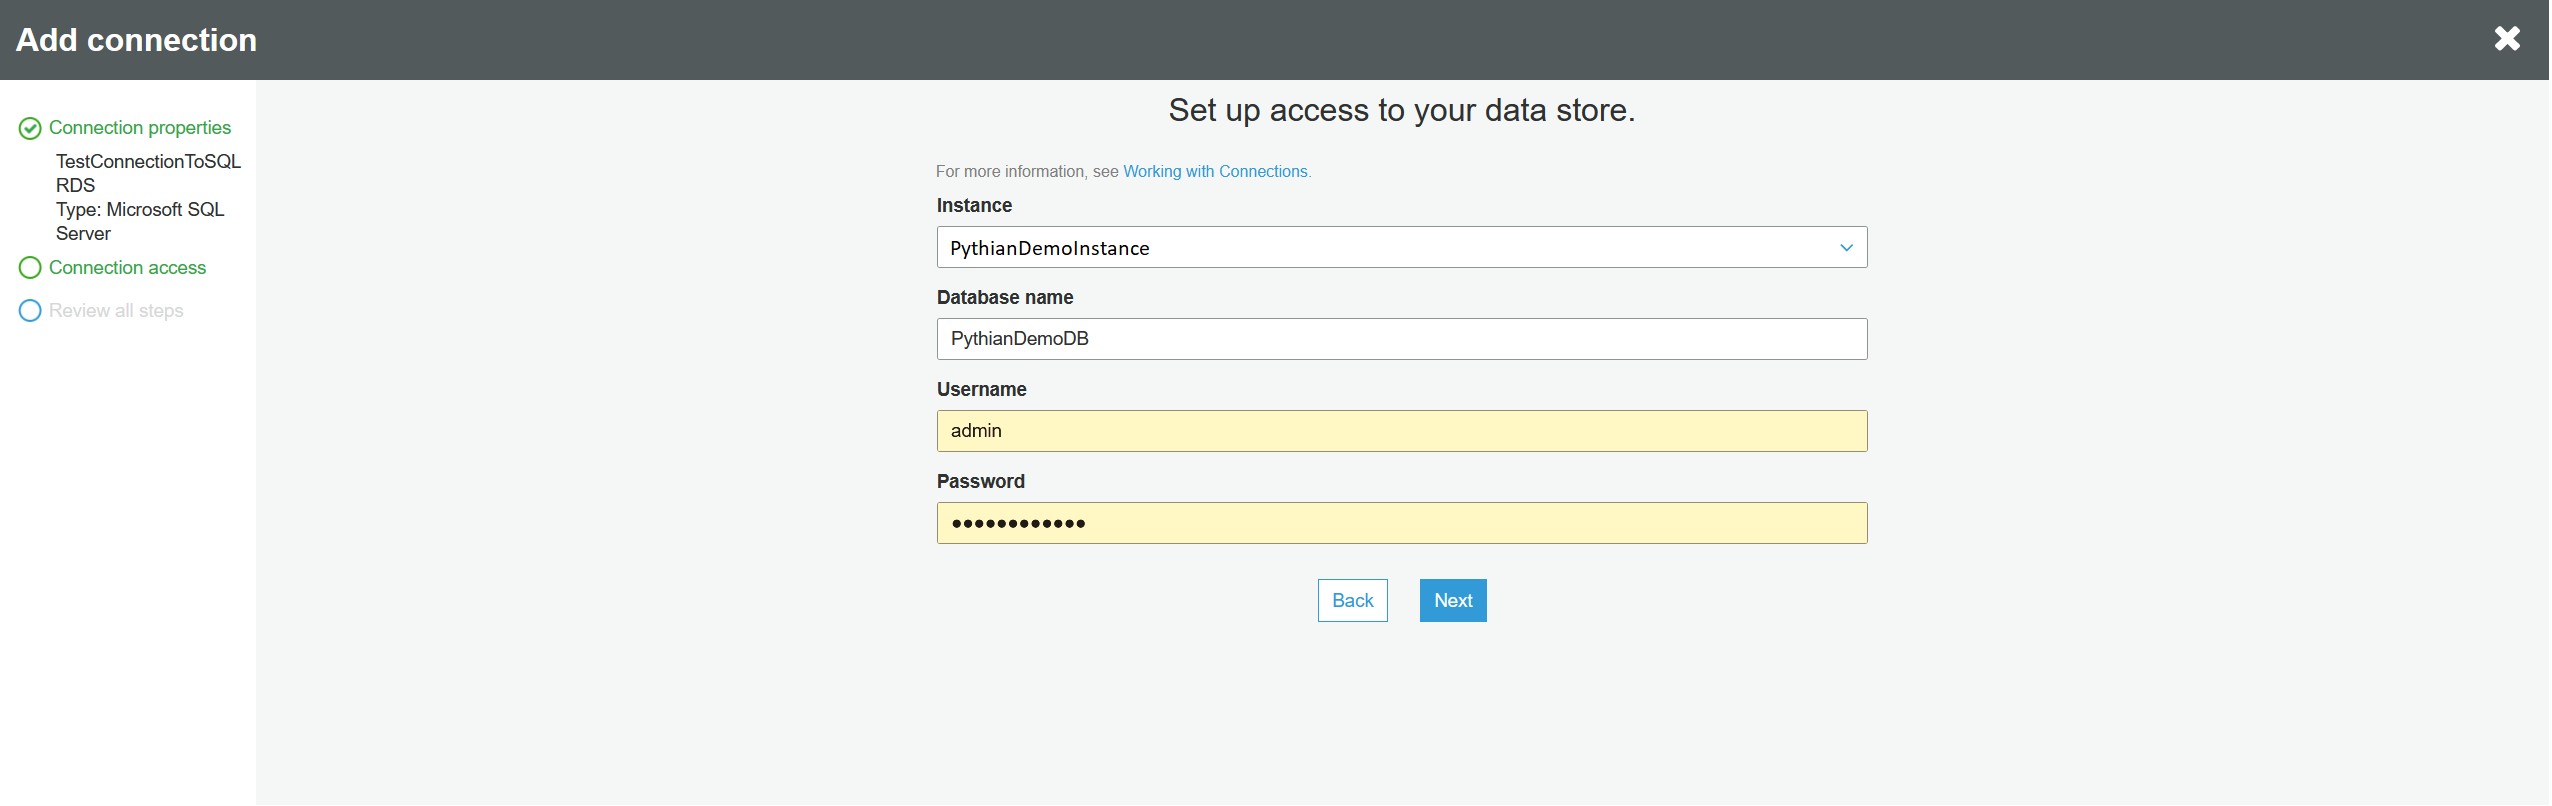
 Choose your instance and database from the drop down lists. If you can't find them, go back to the link above and troubleshoot the prerequisites. It's possible that the instance wasn't created in the same
AWS AZ or on the wrong subnet. Enter your username and password into the RDS database and click "Next":
Choose your instance and database from the drop down lists. If you can't find them, go back to the link above and troubleshoot the prerequisites. It's possible that the instance wasn't created in the same
AWS AZ or on the wrong subnet. Enter your username and password into the RDS database and click "Next":
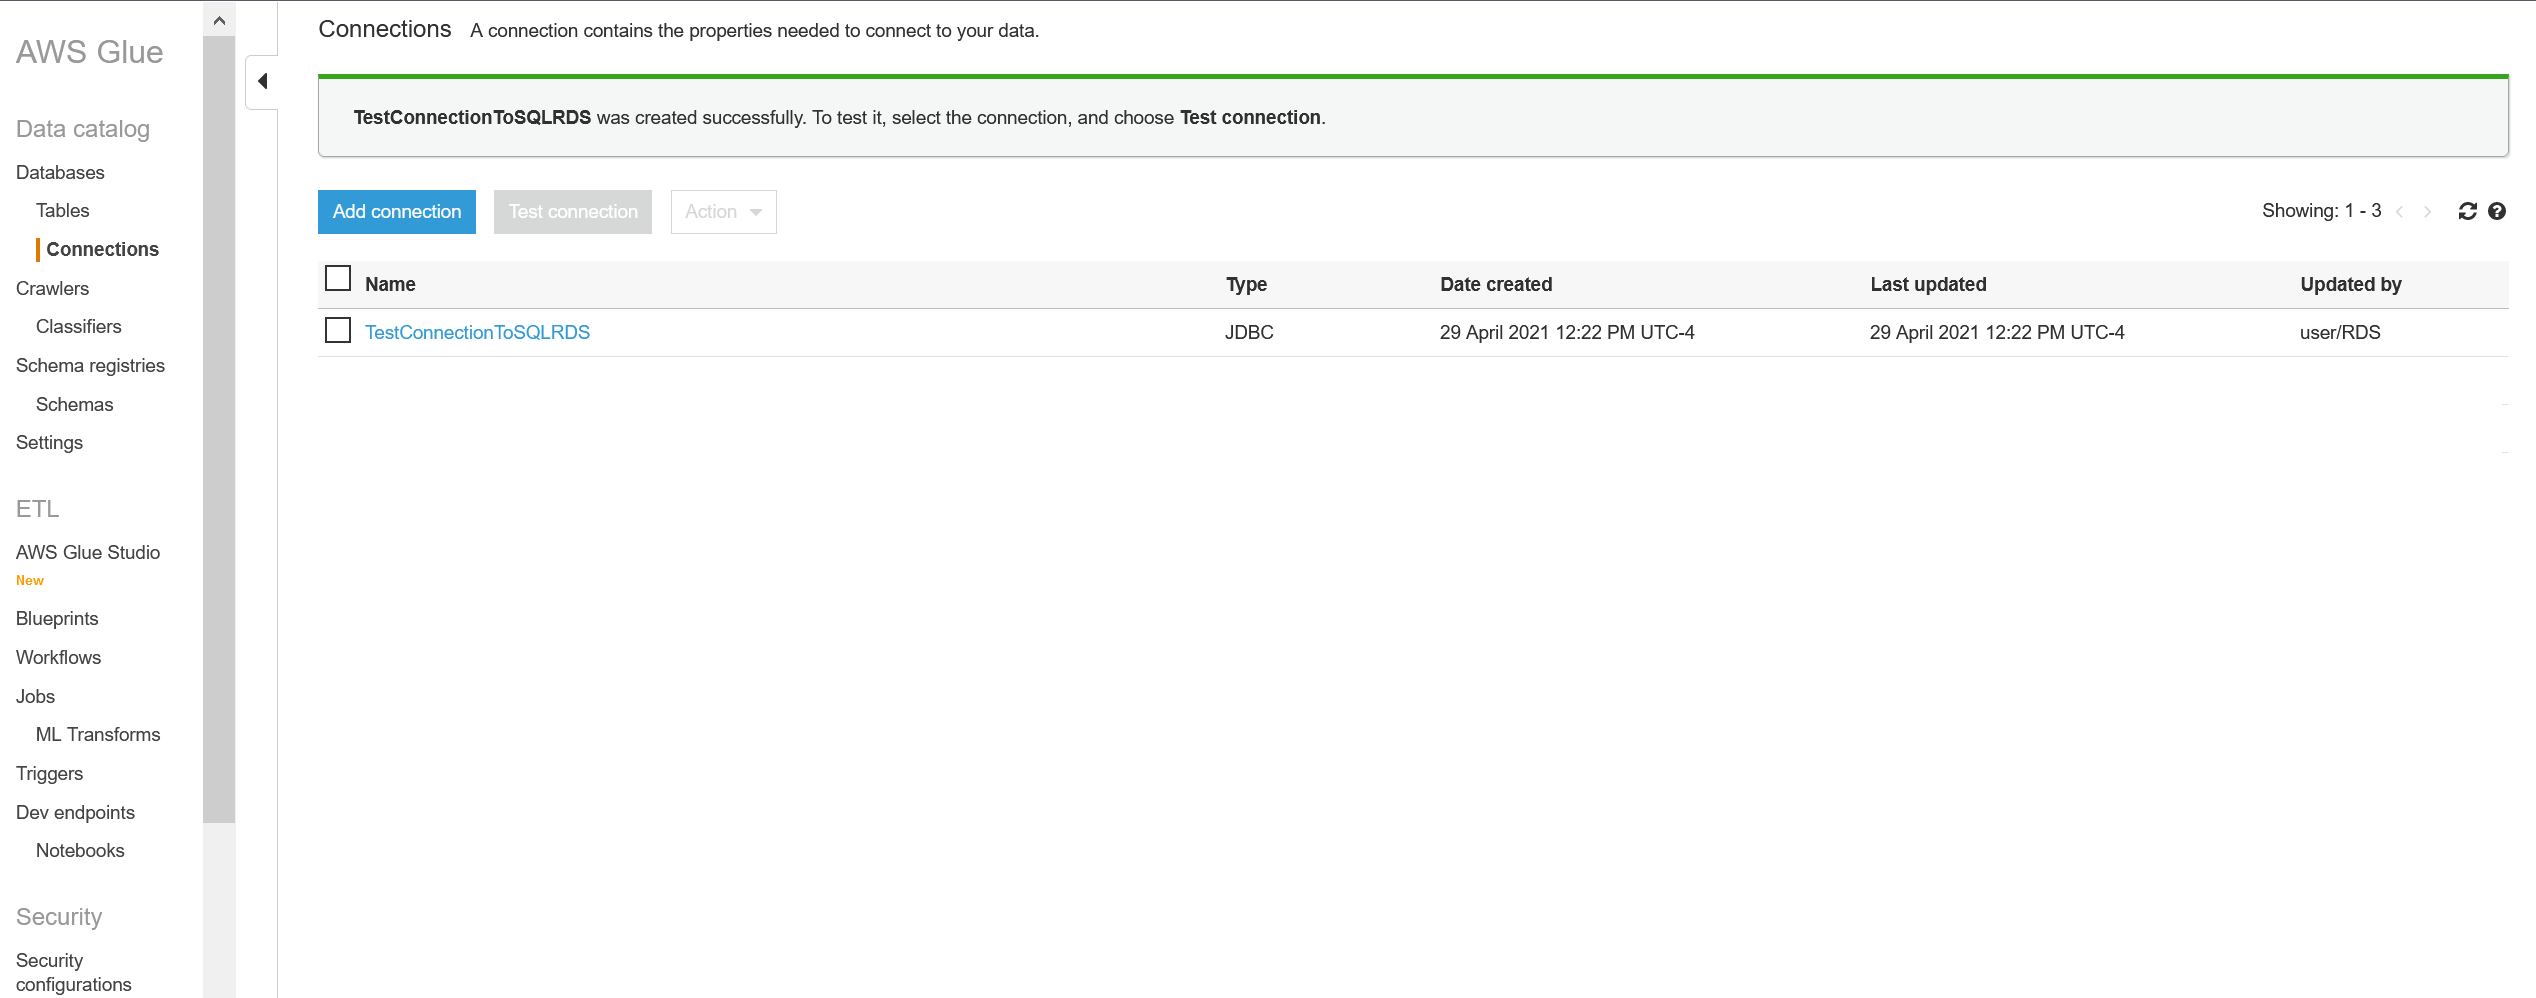
 Check all the details and click "Finish" on the next screen. Now, verify that your connection is there:
3. Create a connection to the destination S3 bucket
We'll now create the connection to the S3 bucket at the destination. Repeat the same process as above: Connections --> Add connection. This time the "Connection type" will be "Network":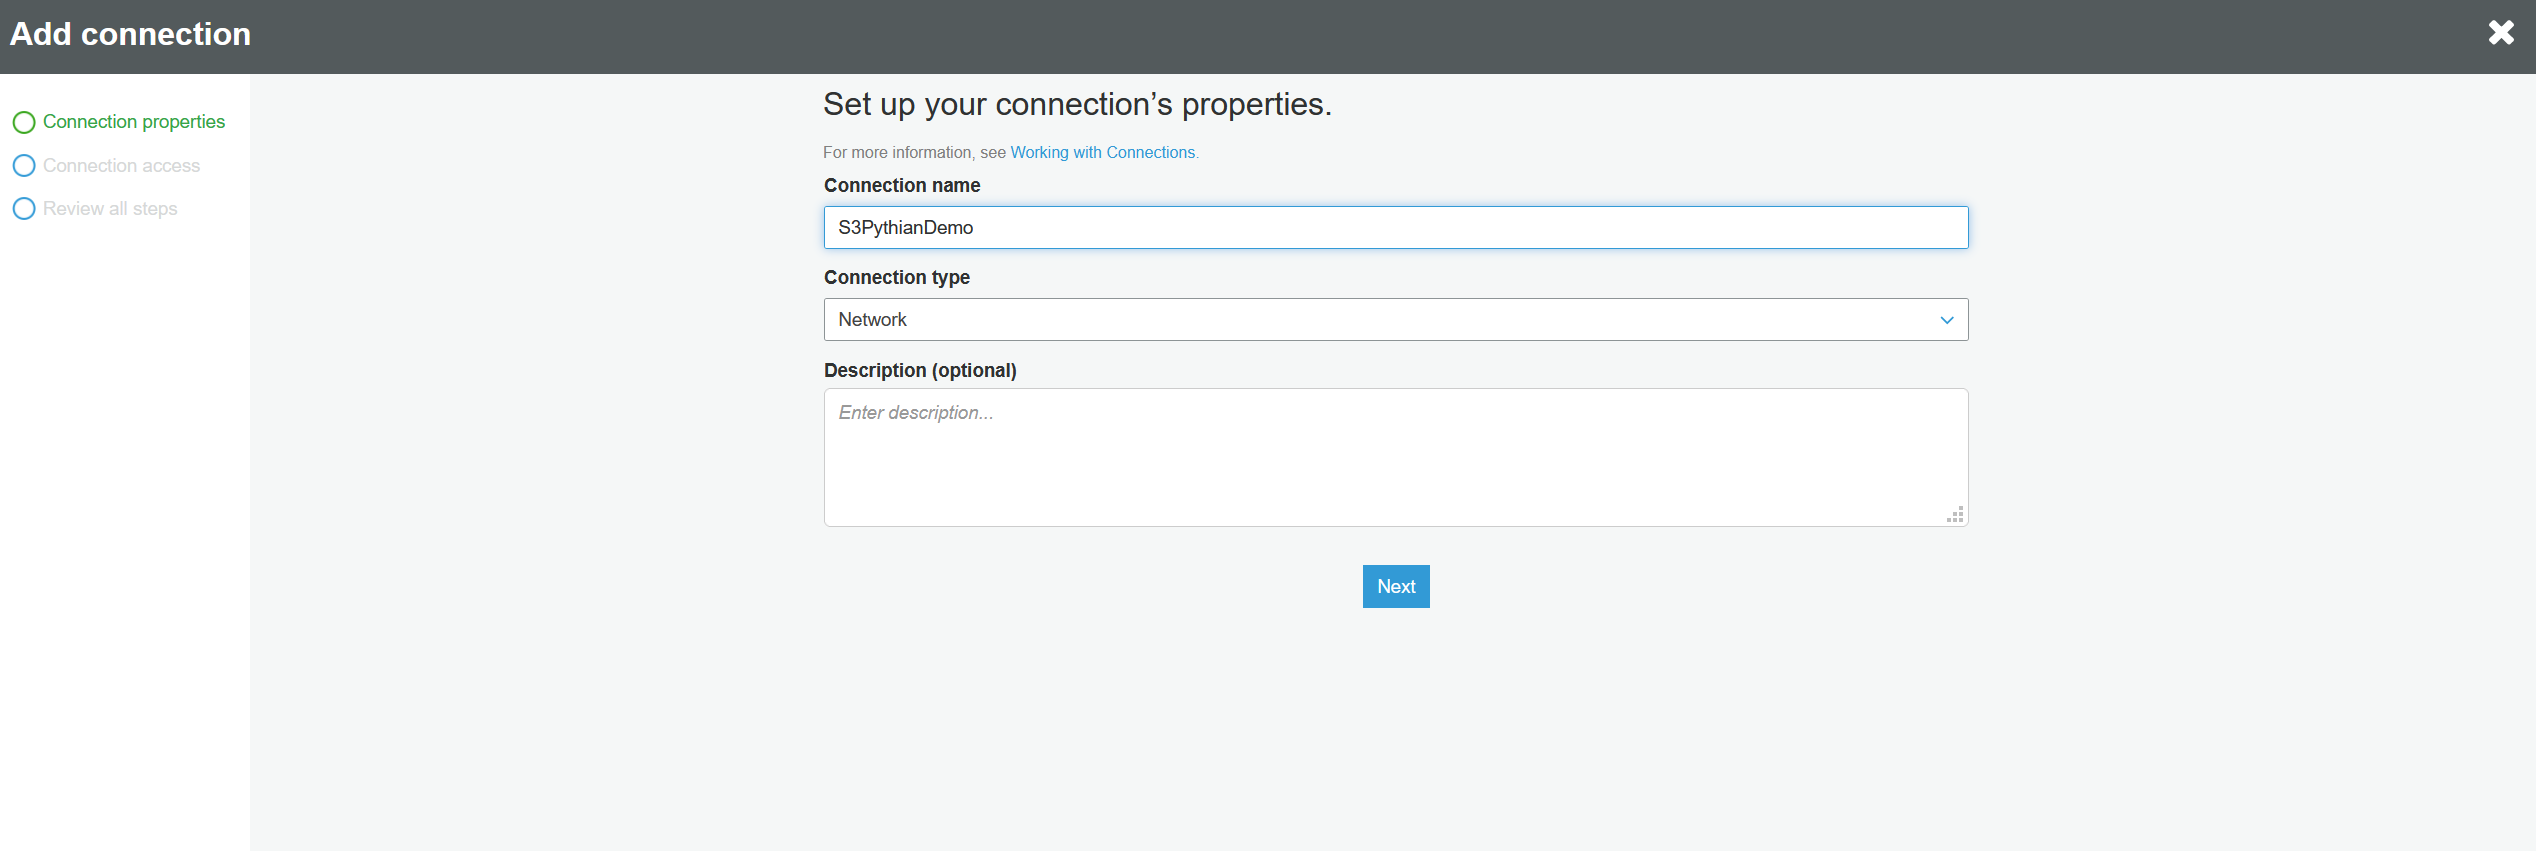 Next you have to choose the same VPC and subnet where the S3 is placed. Note that the RDS database and the S3 bucket should be on the same VPC and subnet for this to work:
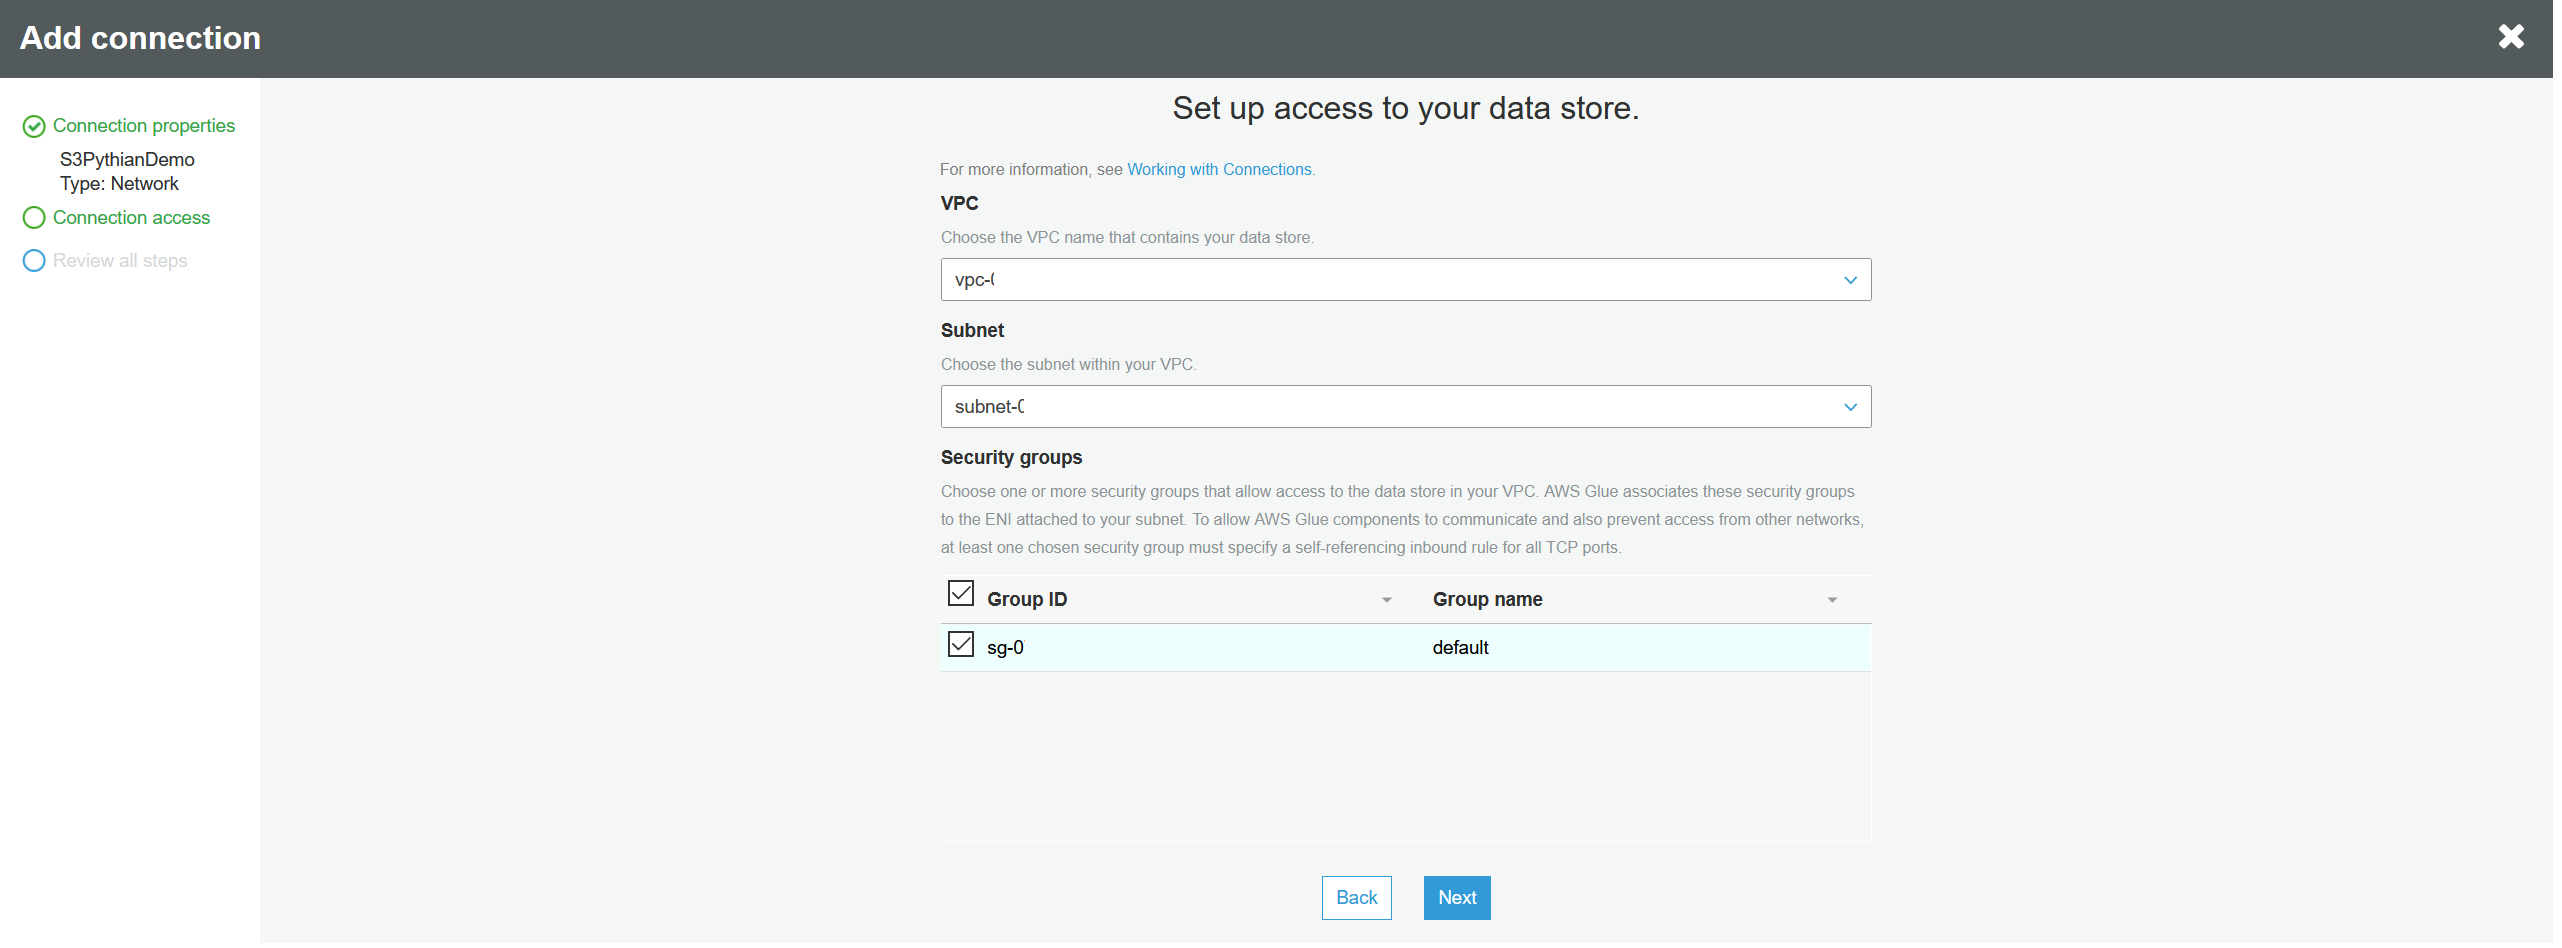 Next verify all the details and click "Finish." Check that you see the new connection in the list.
4. Create and run a crawler that will map the RDS tables to Glue tables in the Glue database
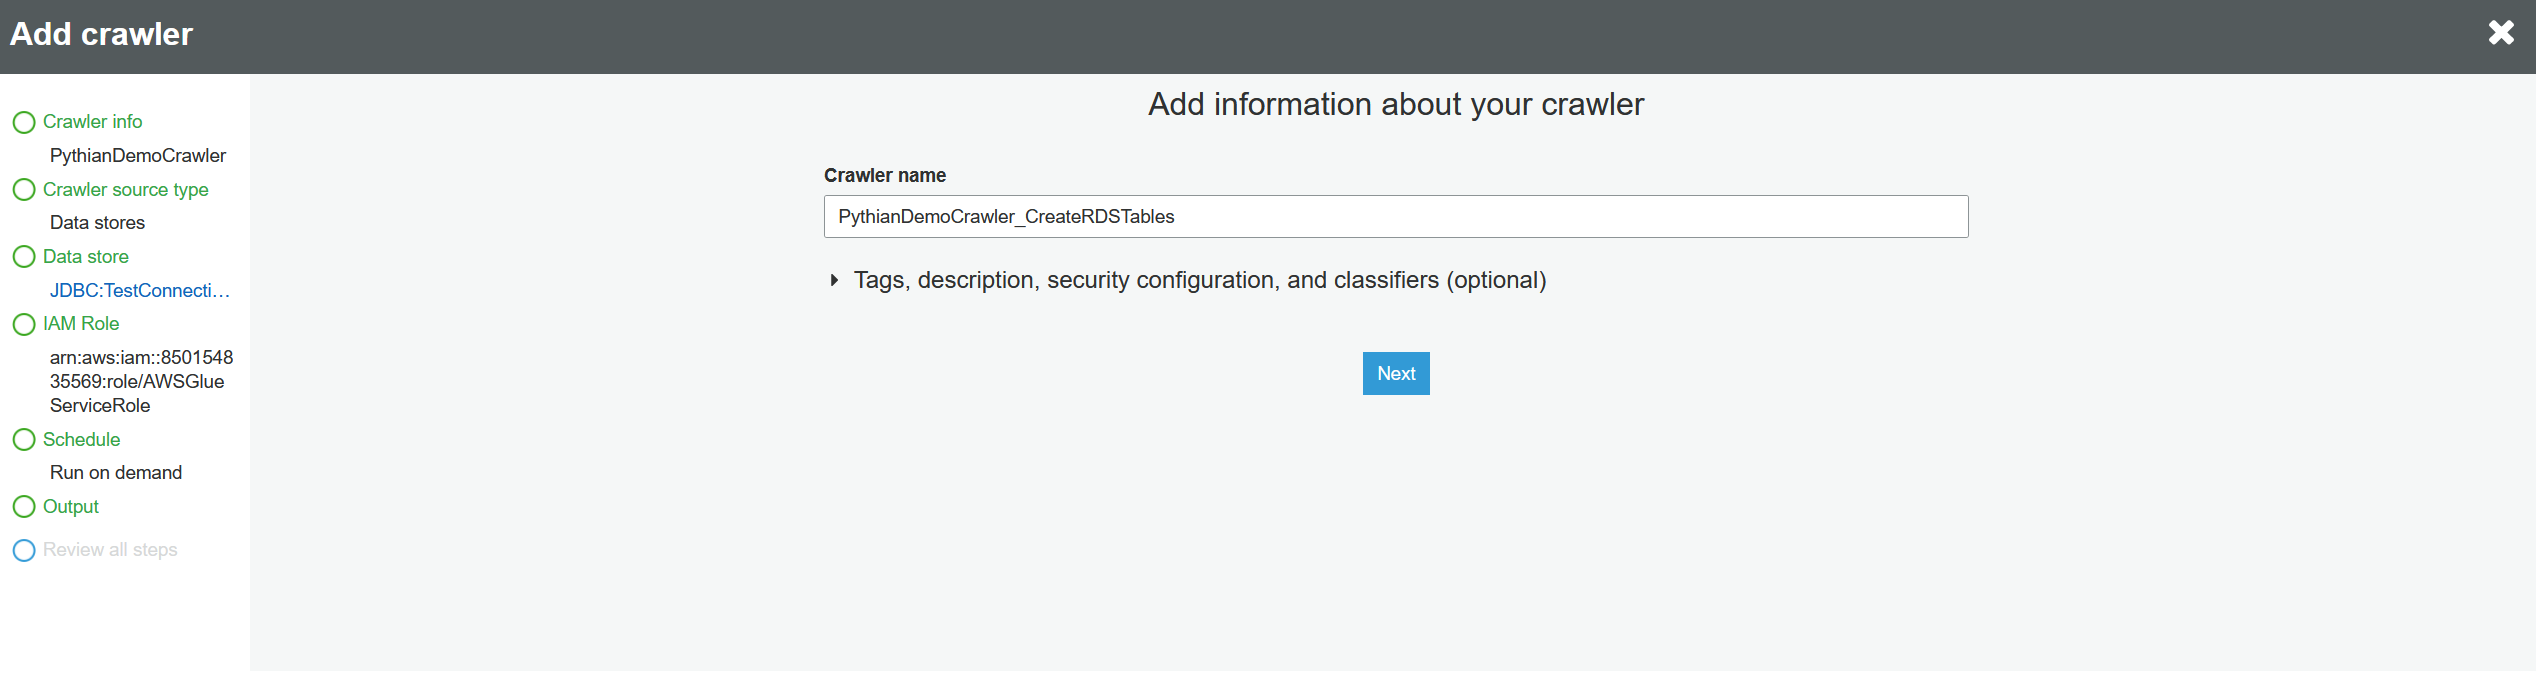
This crawler will create tables in the Glue database with the same schema as the tables in RDS, and will point those tables to the RDS data. This step is important because Glue jobs work solely with Glue tables pointing to data sources and not directly with the data sources. On the left pane, click on "Crawlers" and "Add crawler":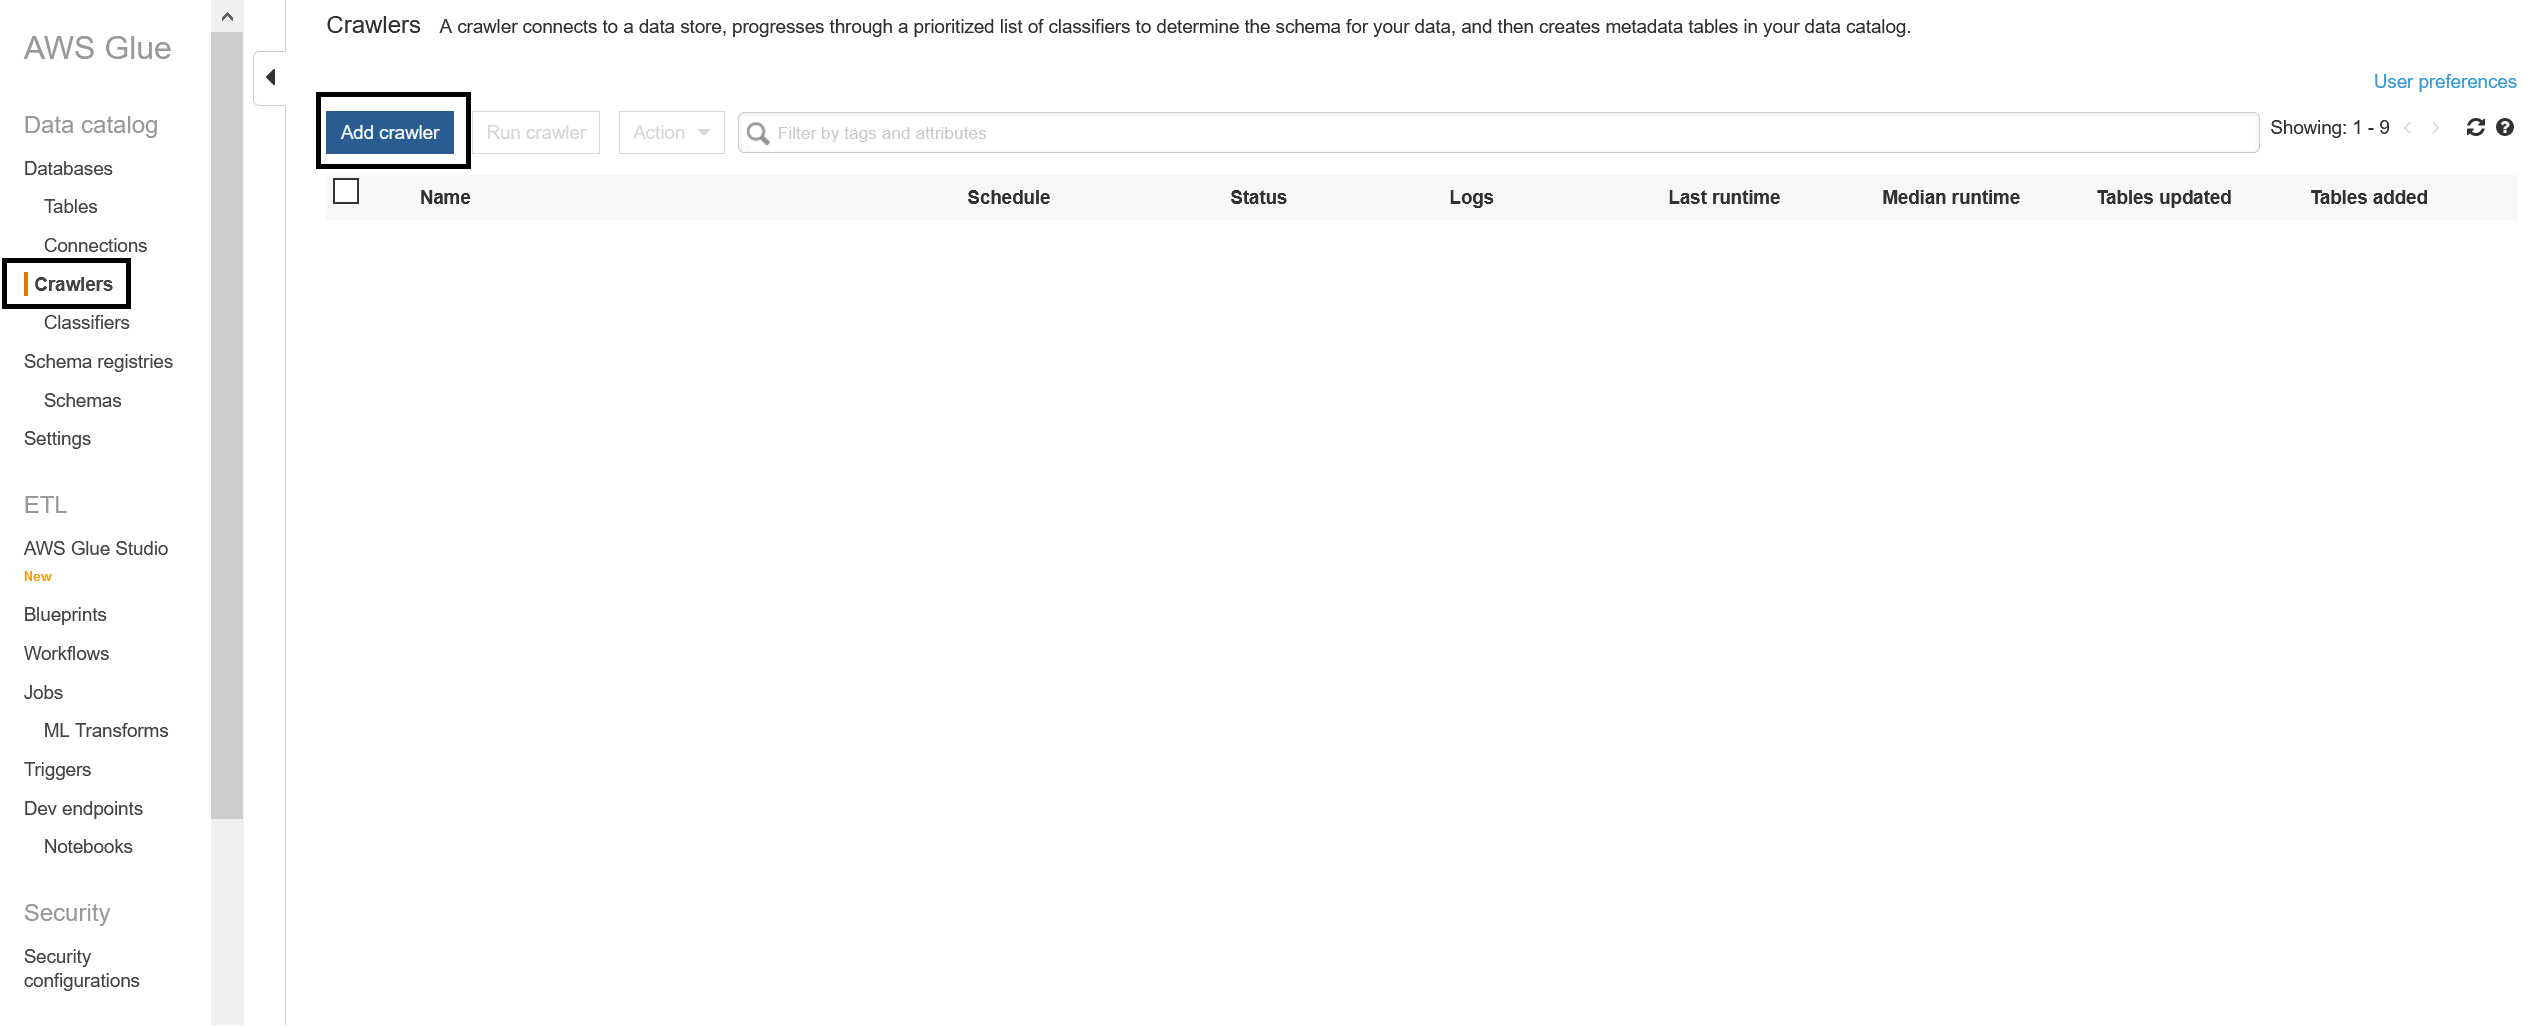 Add a crawler name and click "Next":
 Click "Next" to accept the defaults:
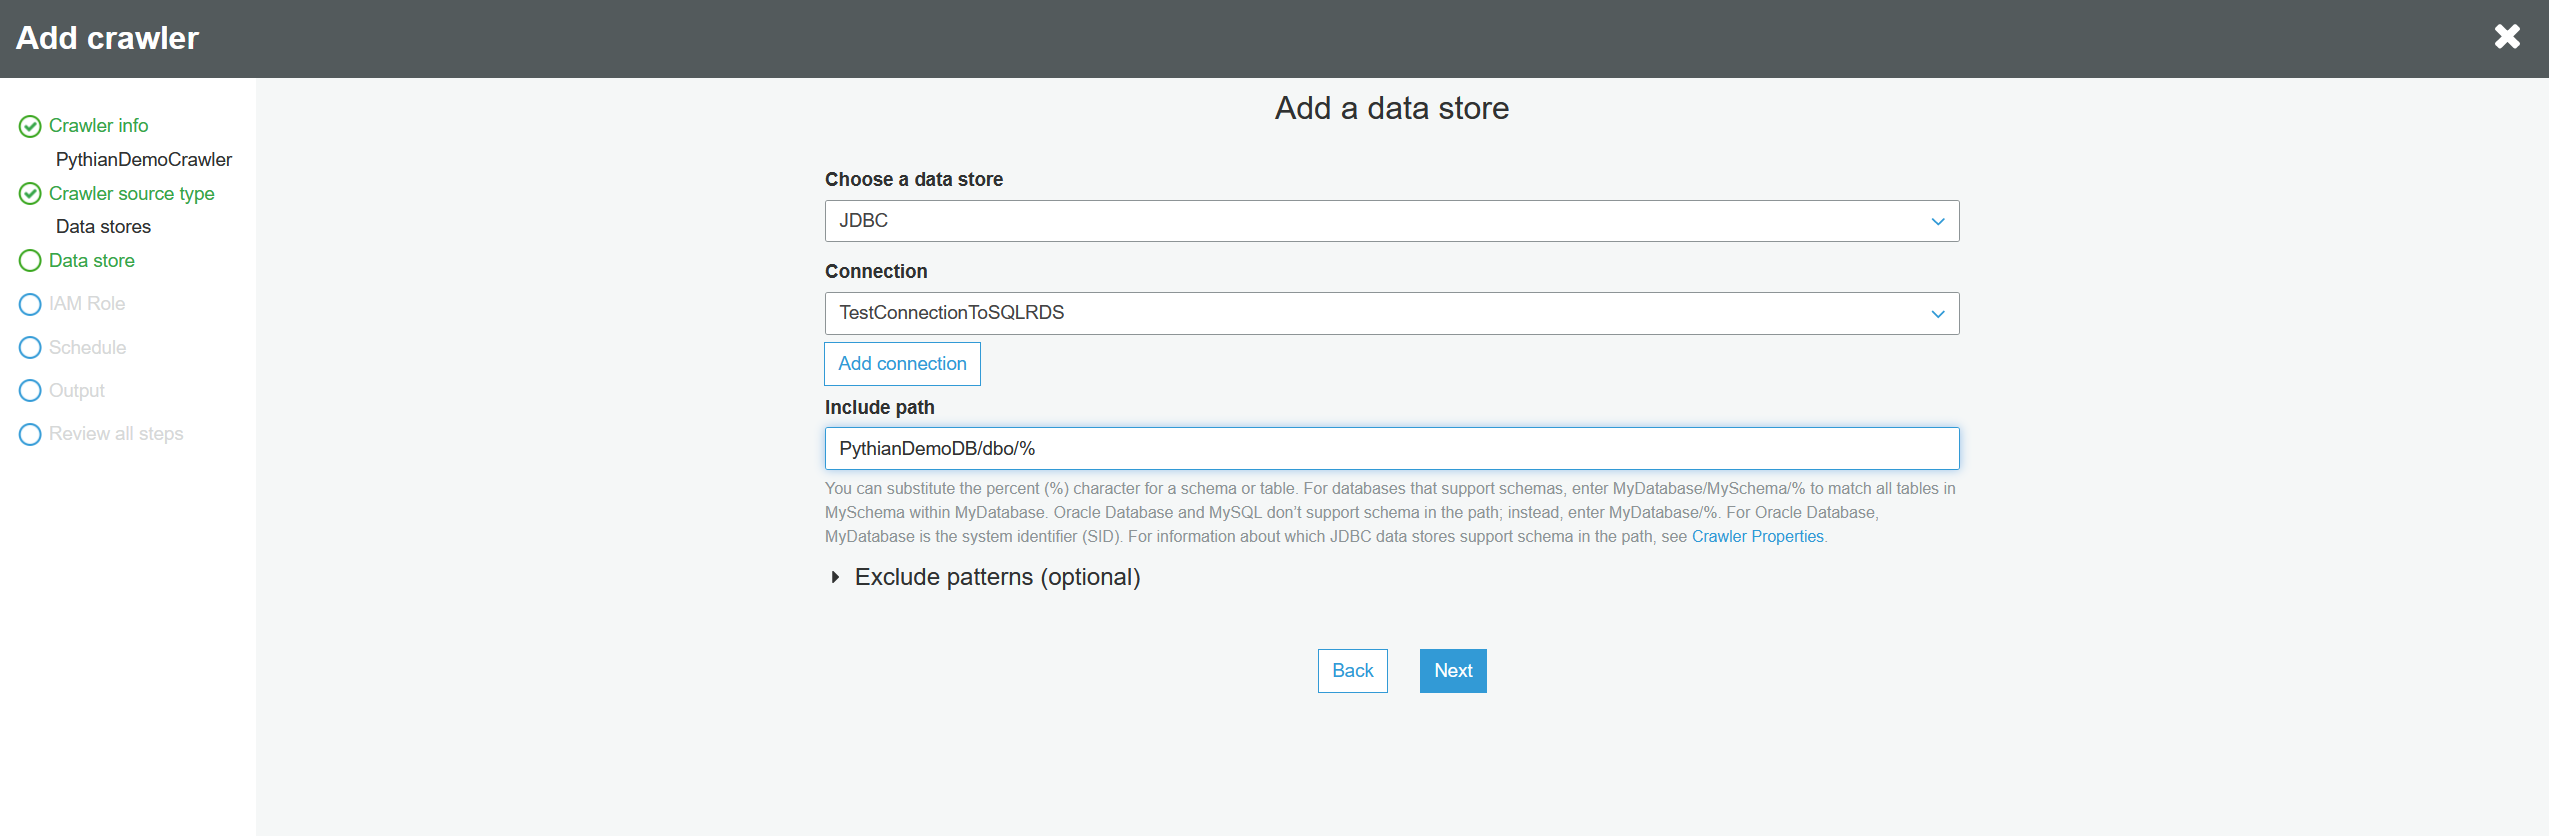
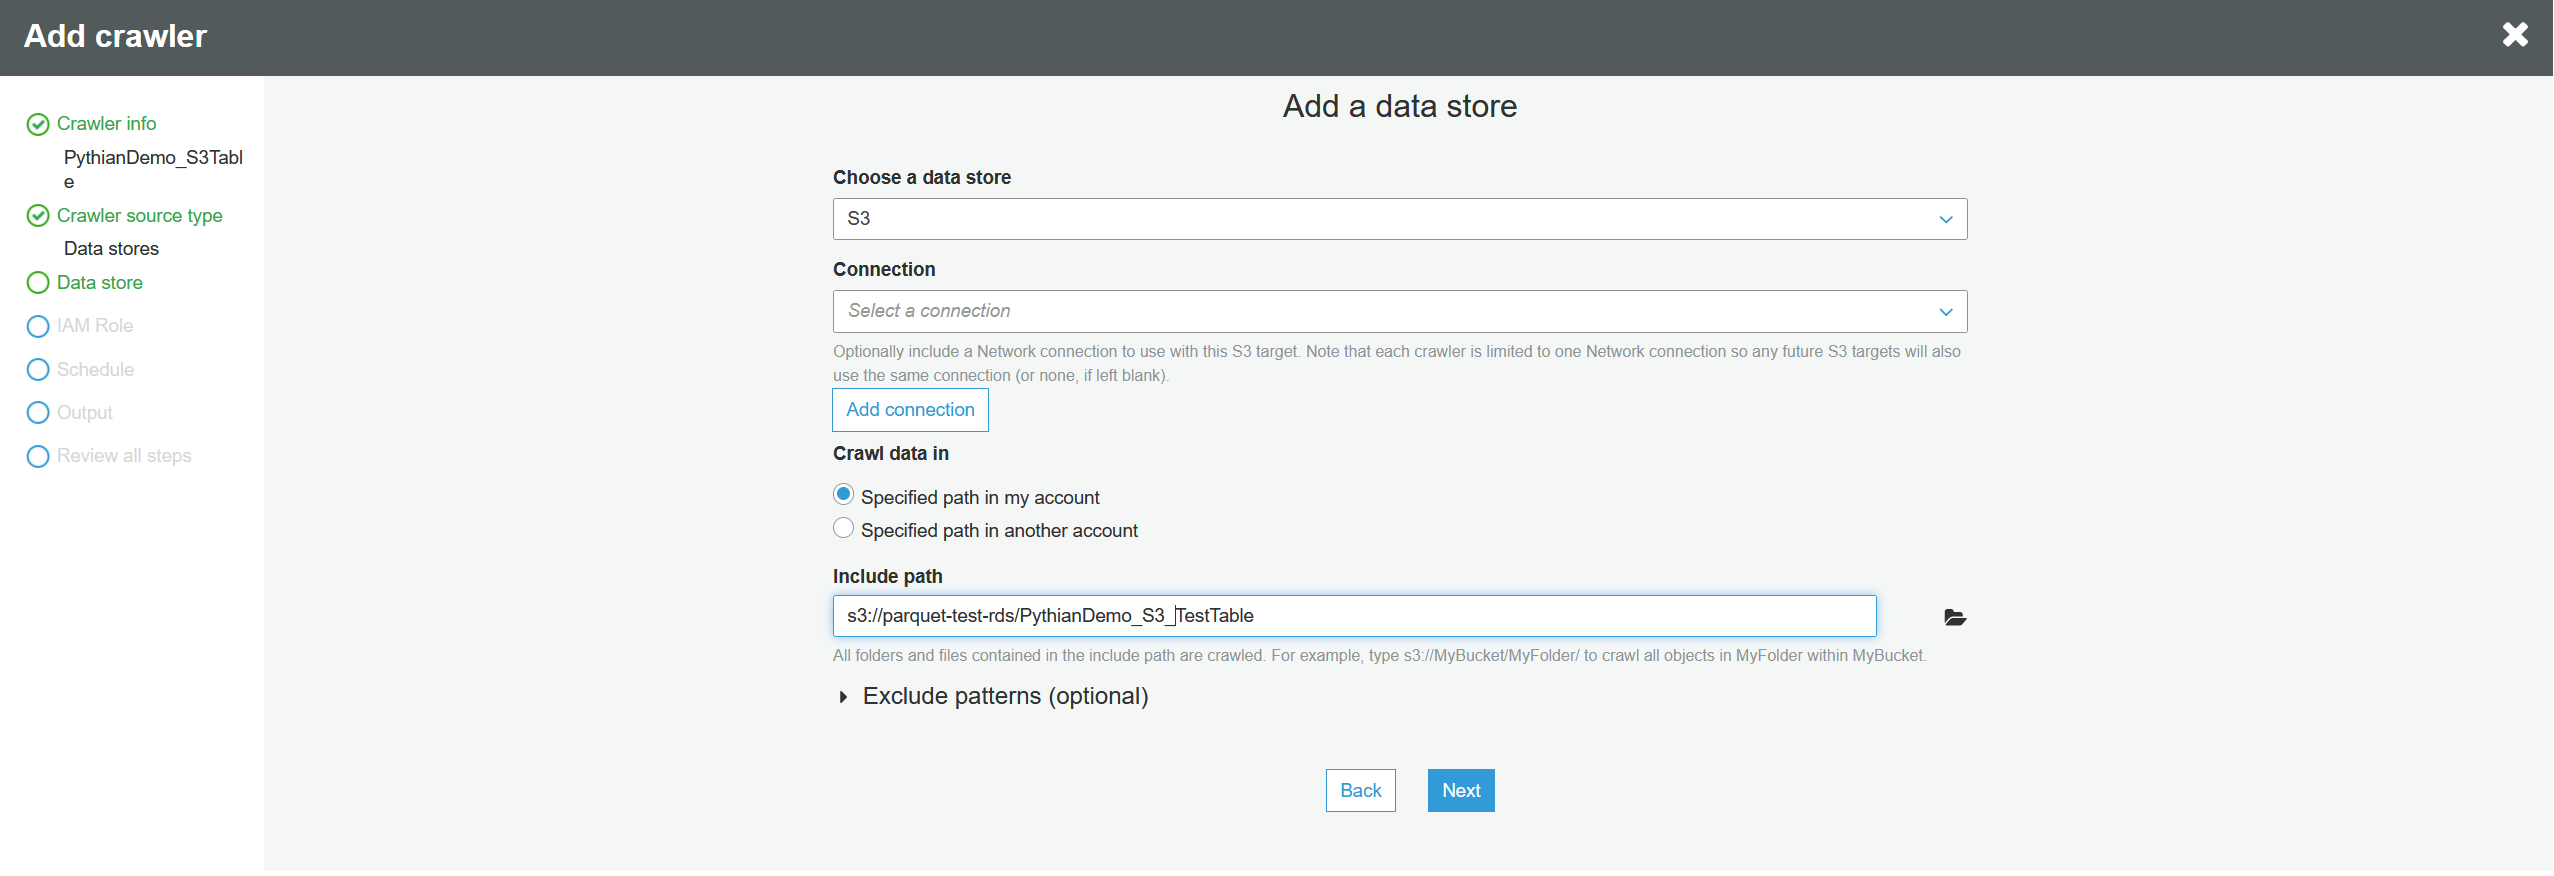
 Choose "JDBC" (Java Database Connectivity) data source and the connection to the RDS database that we just created, and in the "Include path," you'll add the RDS database name, the schema, and the table/tables or wildcards. The following will map ALL the tables in the PythianDemoDB database, dbo schema to Glue tables. And click "Next":
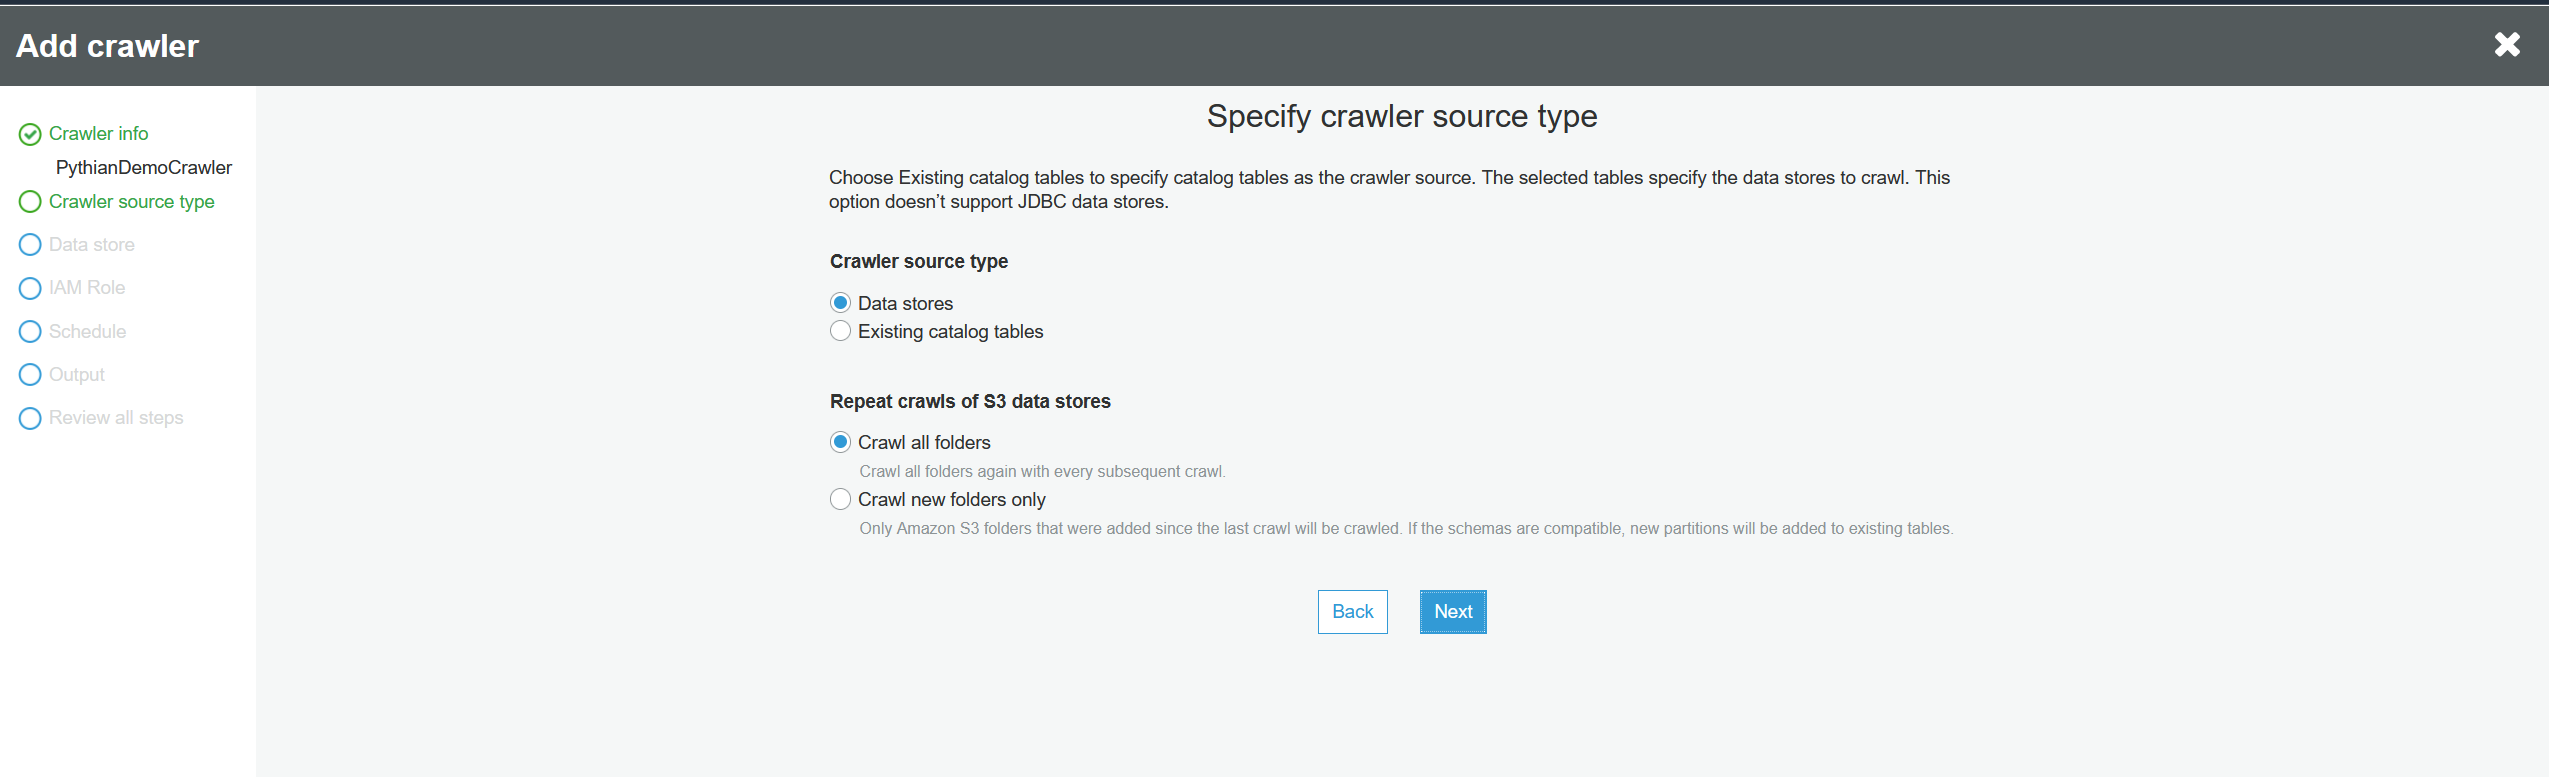
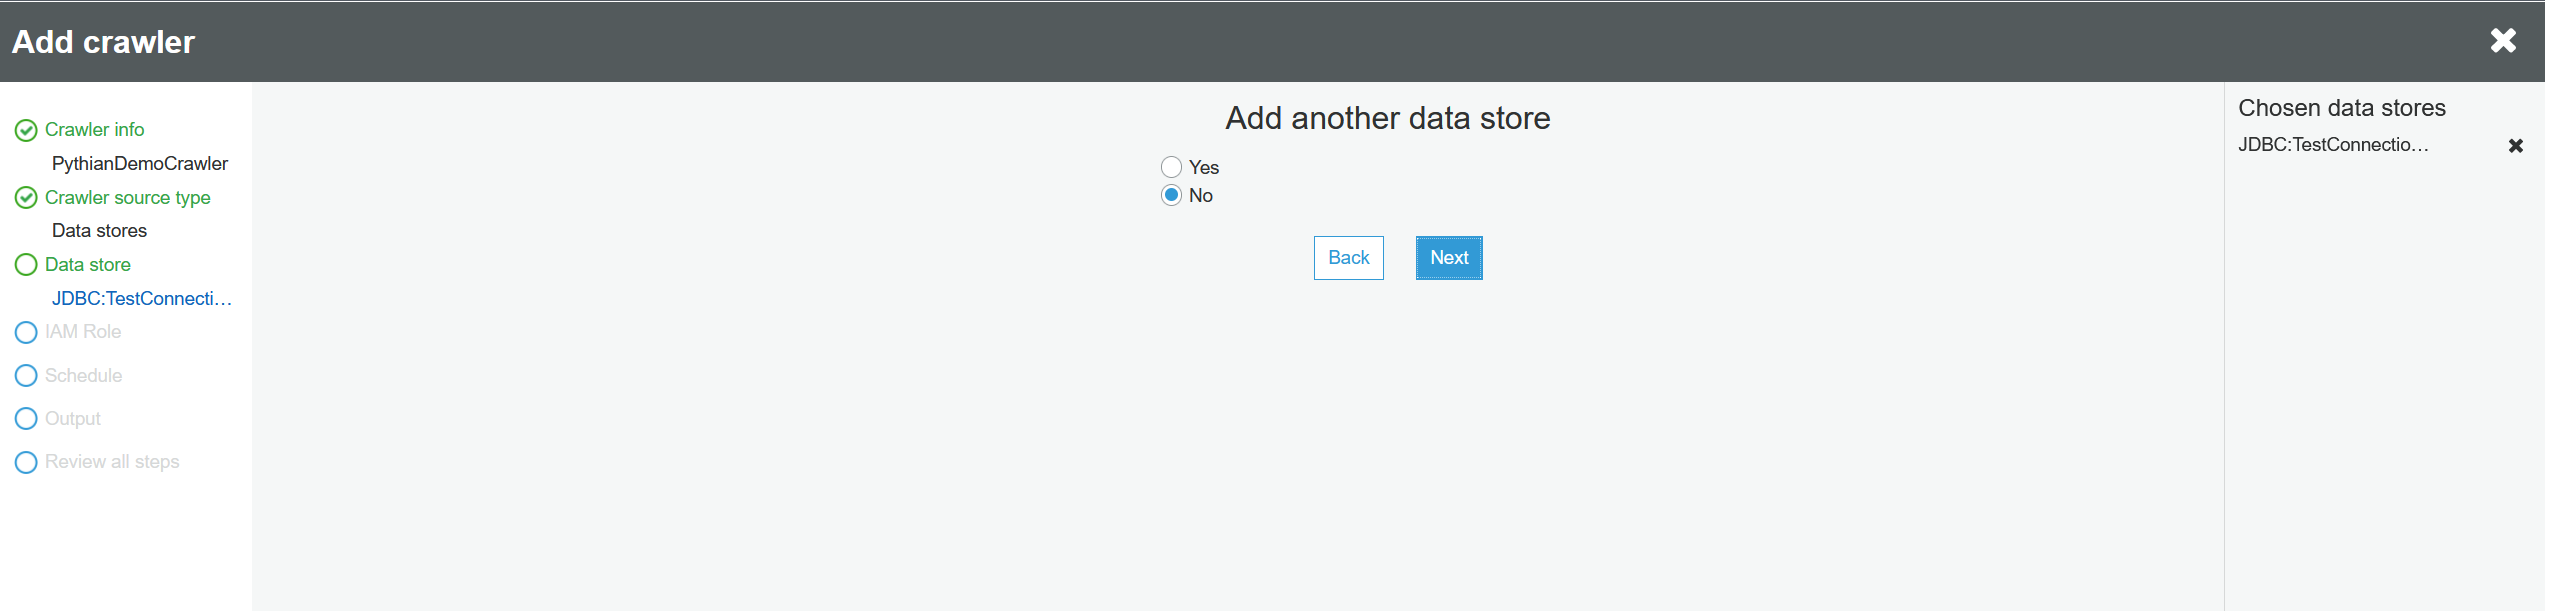
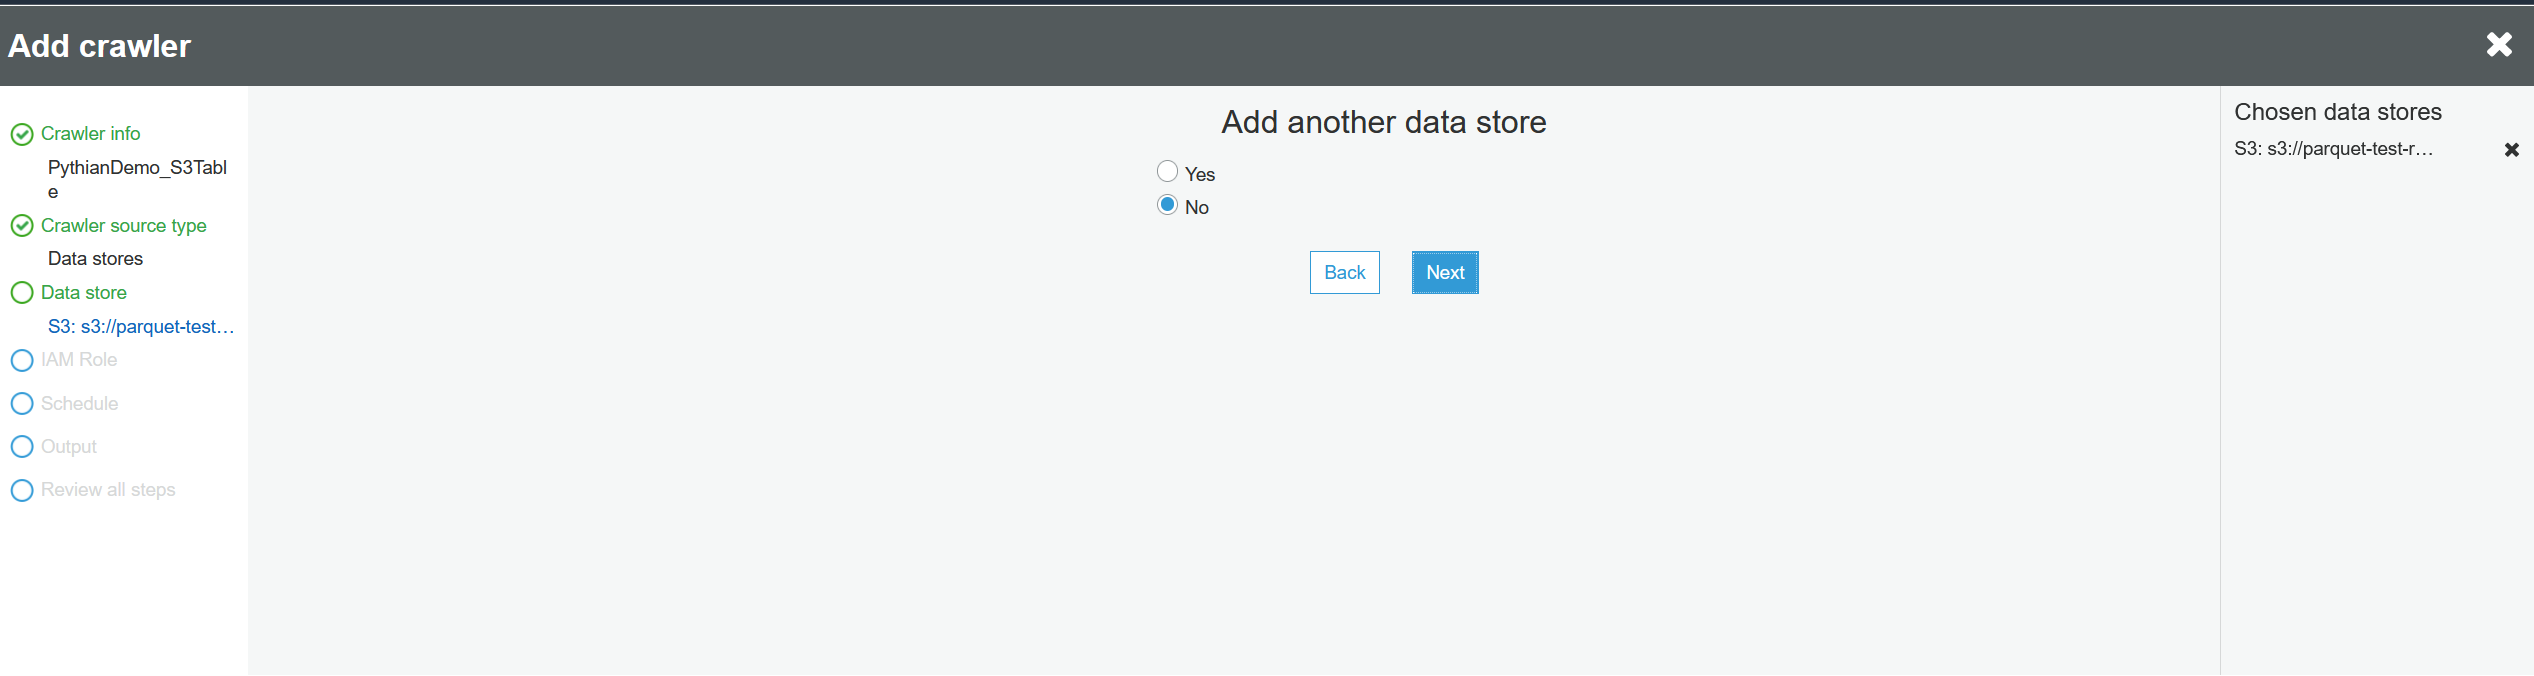
 There's no need to choose another data store. Click "Next":
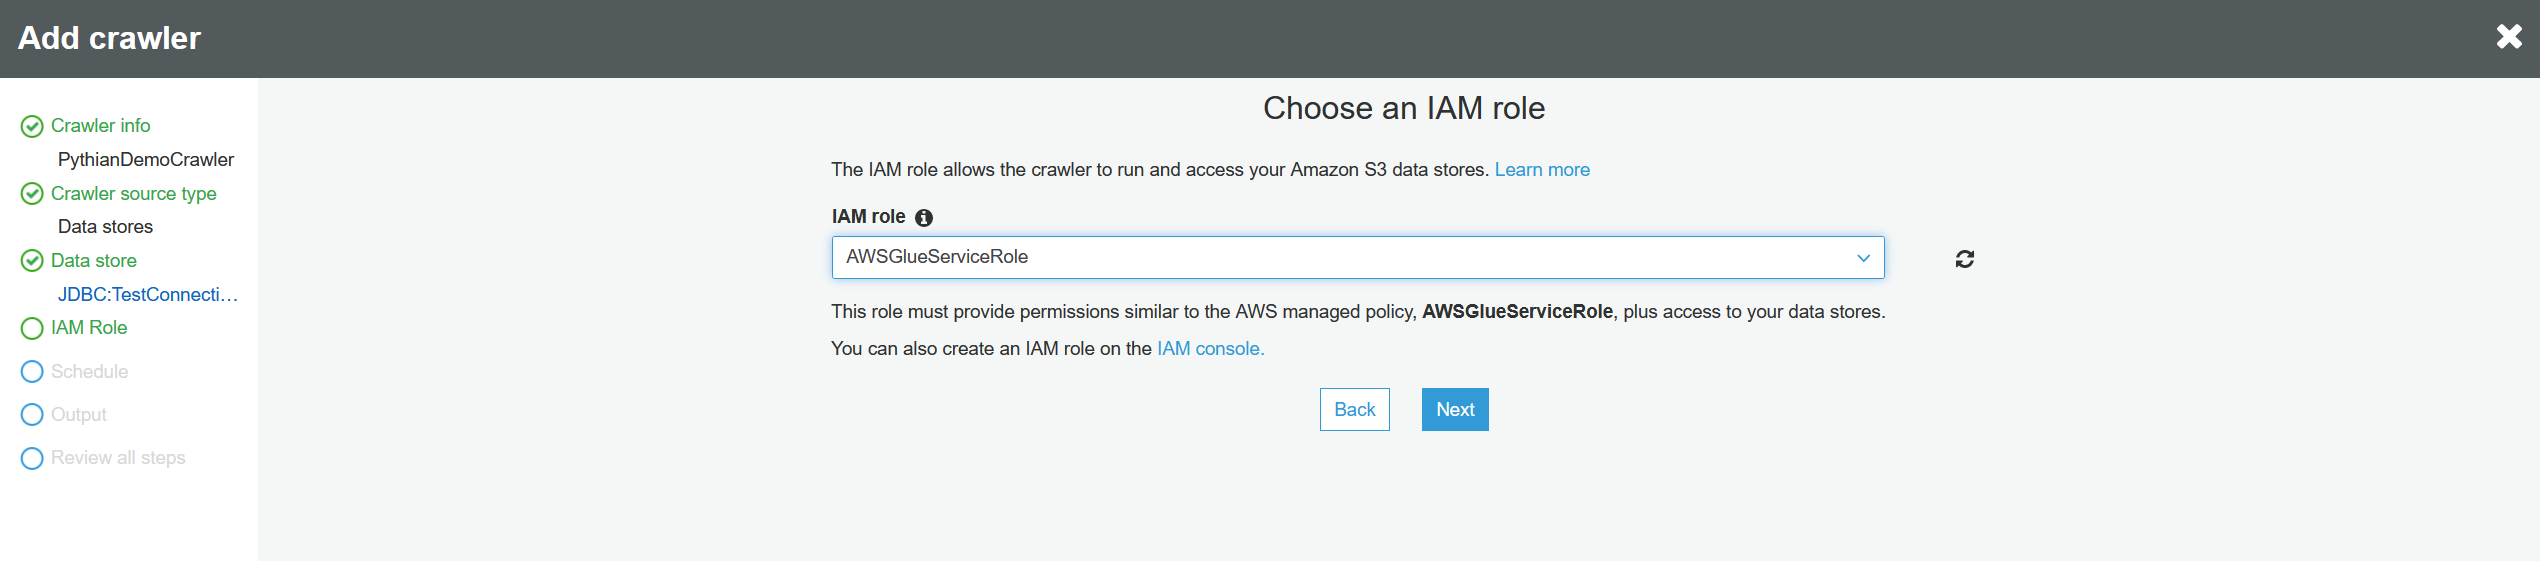
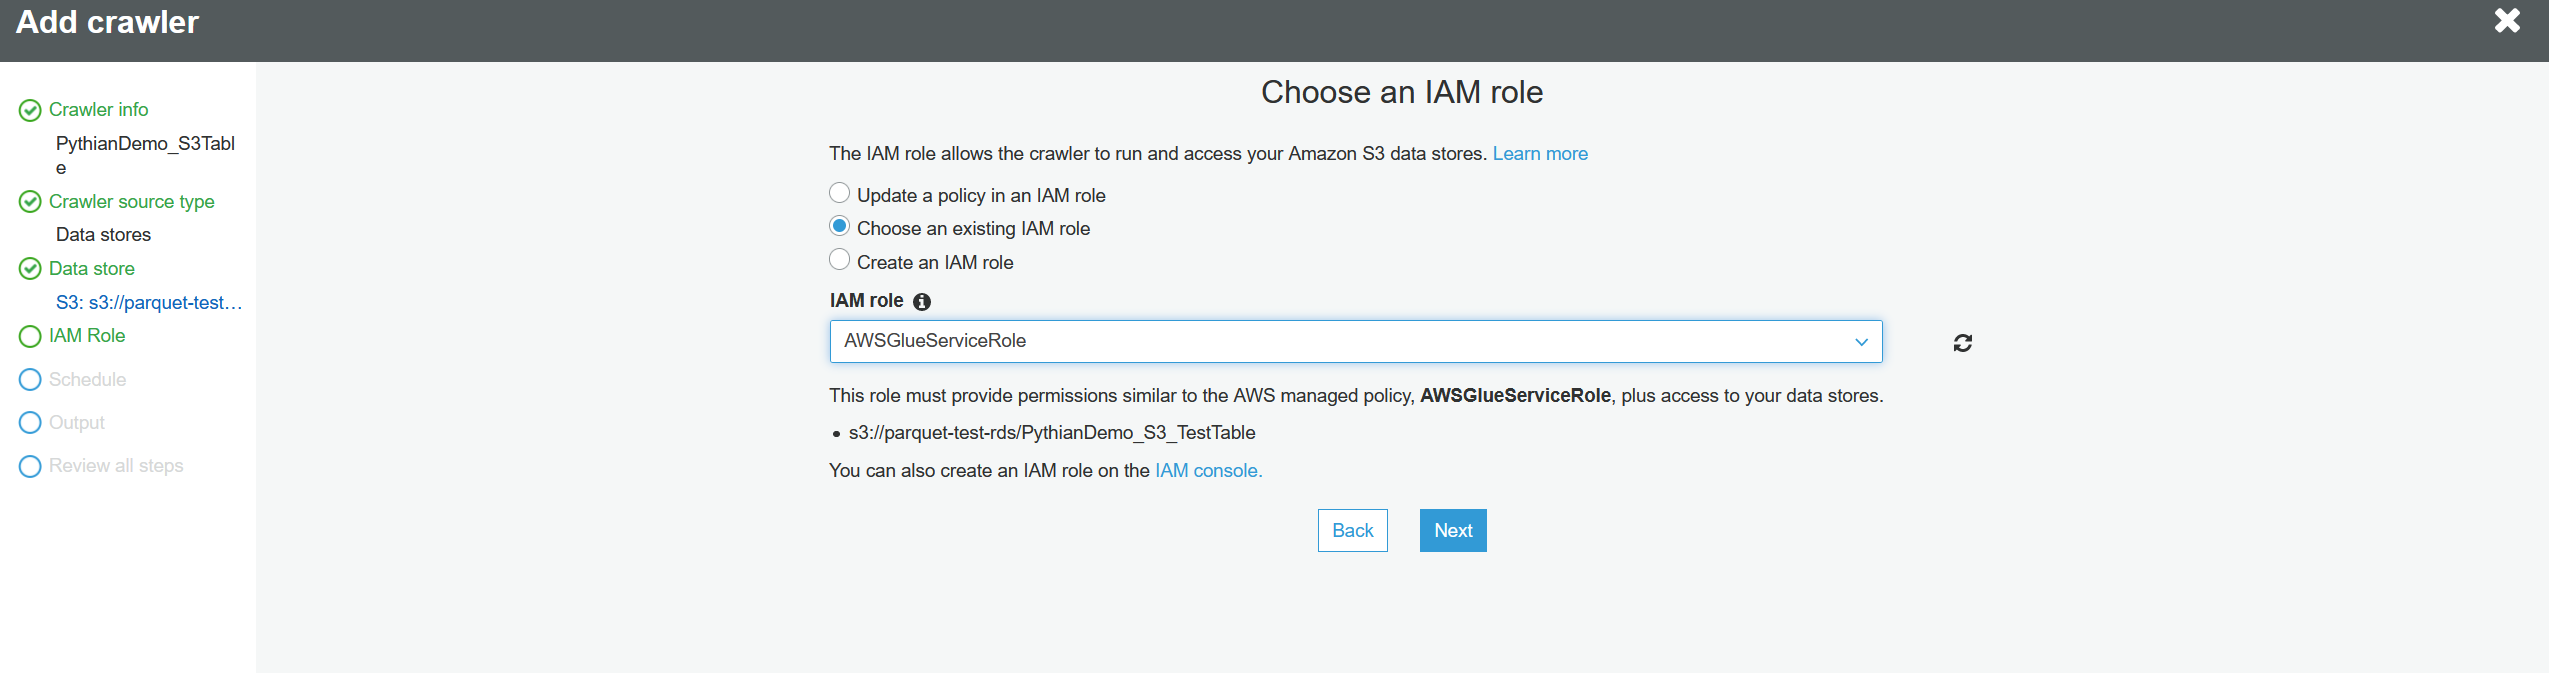
 Choose an IAM (identity and access management) role from the list and click "Next":
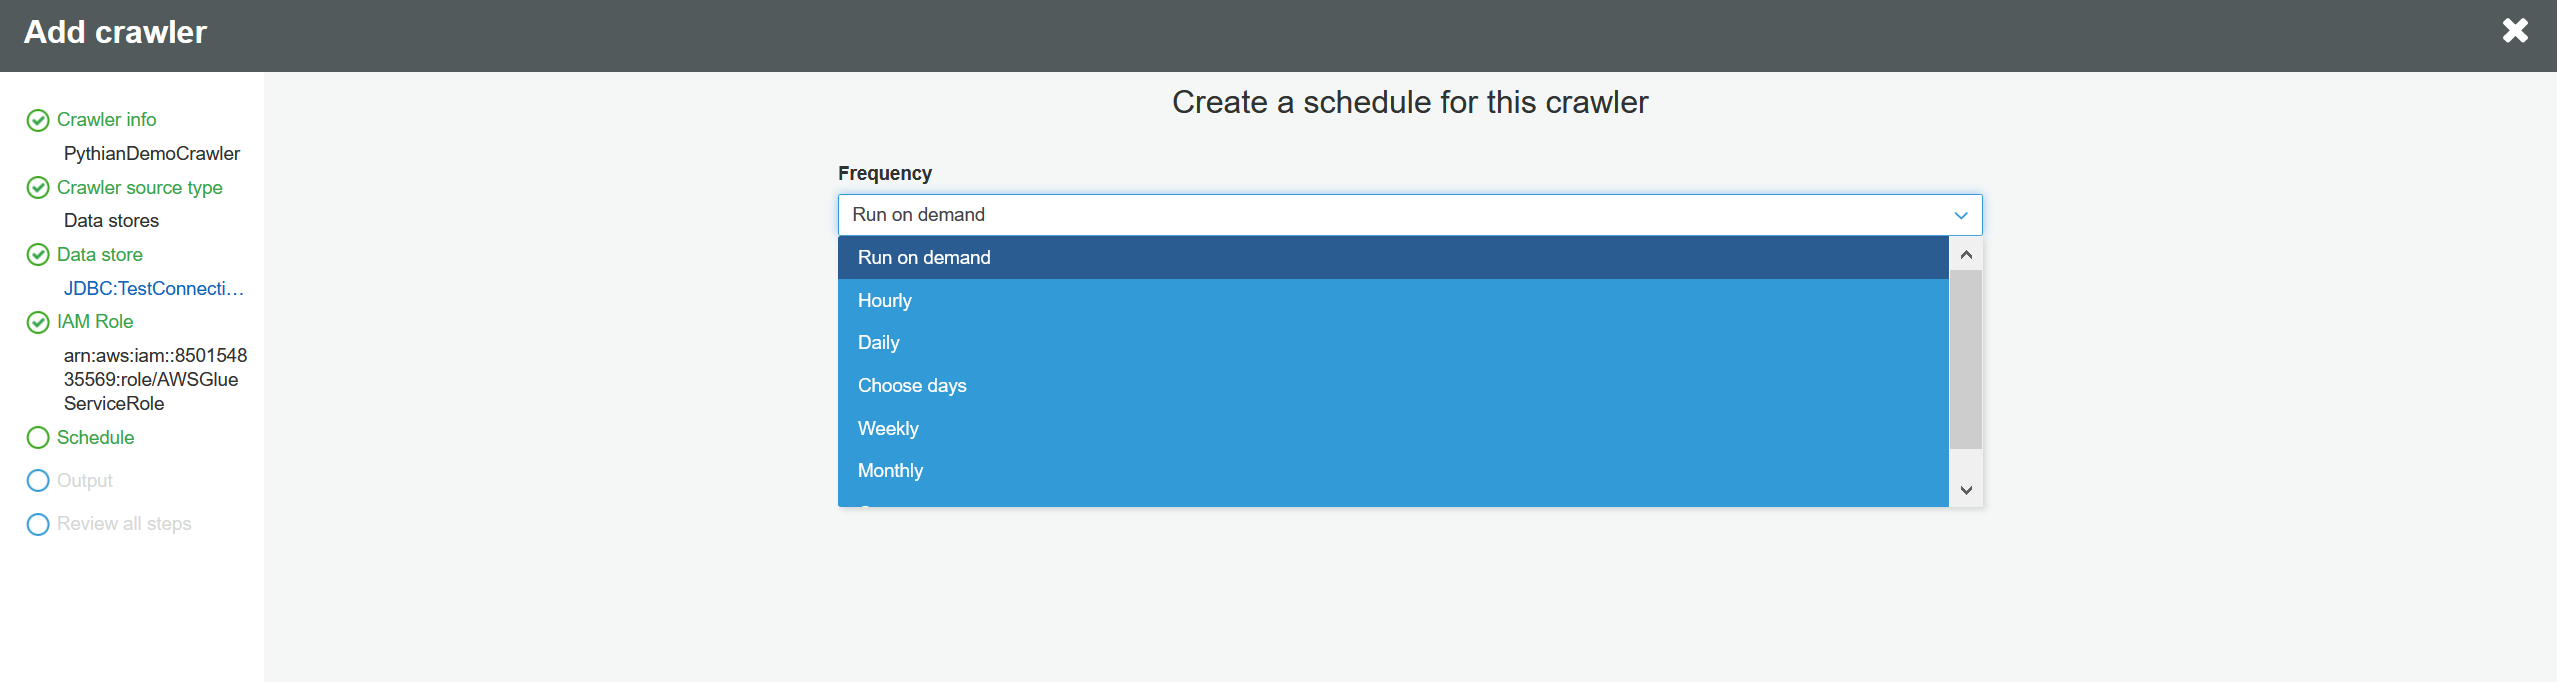
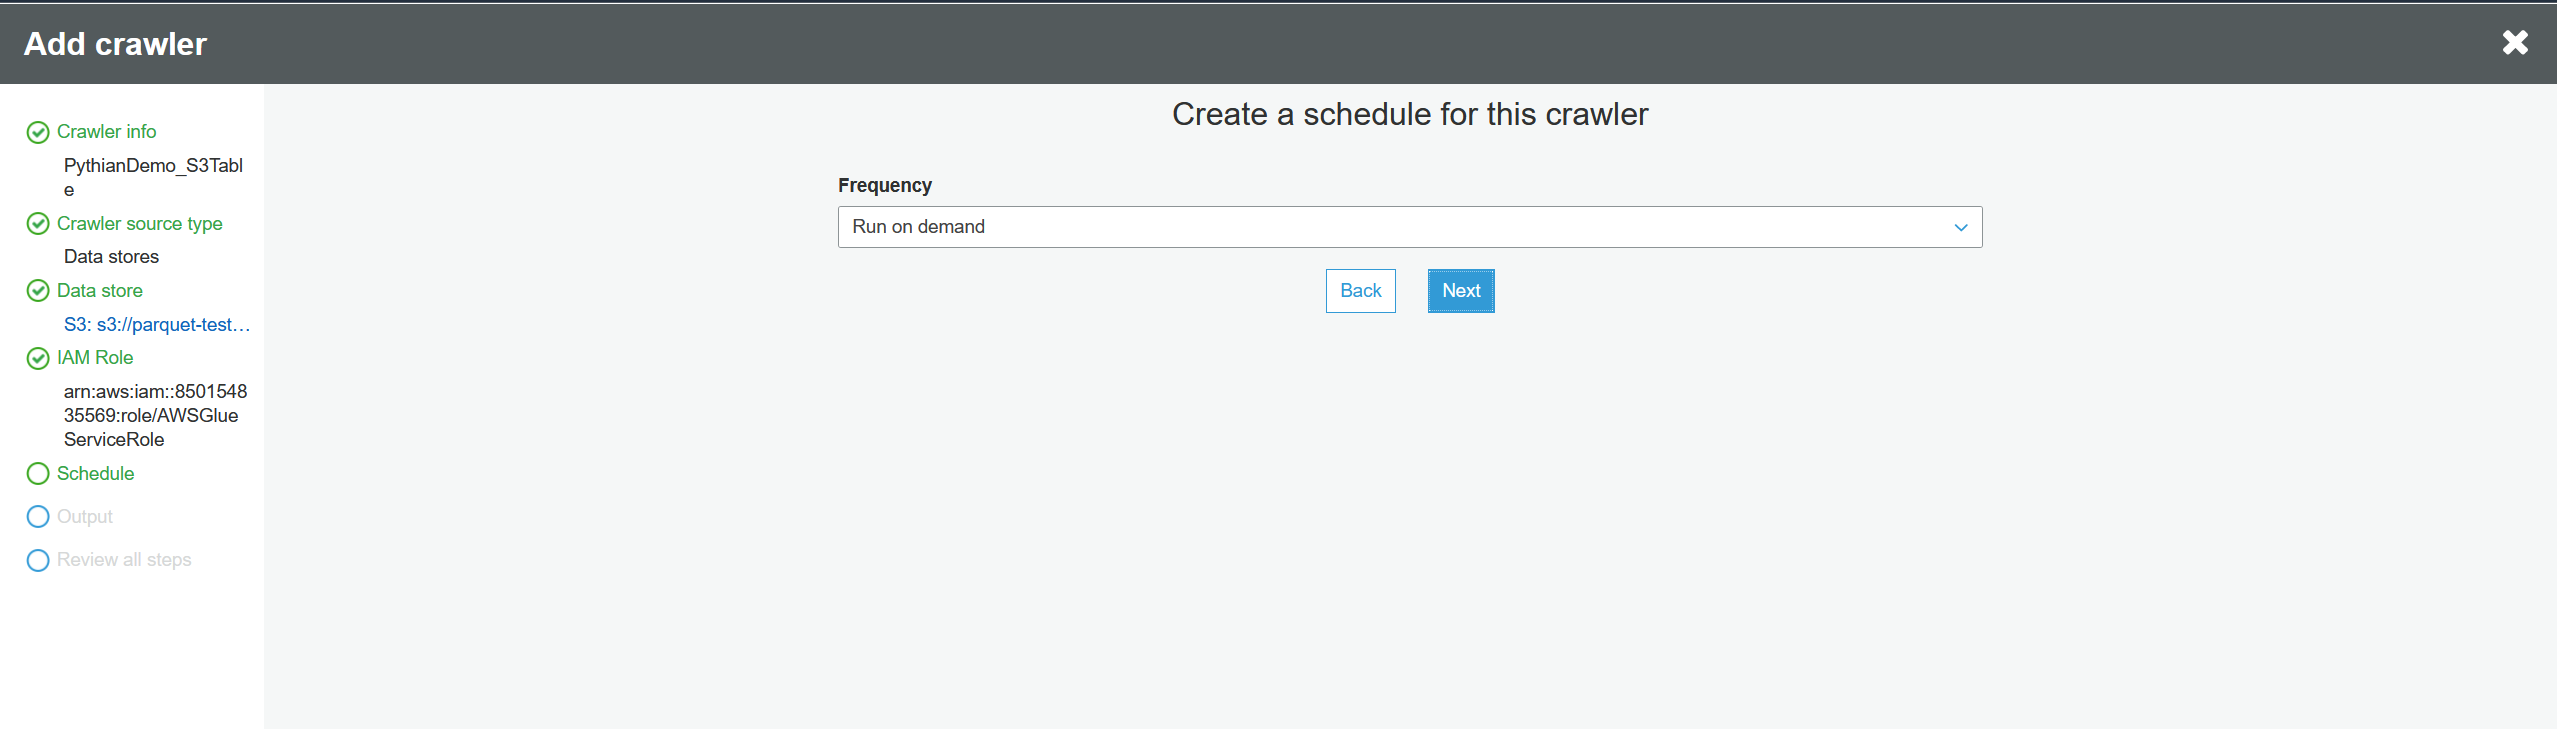
 Next you need to decide if this crawler will run on demand or on a scheduled frequency. In this case, we aren't adding or modifying tables in the RDS database, so we can run this once. Select "Run on demand" and click "Next":
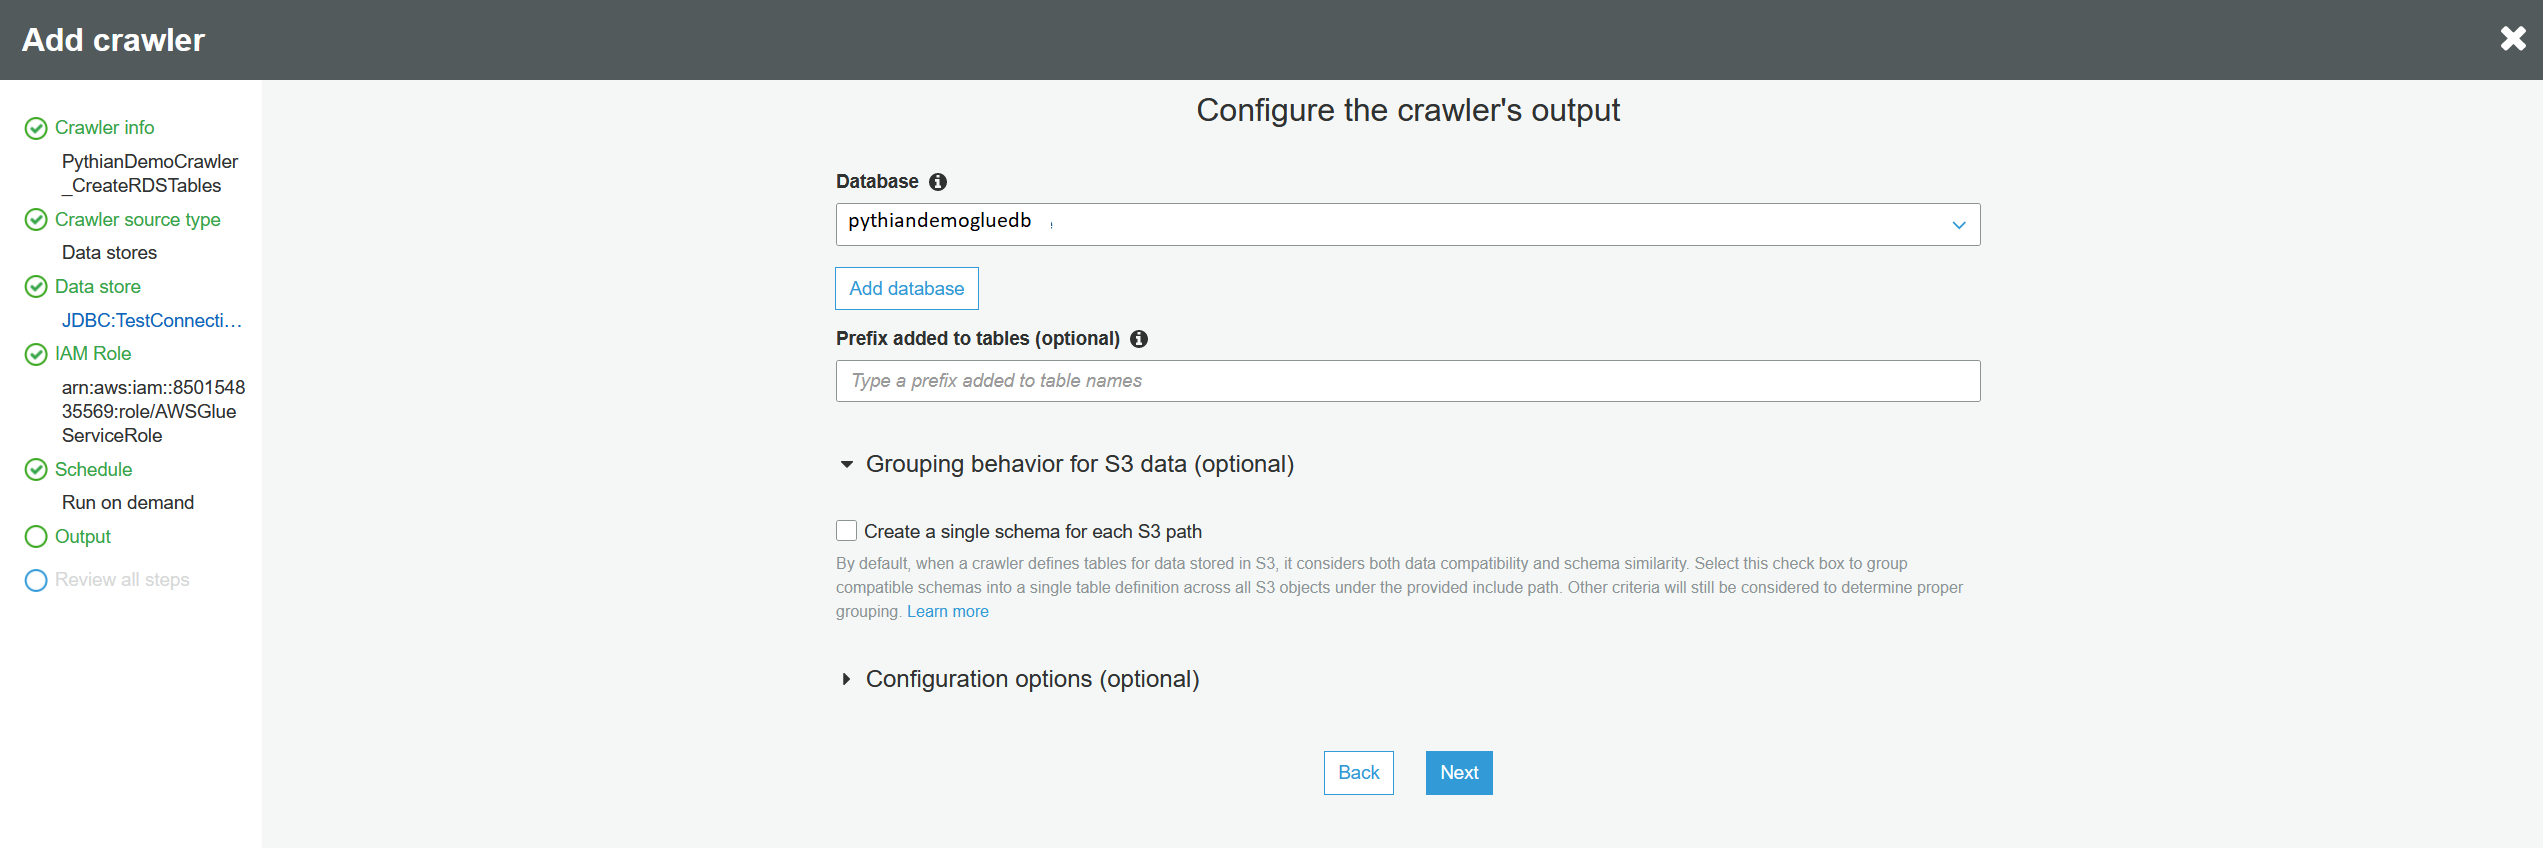
 Choose the Glue database where the Glue tables will be created and will point to the RDS tables. Leave everything else at default values and click "Next":
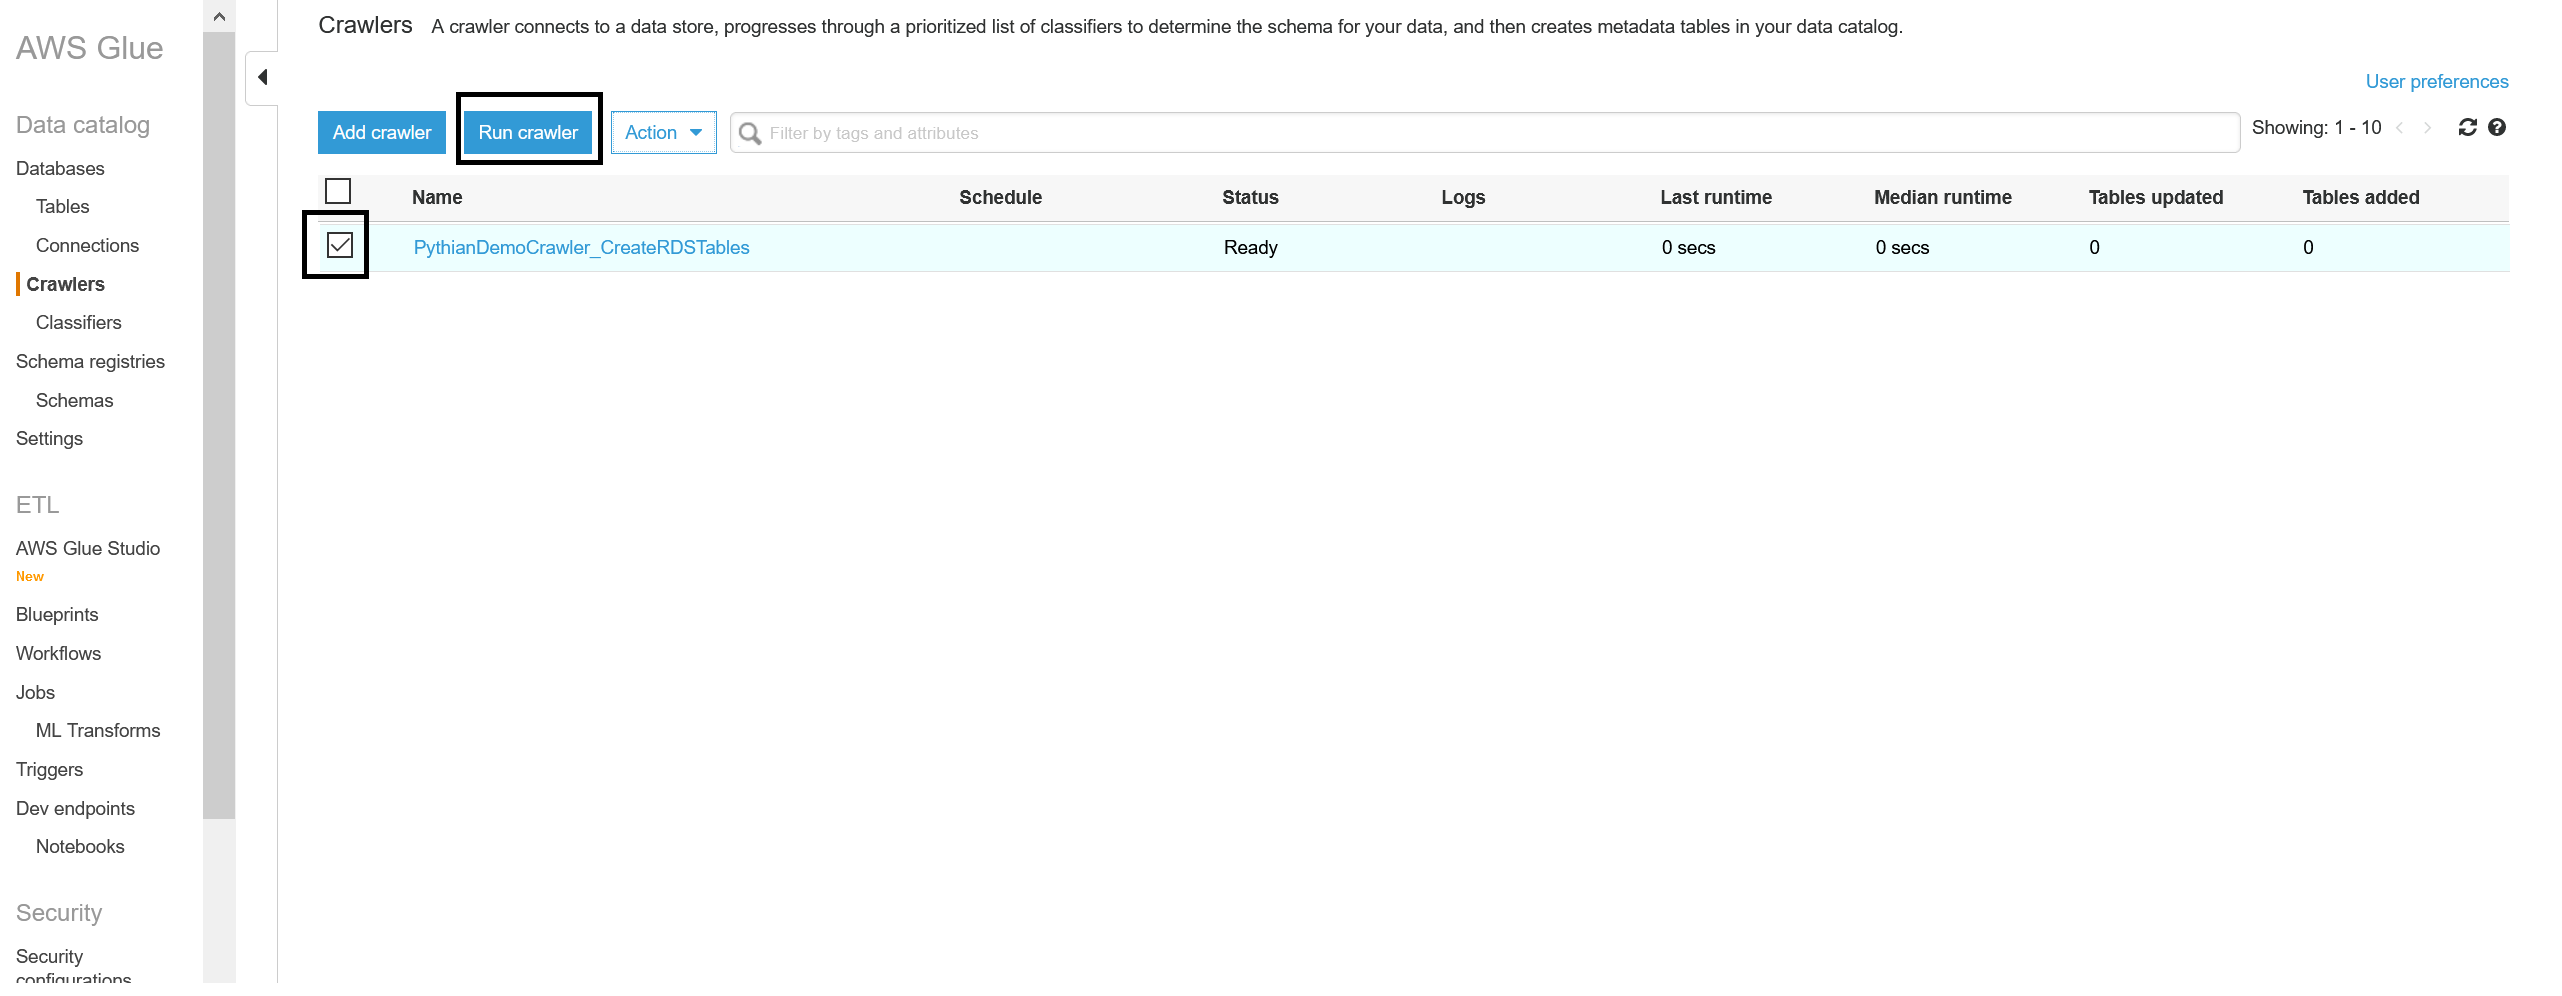
 Then review all the details and press "Finish." Check the box for the new crawler and run it:
 Once the crawler task is completed, click on "Tables" in the left pane and verify that the Glue tables have been created properly. The classification of those tables will be "sqlserver."
5. Create and run a job to copy the data from RDS table to S3 bucket folder
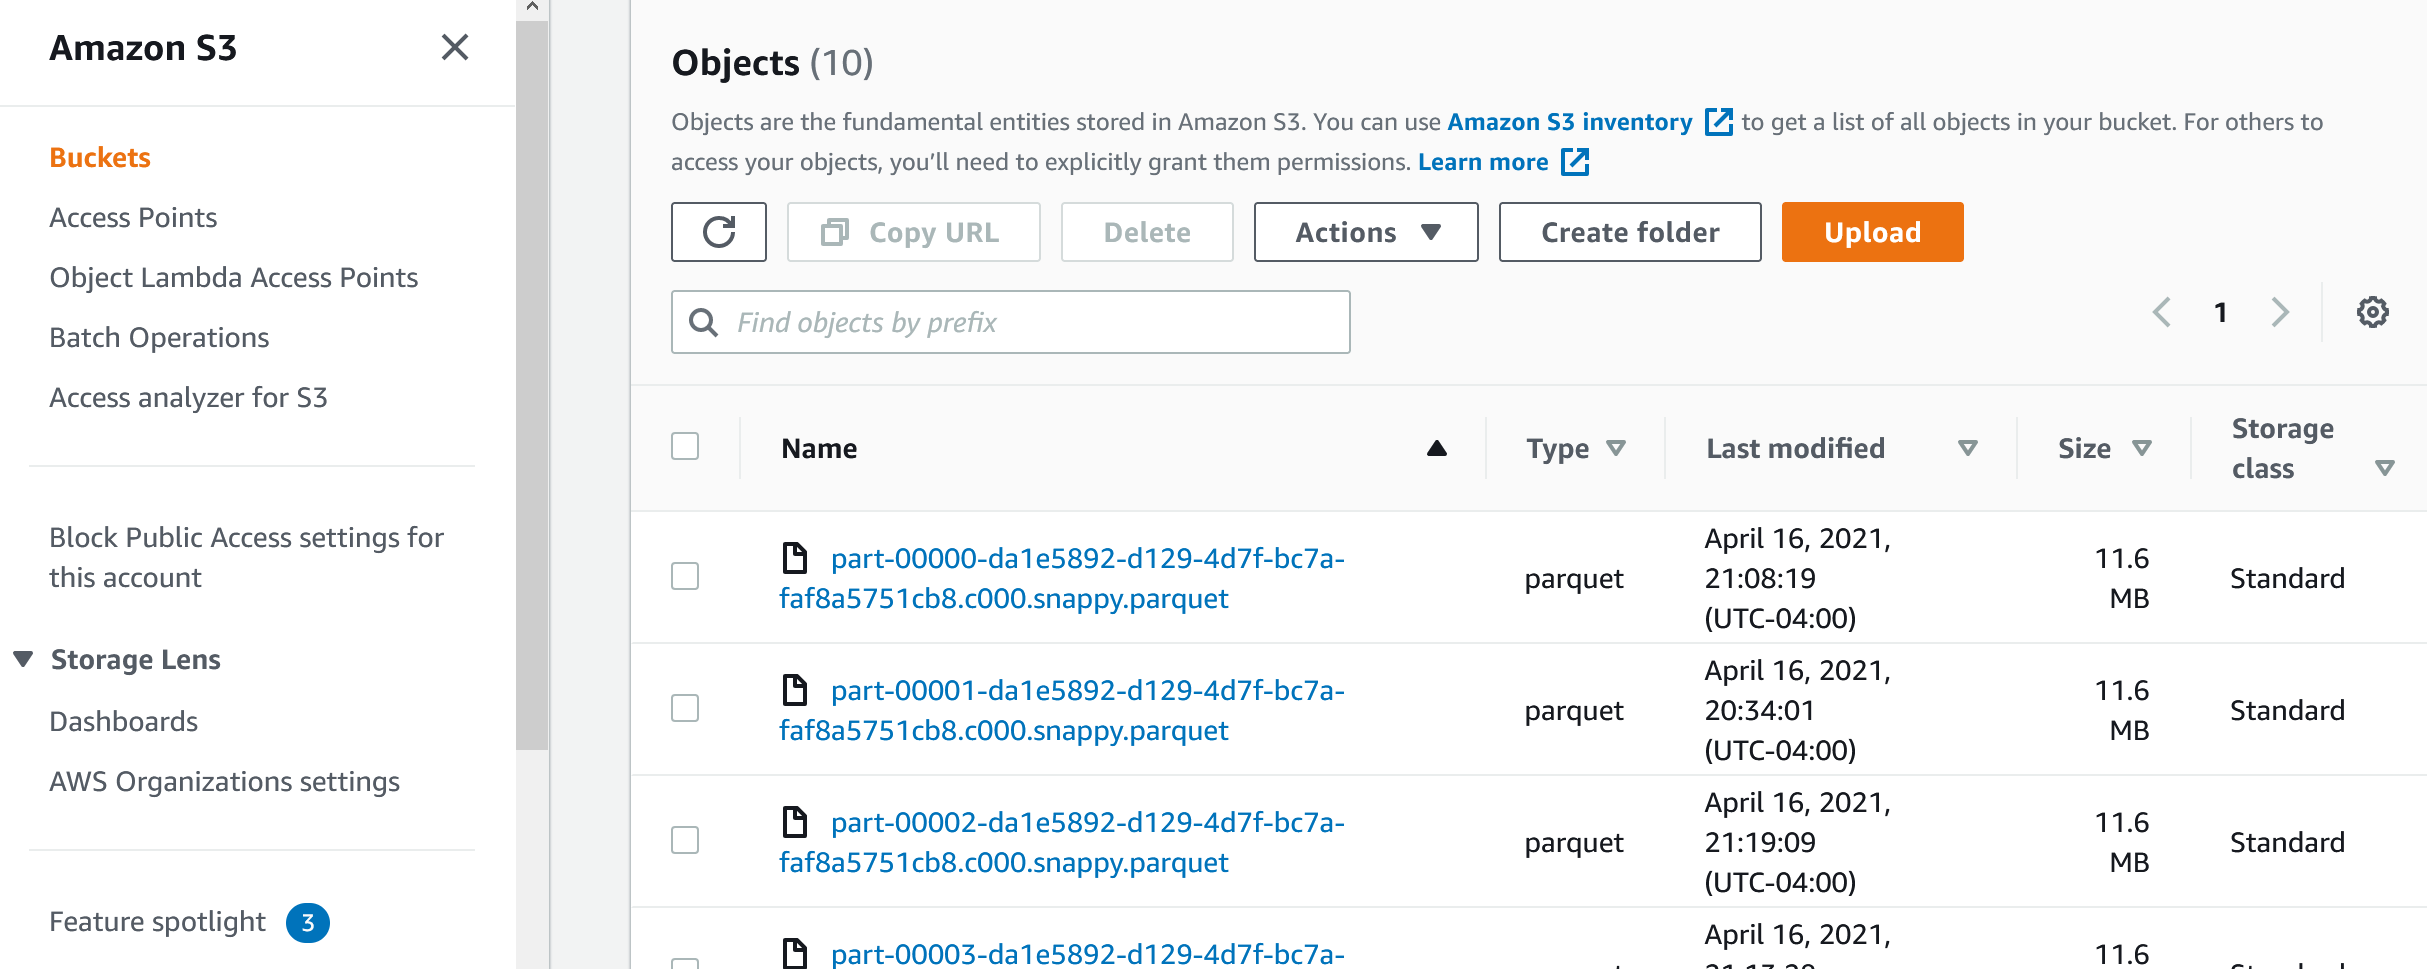
Now we want to copy the data from the RDS database table into S3 buckets and partition that data in S3 by a numeric key because we're assuming that the data set is, or will eventually be, very large. We'll create a logical key during execution, for example <partitioned column> / 10,000,000 rows so that every 10,000,000 rows will reside in one partition. You may want to change this number as you need (i.e: 10,000 rows per partition). The process will "know" how many rows can reside in each Parquet file, in each partition. The end result on S3 will look something like this: Folder = test_table/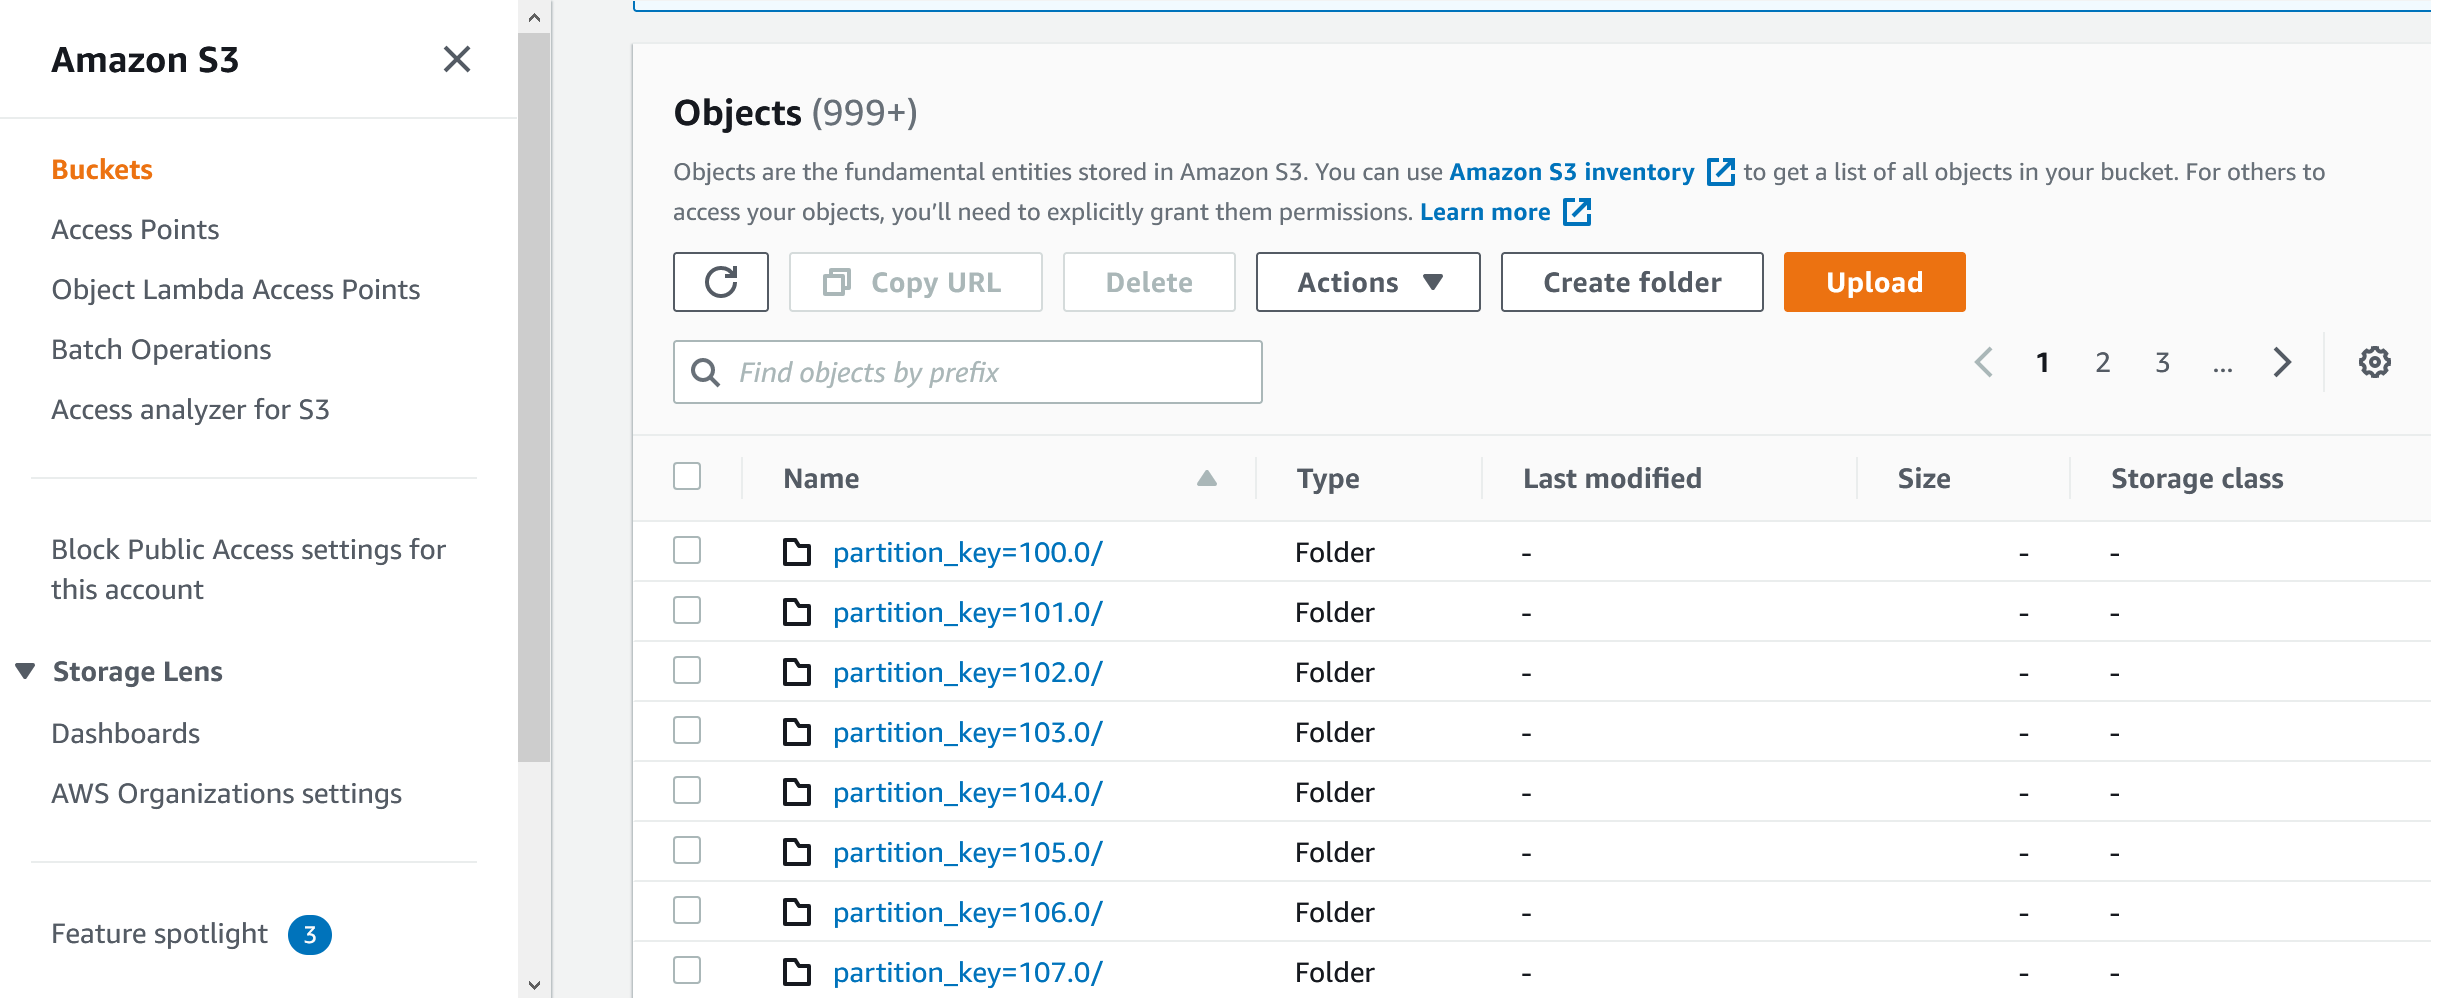 If we click on the first partition, this is what we'll see:
 If you click on the files themselves, they'll open but since the data is encrypted, you won't be able to see it. Let's create the job that will create the above folders and files. In Glue, on the left pane, open ETL --> AWS Glue Studio. Don't try to create the job from the "Jobs" section; it won't work:
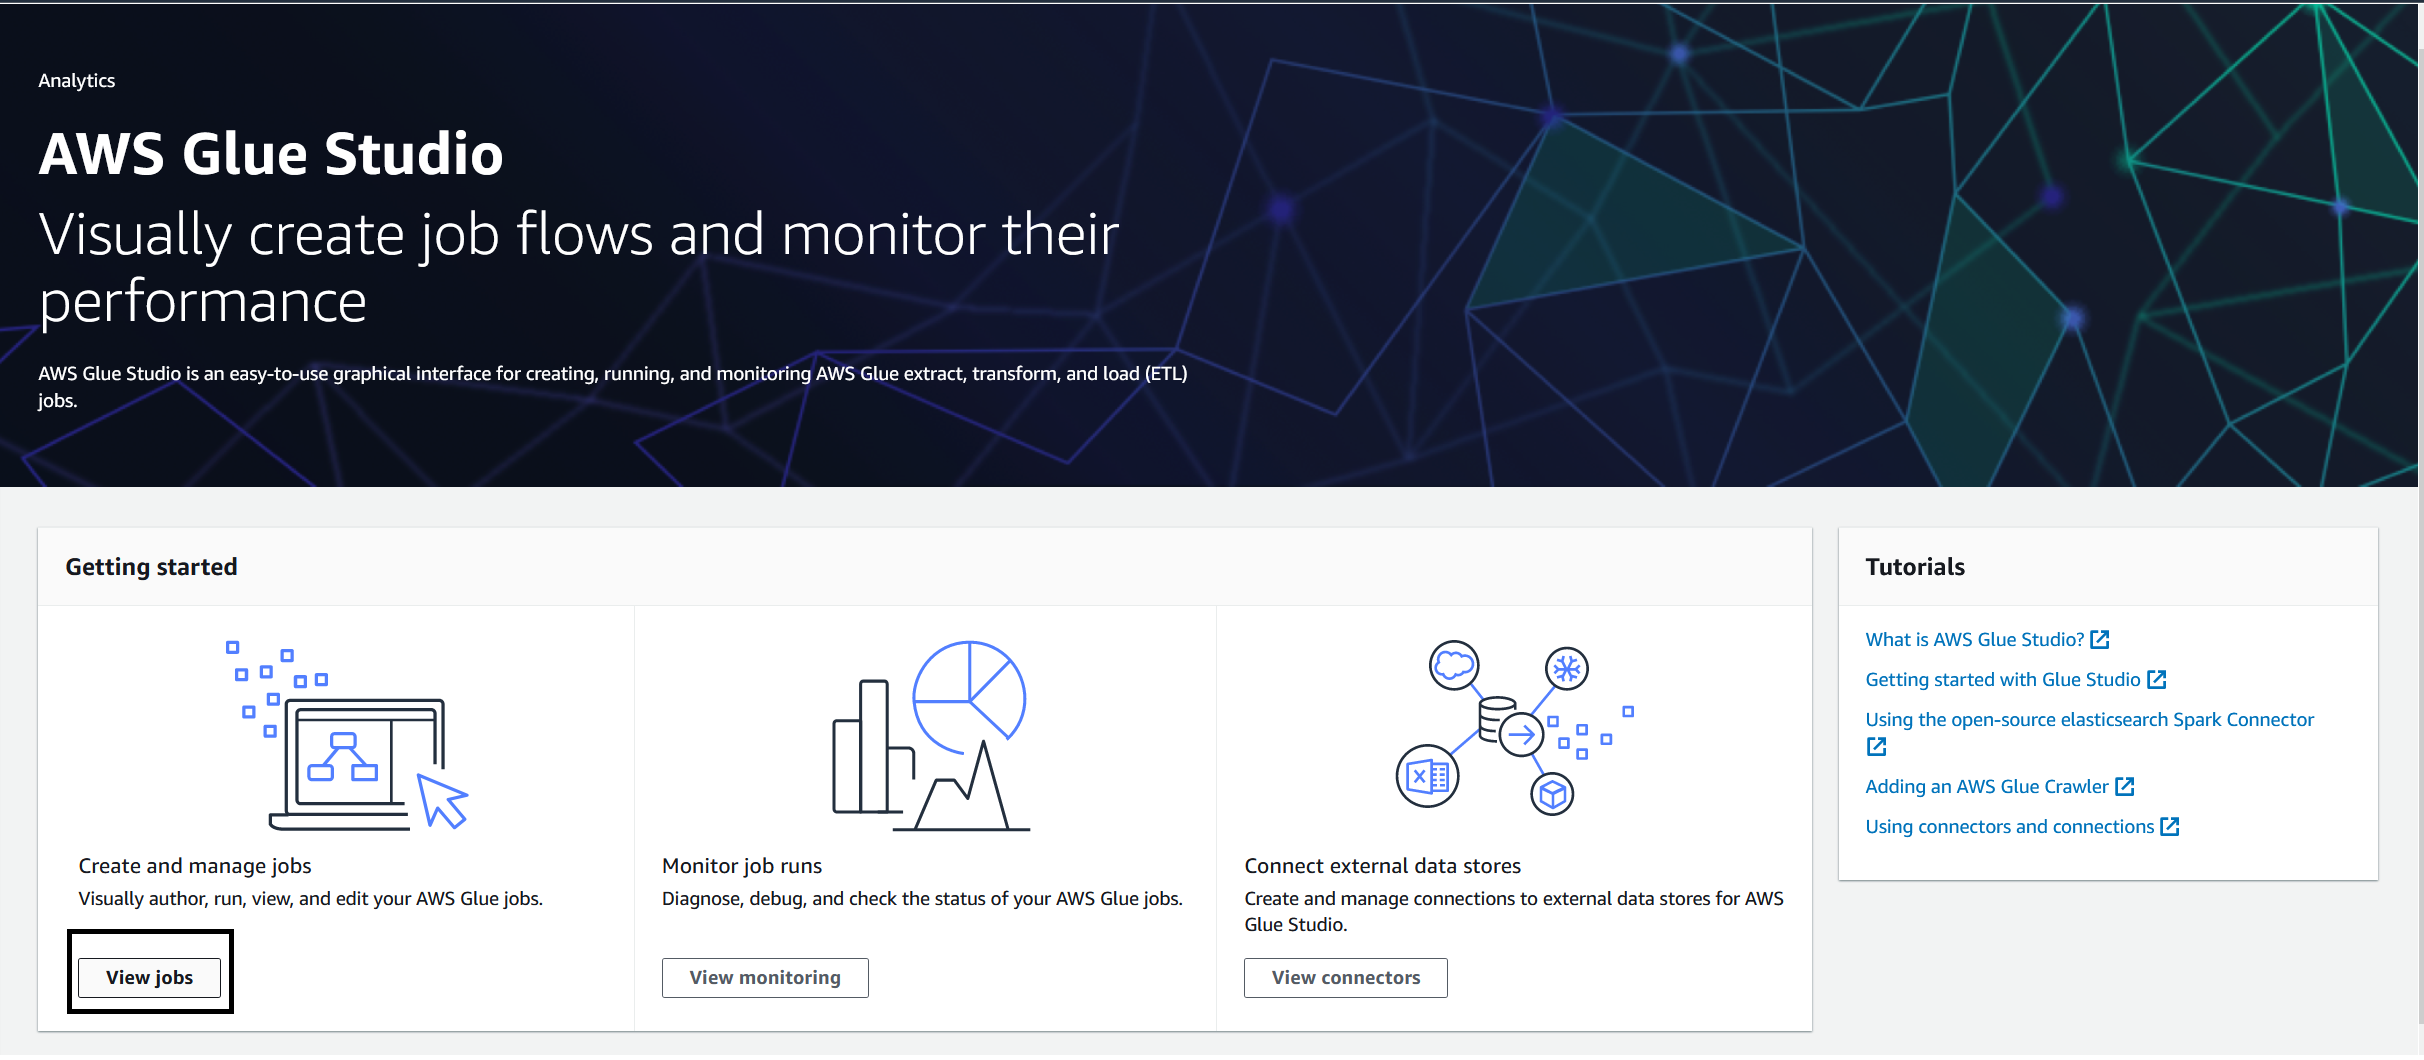
 In the Glue Studio, click on "View jobs":
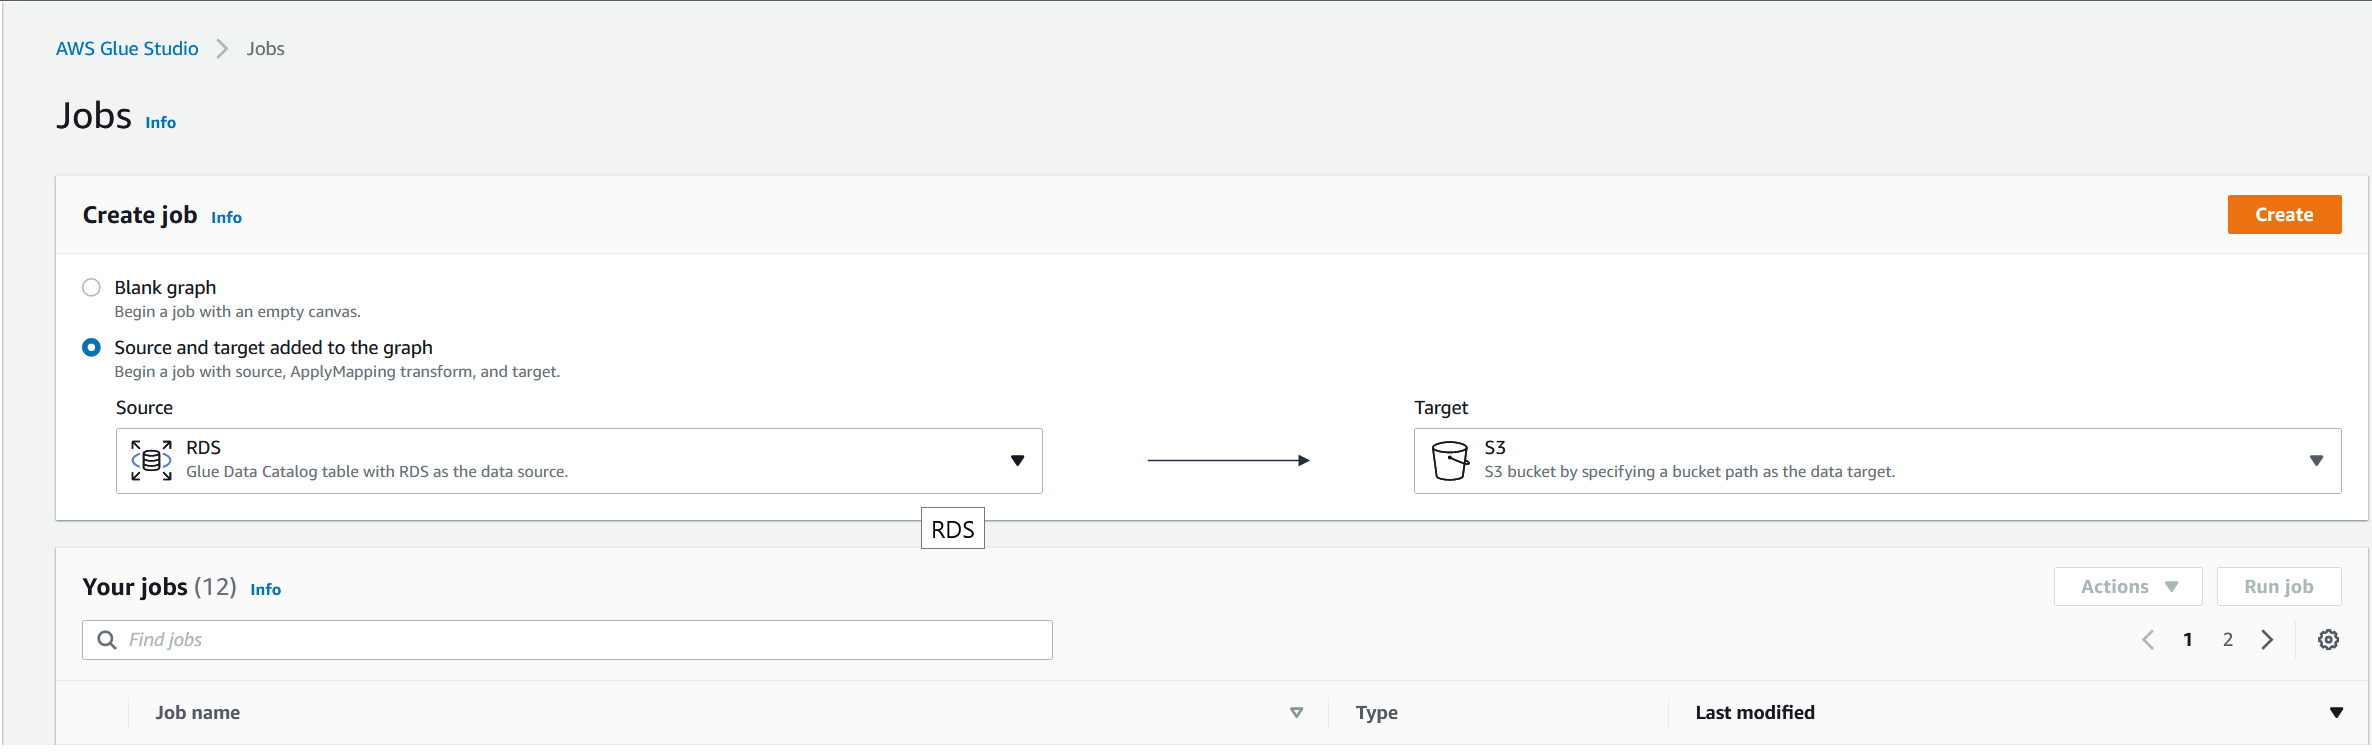
 On the next screen choose "RDS" as the source and leave "S3" as the destination. Click "Create":
 Click on the "JDBC Connection" square on the left and we'll fill up the details of the Glue RDS table we're going to copy the data from (i.e.: test_table):
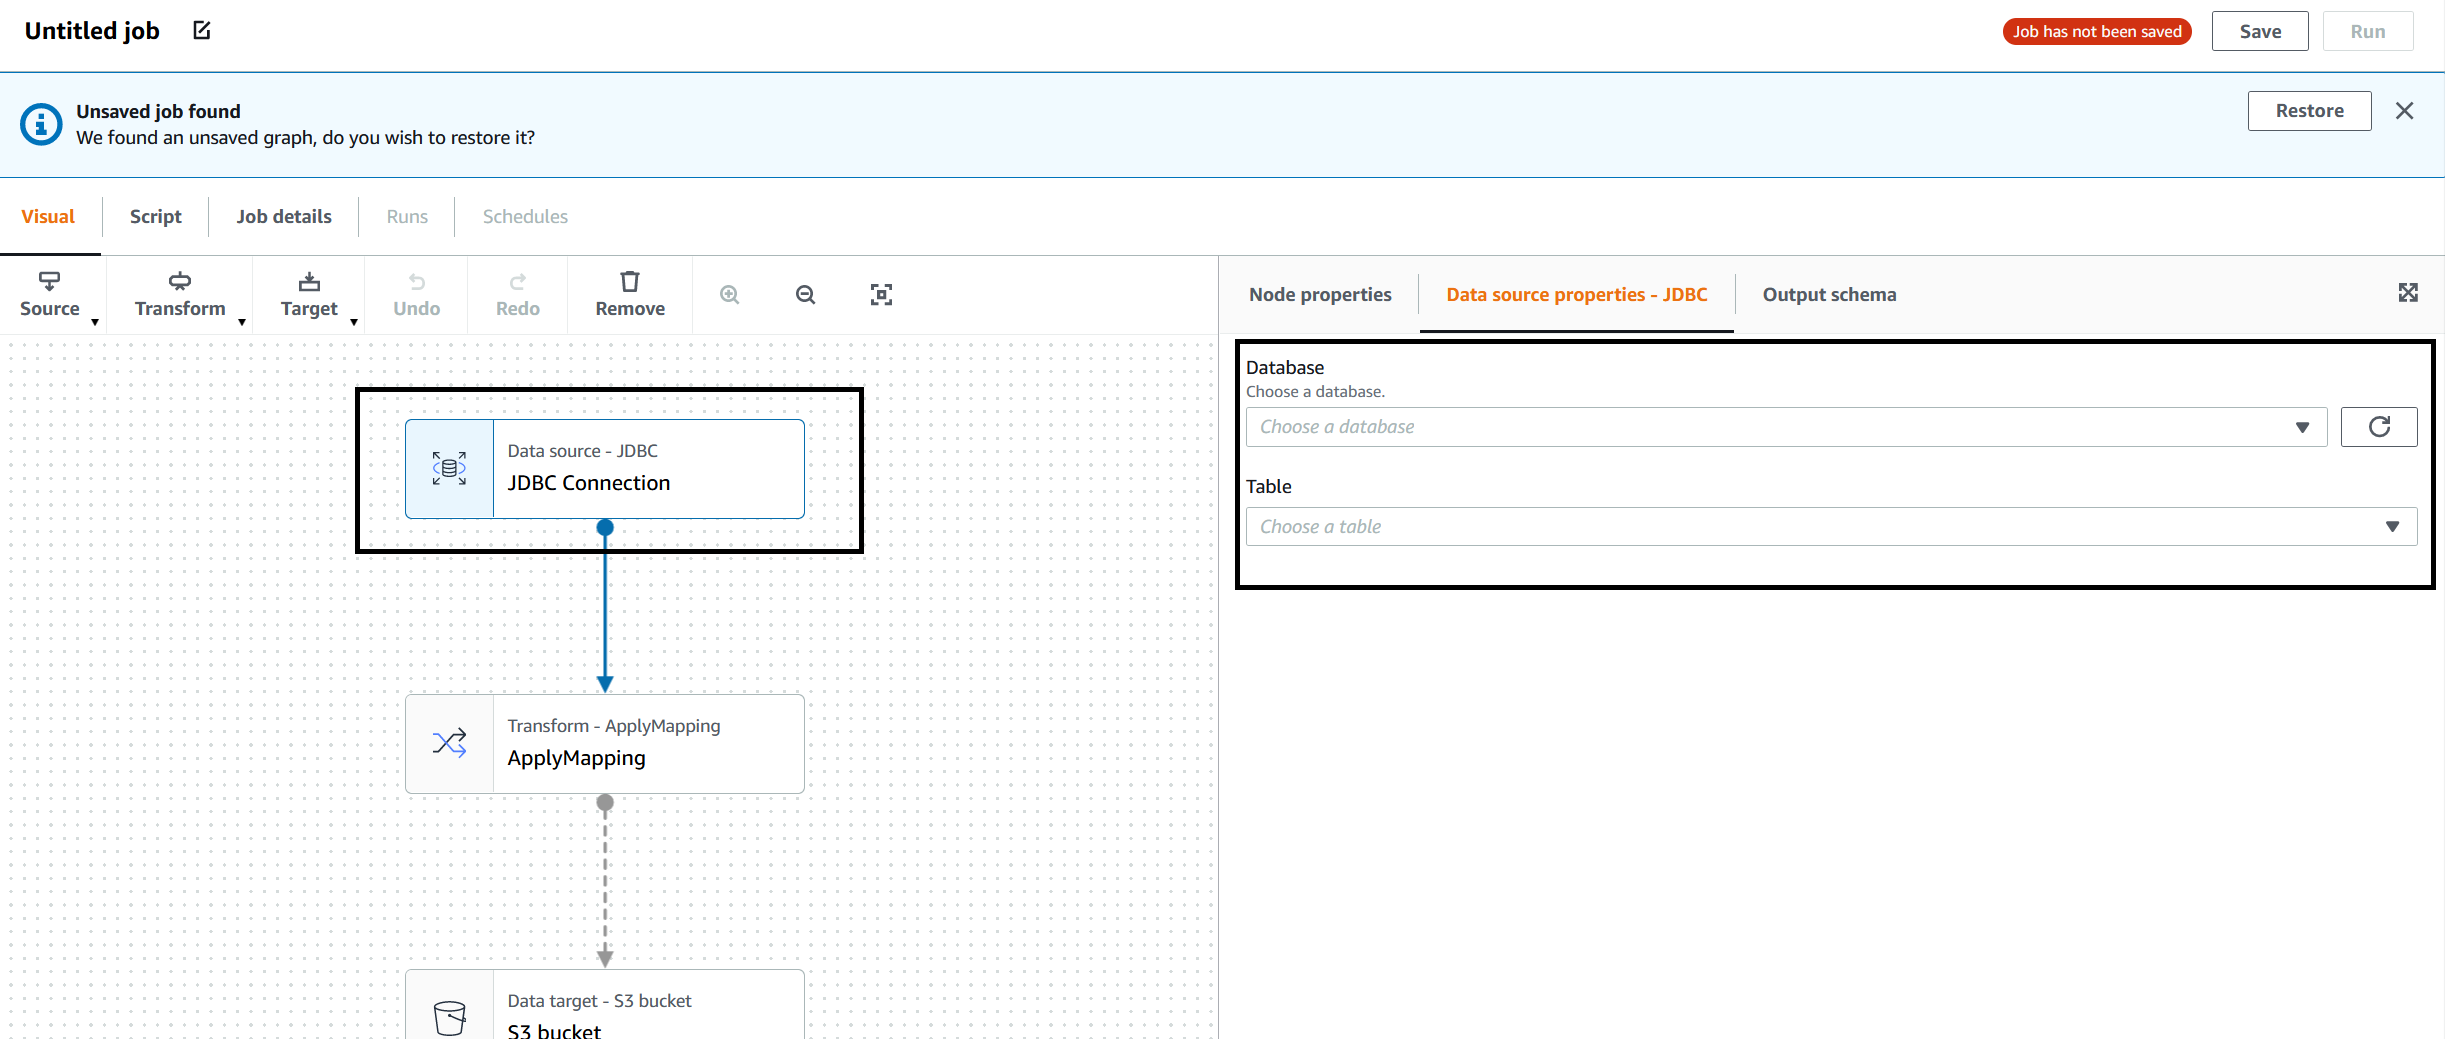 Here's an example—please note that the little square for the JDBC connection is checked:
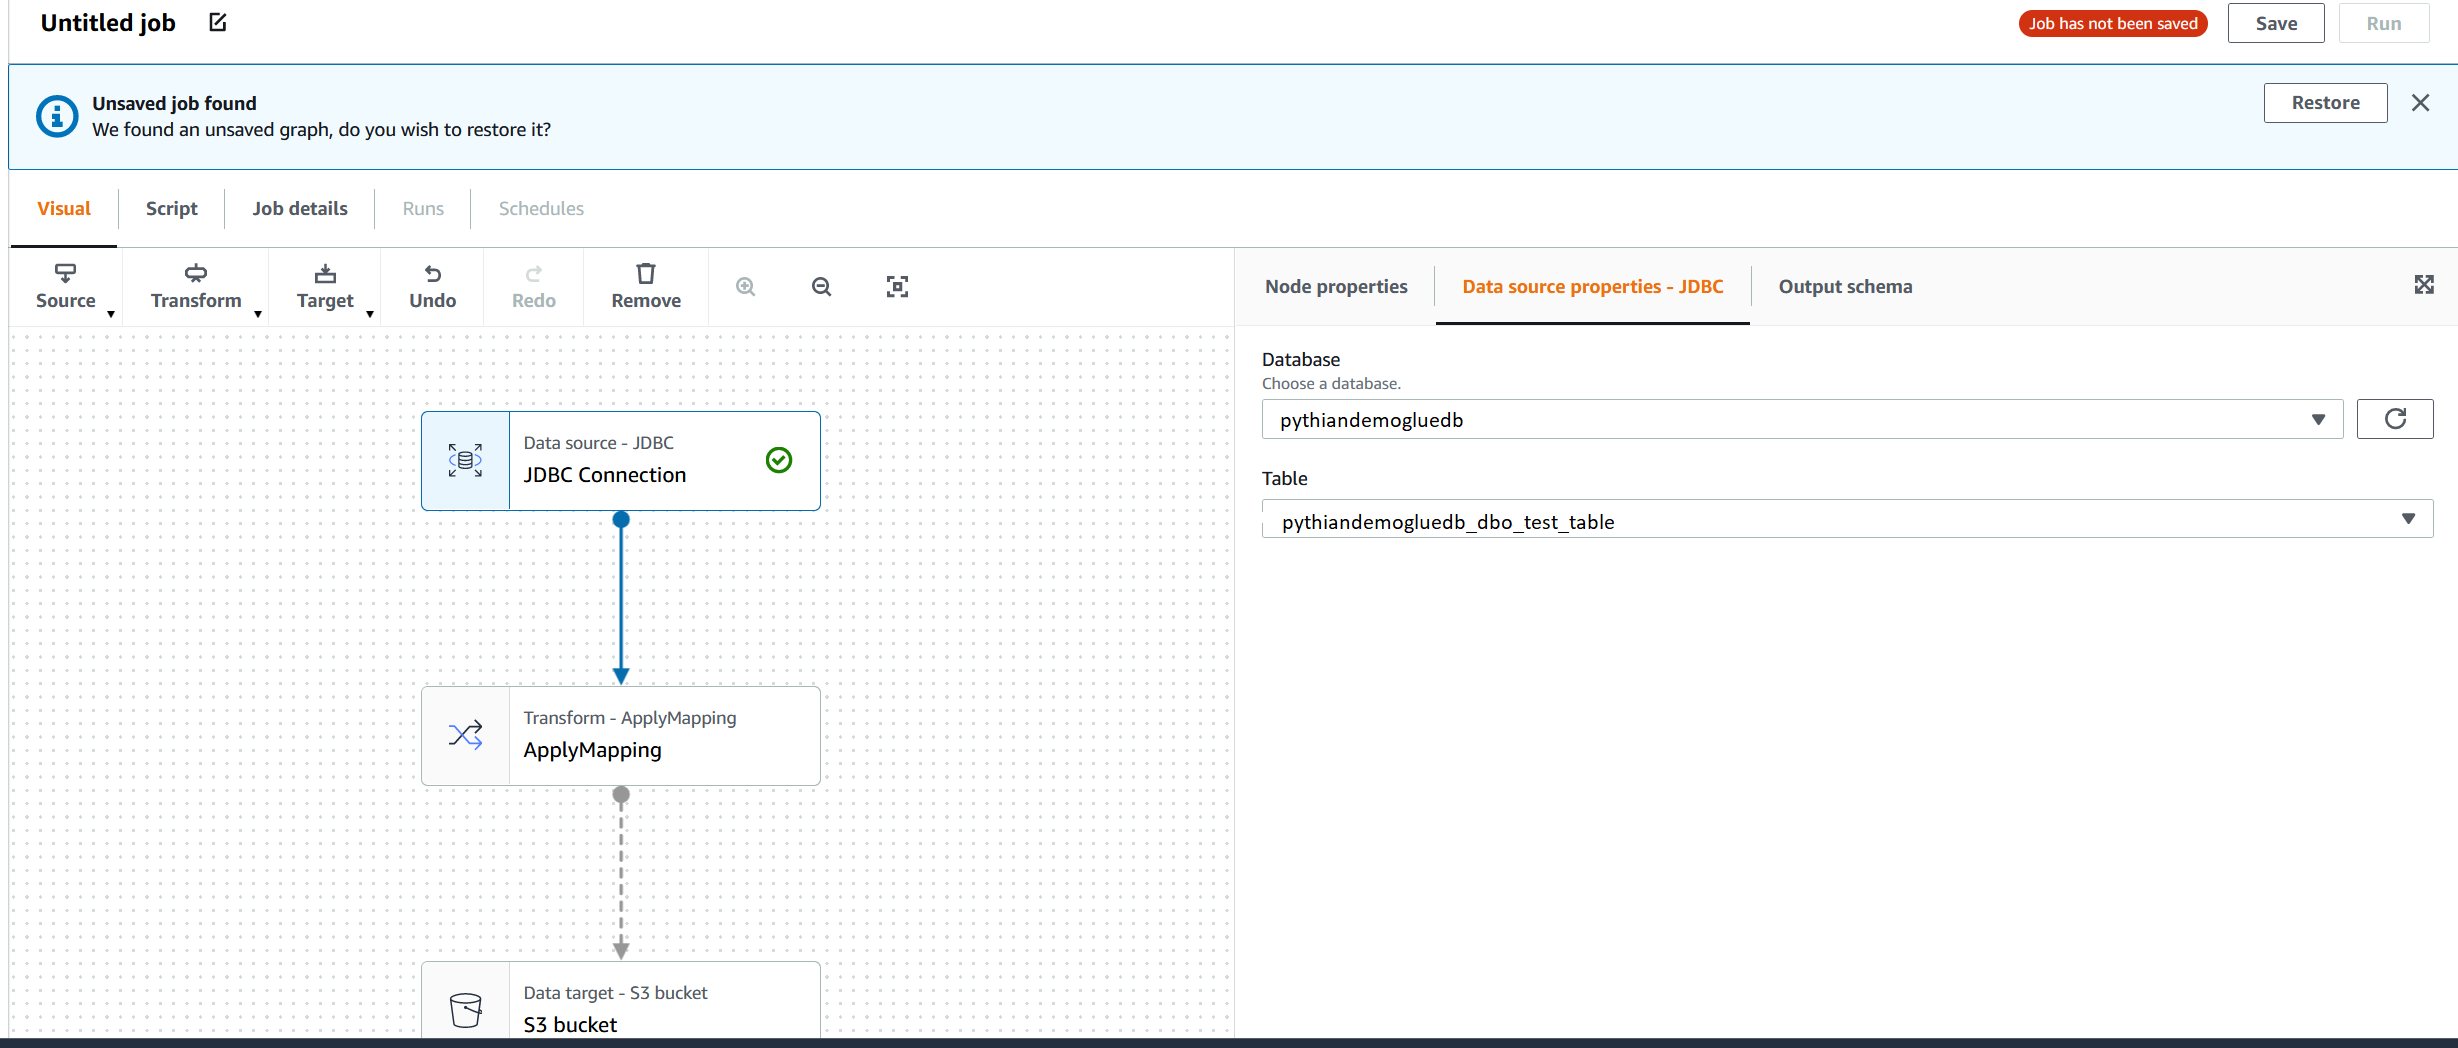 Then we'll click on the "S3 bucket" square and fill up the details for the destination. Note that the "S3 Target Location path" will be created by the job if it doesn't exist (the test_table/ folder still doesn't exist):
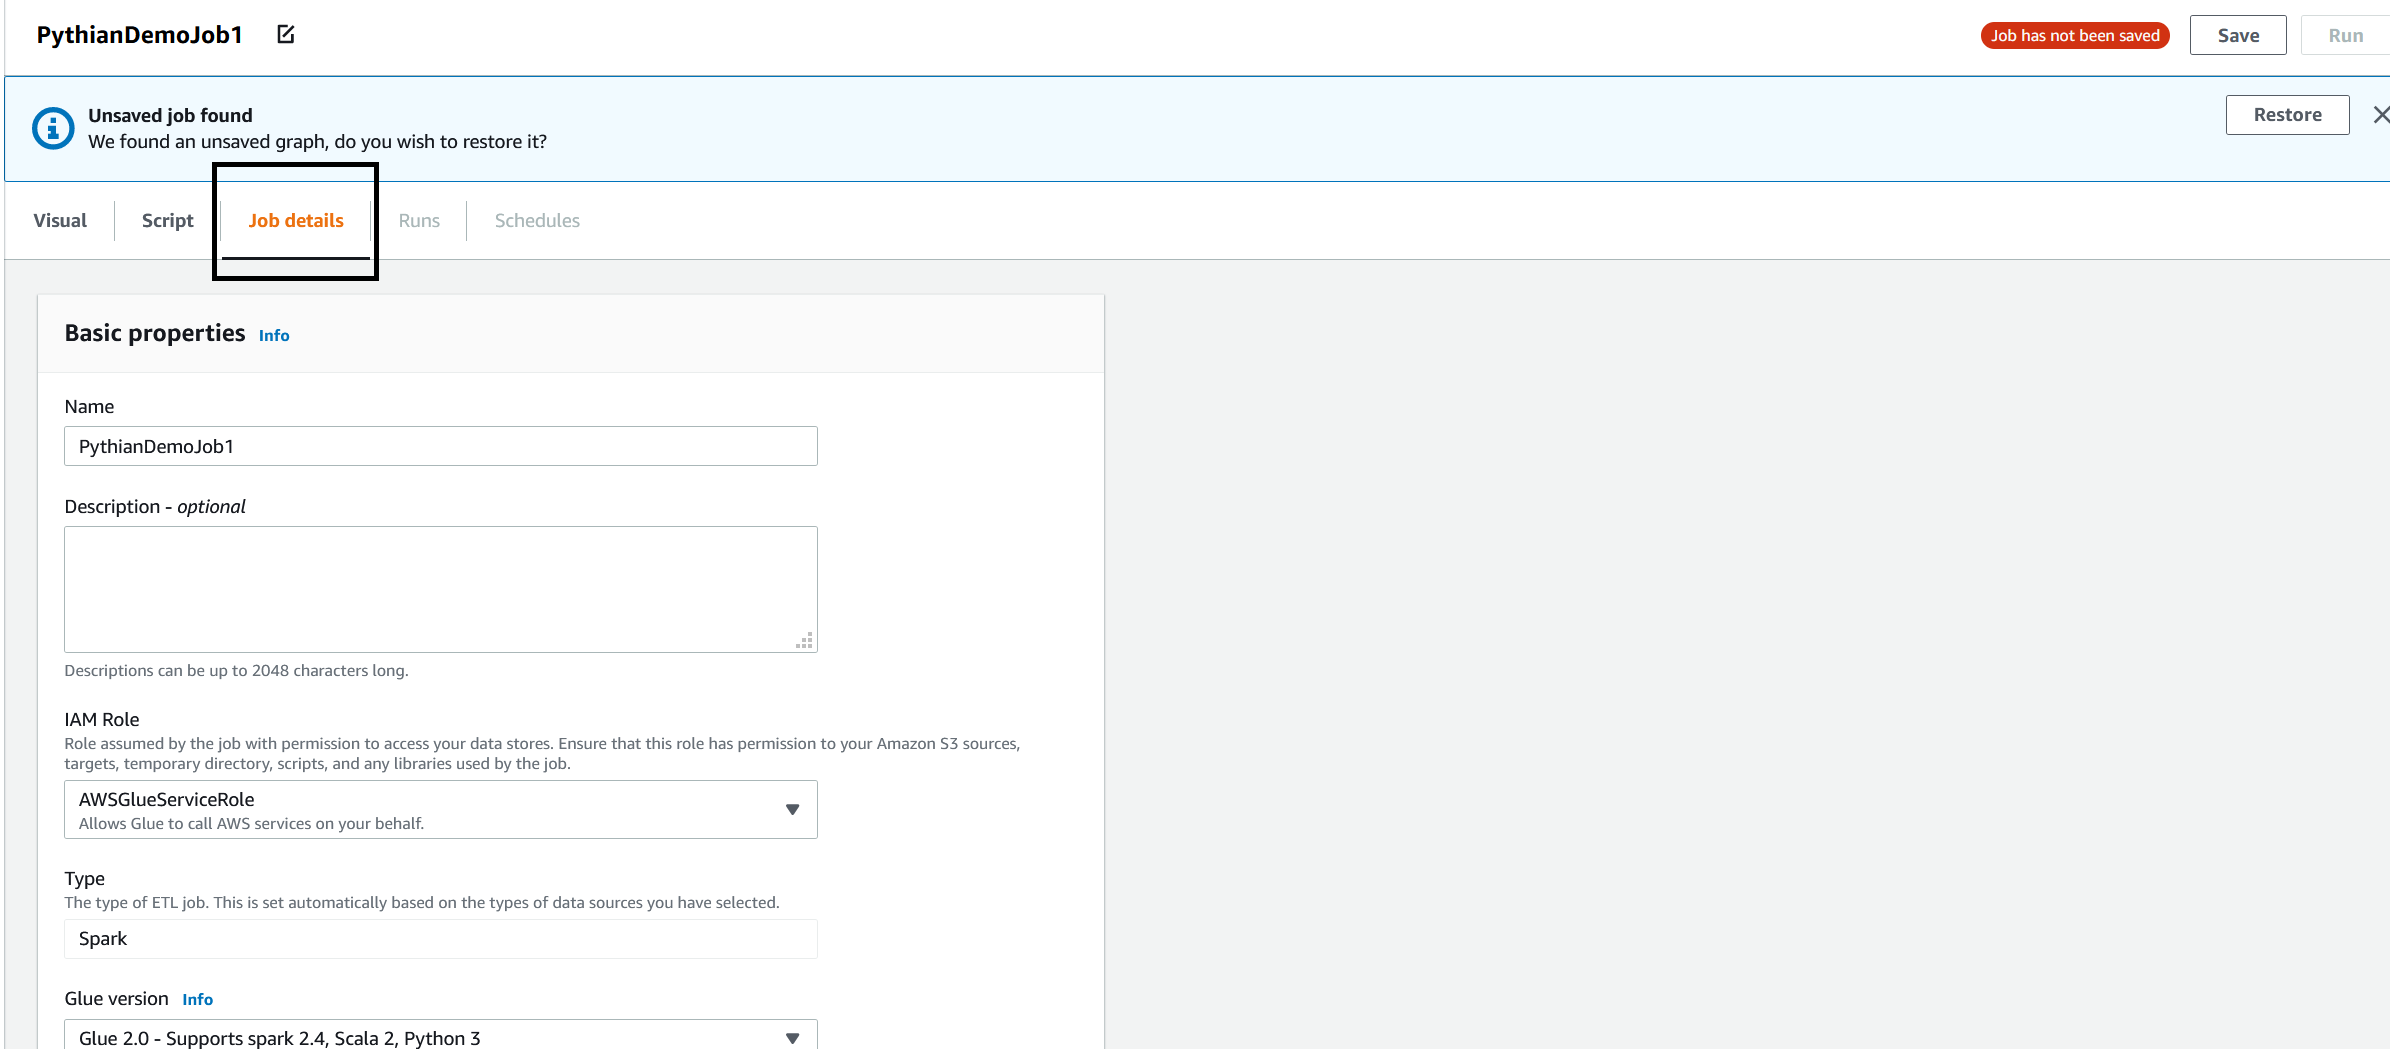
 Note that the name of the job hasn't been set yet and that the job hasn't been saved. To be able to save the job, we need to give it a name. Click on the "Job details" tab and fill up the details: "Name" and the "IAM Role." You can leave the rest of the parameters at default:
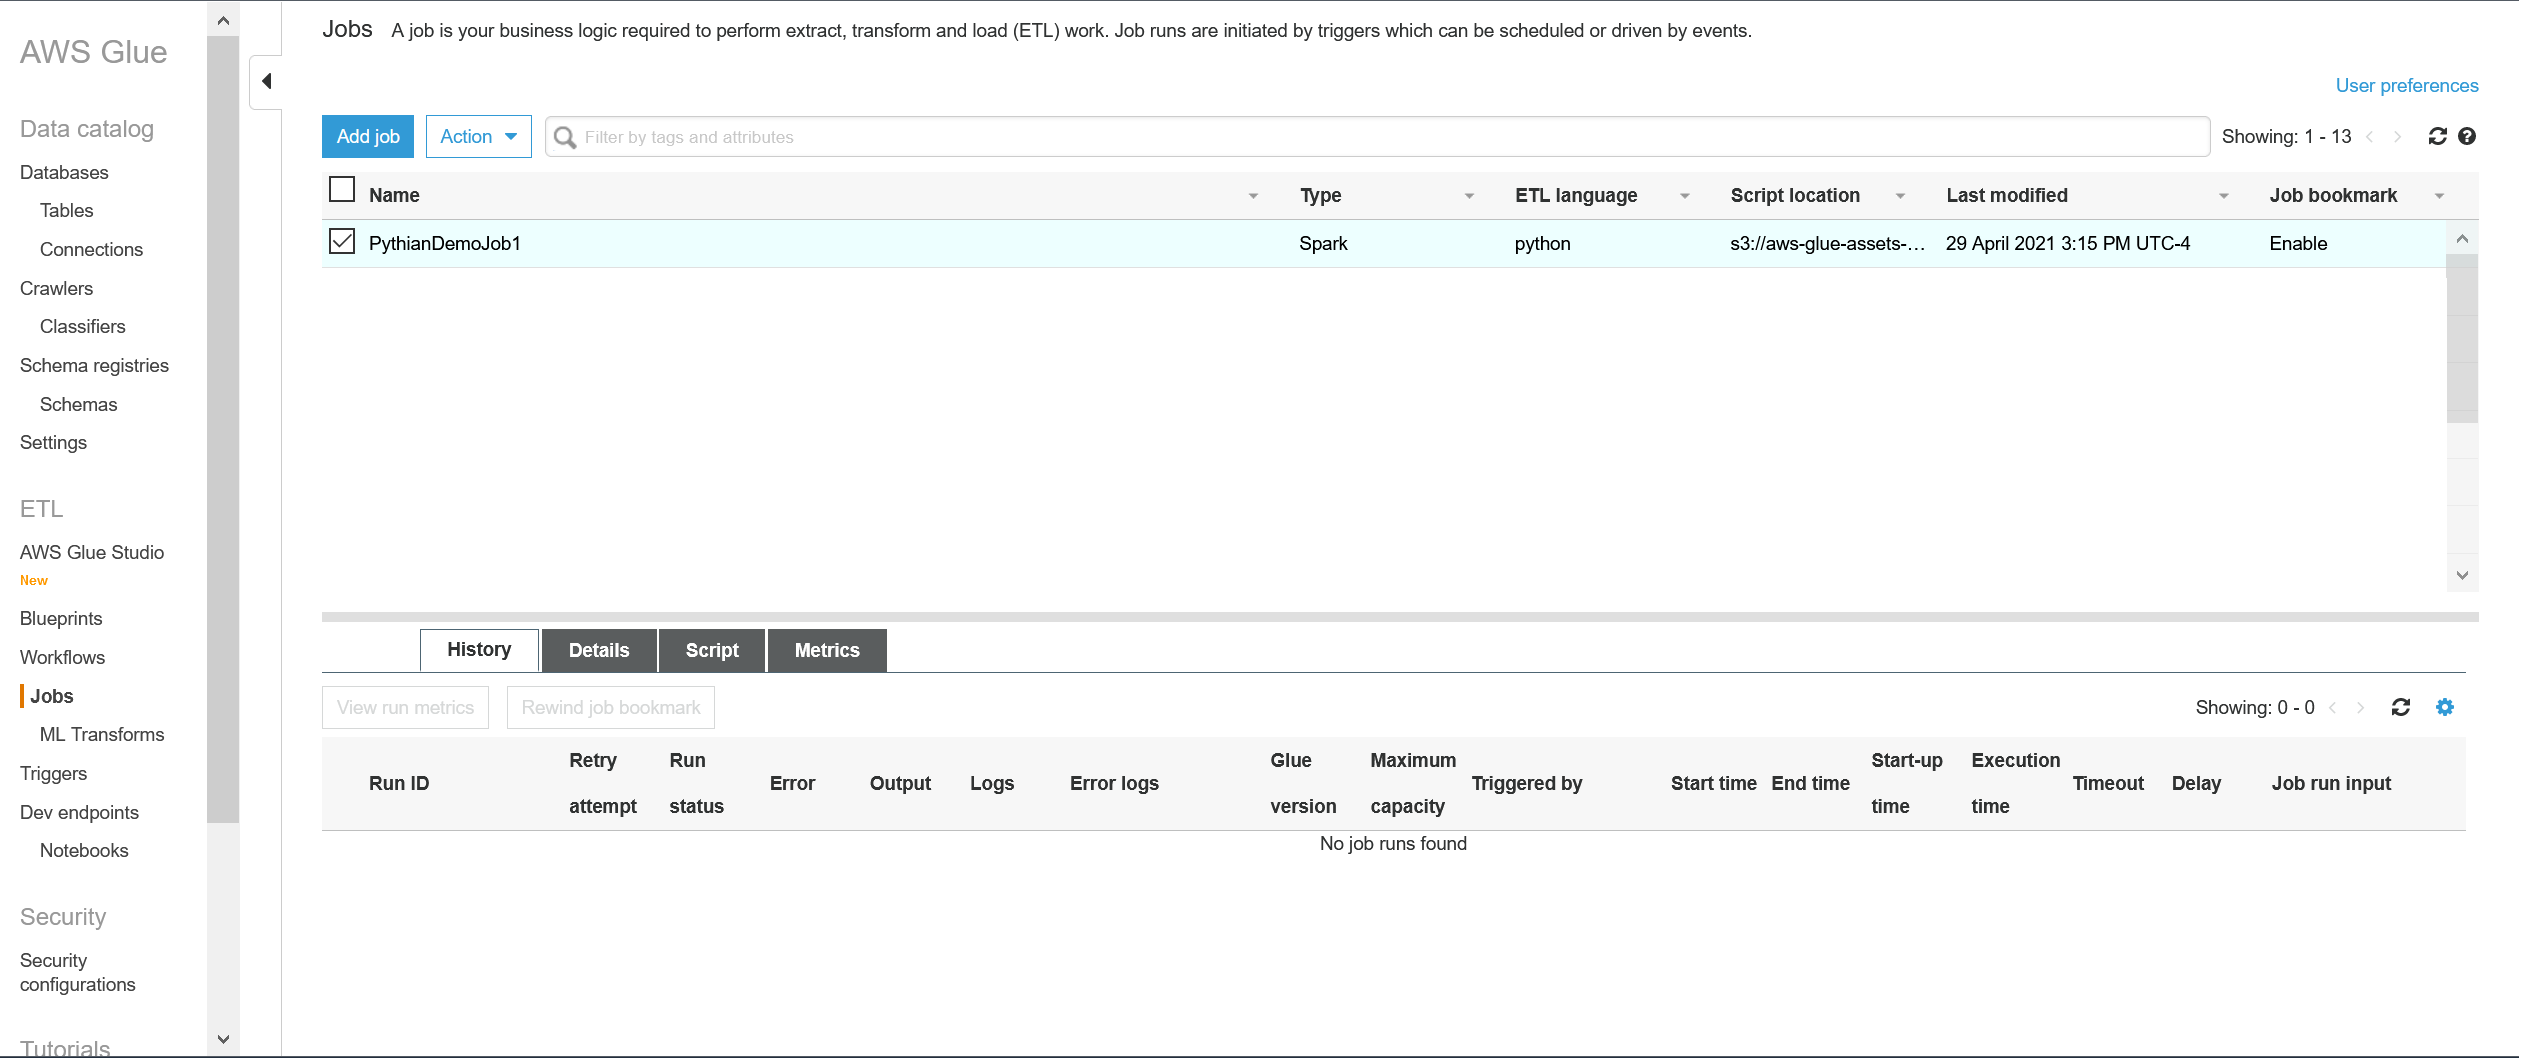
 When you click "Save" at the top right, the job will be saved. Now we need to modify the script of the job, but you won't be able to do it from here. Go back to Services --> Glue then choose "Jobs" in the left pane. You'll see our job in the list:
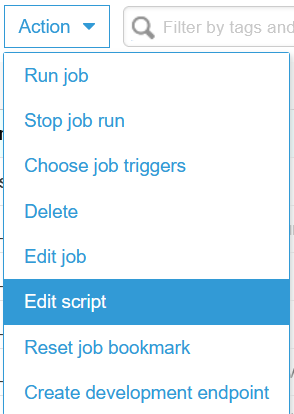
 Click on "Action" at the top left --> Edit script:
 The script will open:
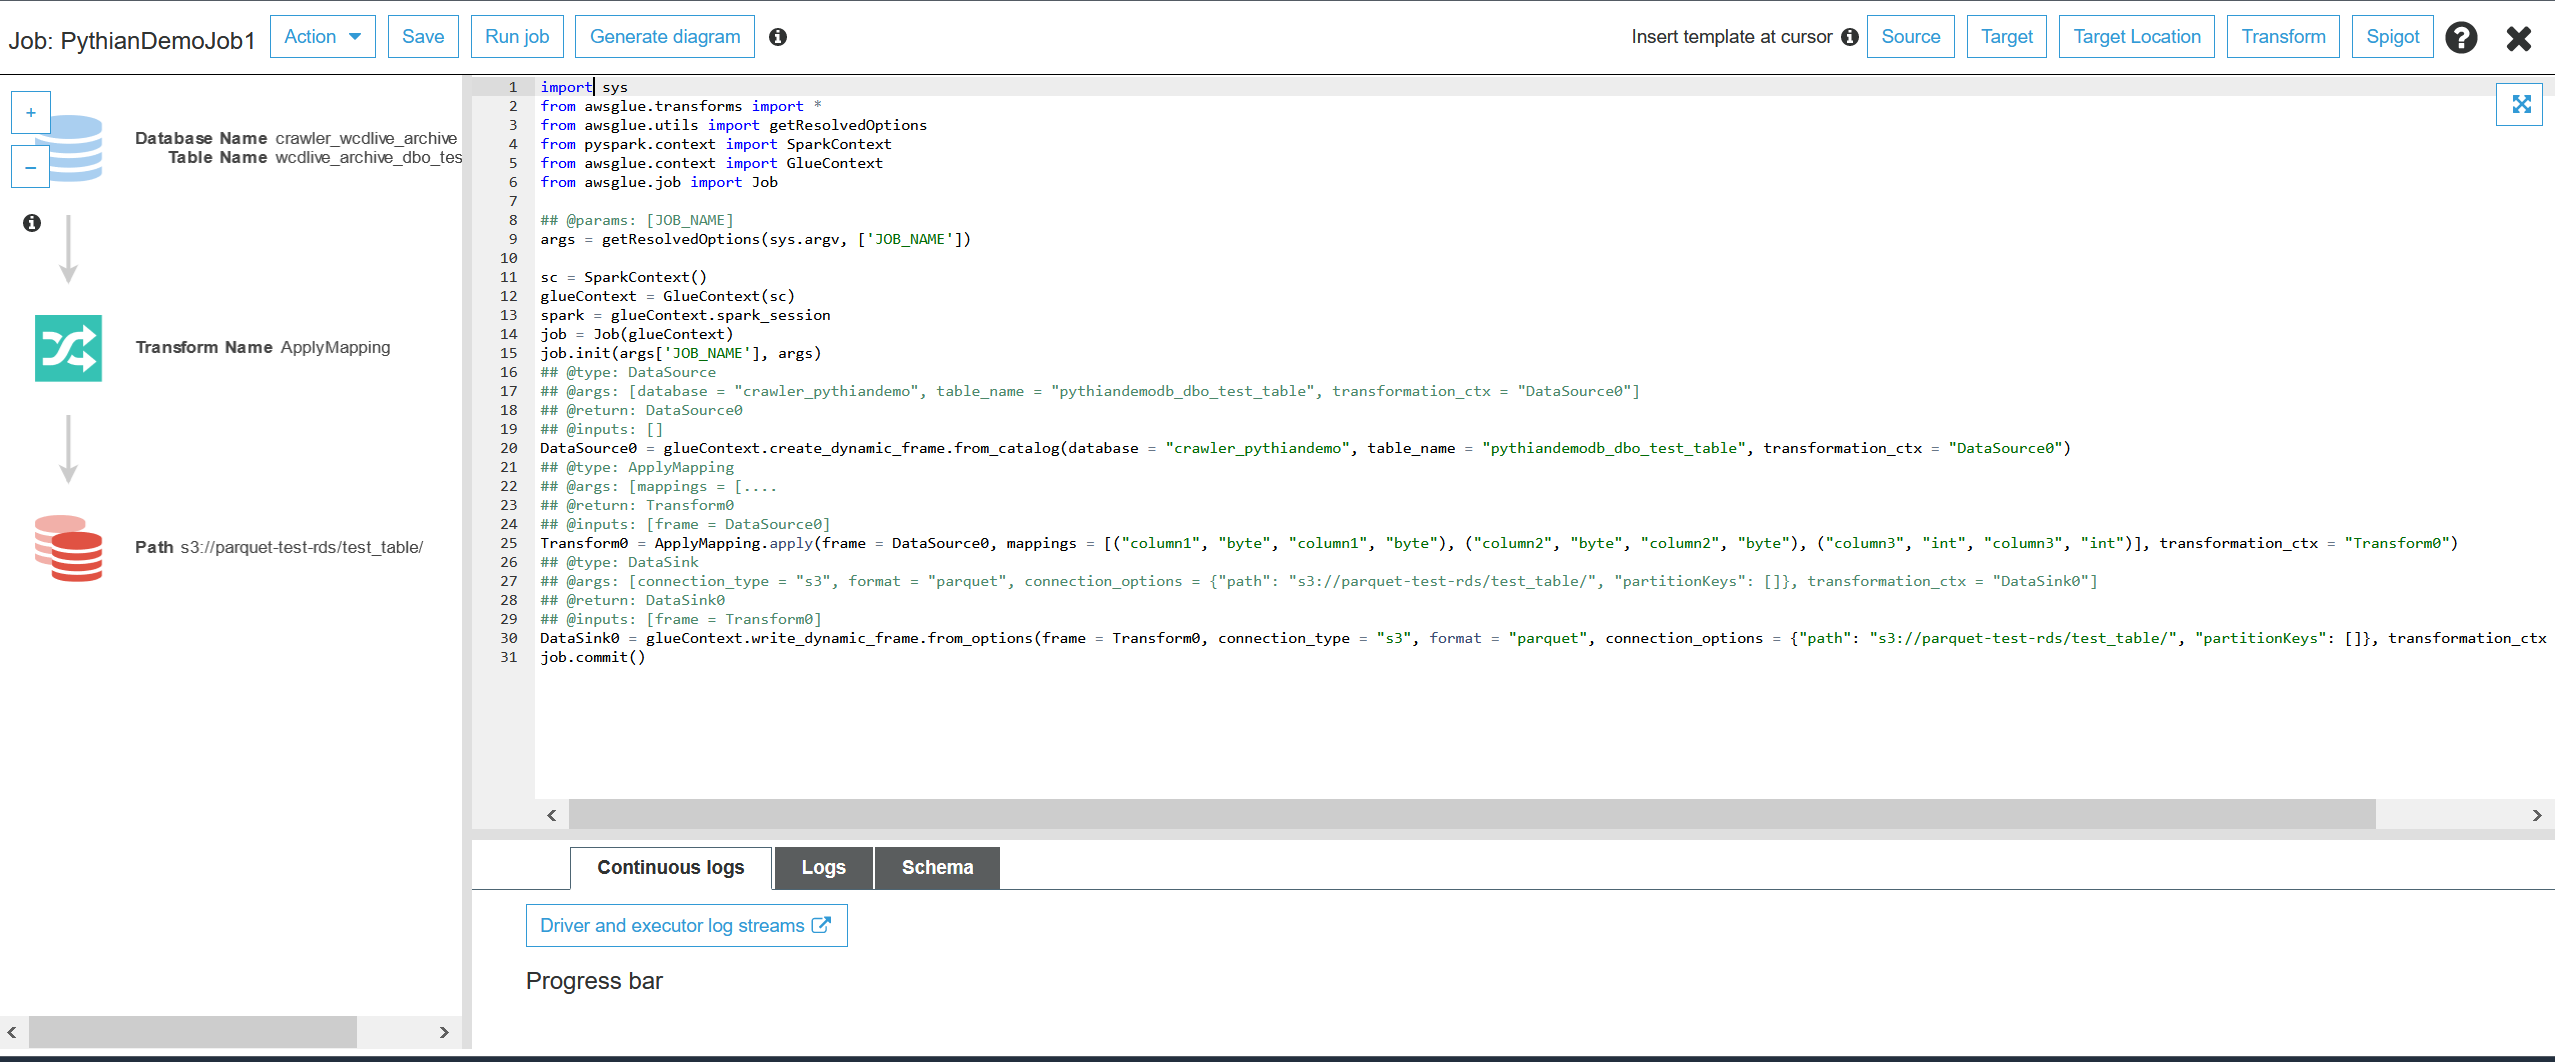 In the job's Python script, we need to modify the parts following "##&&&&&&," as per instructions in the comments (##):
- The "nameofthepartitionedcolumn" column below is the column name you'll partition the S3 files by.
- The number of rows in a partition is set to 10000000. You can modify this number as you wish.
import sys
 from awsglue.transforms import *
 from awsglue.utils import getResolvedOptions
 from pyspark.context import SparkContext
 from awsglue.context import GlueContext
 from awsglue.job import Job
 ## Add the following line:
 ####&&&&&&&&&&&&&&&&&&&&&&&&&&&&&&&&&&&&&&&&&&&&&&&&&&&&&&&&&&&&&&&&&&&&&&&&&&&&&&&&&&&&&&&&&&&&&&&&&&&&&&&&&&&&&&&&&&&&&&&&&&&&&&&&&&&&&&&&&&&&&&&&&&&&&&&&&&&&&&&&&&&&&&&&&&&&&&
 from awsglue.dynamicframe import DynamicFrame
 ####&&&&&&&&&&&&&&&&&&&&&&&&&&&&&&&&&&&&&&&&&&&&&&&&&&&&&&&&&&&&&&&&&&&&&&&&&&&&&&&&&&&&&&&&&&&&&&&&&&&&&&&&&&&&&&&&&&&&&&&&&&&&&&&&&&&&&&&&&&&&&&&&&&&&&&&&&&&&&&&&&&&&&&&&&&&&&&
 ## End of line to be added
 ## @params: [JOB_NAME]
 args = getResolvedOptions(sys.argv, ['JOB_NAME'])
 sc = SparkContext()
 glueContext = GlueContext(sc)
 spark = glueContext.spark_session
 job = Job(glueContext)
 job.init(args['JOB_NAME'], args)
 ## Add this block:
 ####&&&&&&&&&&&&&&&&&&&&&&&&&&&&&&&&&&&&&&&&&&&&&&&&&&&&&&&&&&&&&&&&&&&&&&&&&&&&&&&&&&&&&&&&&&&&&&&&&&&&&&&&&&&&&&&&&&&&&&&&&&&&&&&&&&&&&&&&&&&&&&&&&&&&&&&&&&&&&&&&&&&&&&&&&&&&&&
 MSG_FORMAT = '%(asctime)s %(levelname)s %(name)s: %(message)s'
 DATETIME_FORMAT = '%Y-%m-%d %H:%M:%S'
 logger = glueContext.get_logger()
 ####&&&&&&&&&&&&&&&&&&&&&&&&&&&&&&&&&&&&&&&&&&&&&&&&&&&&&&&&&&&&&&&&&&&&&&&&&&&&&&&&&&&&&&&&&&&&&&&&&&&&&&&&&&&&&&&&&&&&&&&&&&&&&&&&&&&&&&&&&&&&&&&&&&&&&&&&&&&&&&&&&&&&&&&&&&&&&&
 ## Block to be added
 ####&&&&&&&&&&&&&&&&&&&&&&&&&&&&&&&&&&&&&&&&&&&&&&&&&&&&&&&&&&&&&&&&&&&&&&&&&&&&&&&&&&&&&&&&&&&&&&&&&&&&&&&&&&&&&&&&&&&&&&&&&&&&&&&&&&&&&&&&&&&&&&&&&&&&&&&&&&&&&&&&&&&&&&&&&&&&&&
 ##DataSource0 = glueContext.create_dynamic_frame.from_catalog(database = "crawler_pythiandemo", table_name = "pythiandemodb_dbo_test_table", transformation_ctx = "DataSource0")
 ## Above line should be updated to (you need to add the partitioned column):
 DataSource0 = glueContext.create_dynamic_frame.from_catalog(database = "crawler_pythiandemo", table_name = "pythiandemodb_dbo_test_table", additional_options={"hashexpression":"nameofthepartitionedcolumn","hashpartitions":"10"},
 transformation_ctx = "DataSource0")
 ####&&&&&&&&&&&&&&&&&&&&&&&&&&&&&&&&&&&&&&&&&&&&&&&&&&&&&&&&&&&&&&&&&&&&&&&&&&&&&&&&&&&&&&&&&&&&&&&&&&&&&&&&&&&&&&&&&&&&&&&&&&&&&&&&&&&&&&&&&&&&&&&&&&&&&&&&&&&&&&&&&&&&&&&&&&&&&&
 ## Don't change the following line !!!!!!!!
 ##################################################################################################################################################################################
 Transform0 = ApplyMapping.apply(frame = DataSource0, mappings = [("column1", "byte", "column1", "byte"), ("column2", "byte", "column2", "byte"), ("nameofthepartitionedcolumn", "int", "nameofthepartitionedcolumn", "int")], transformation_ctx = "Transform0")
 ## Add the following block:
 ####&&&&&&&&&&&&&&&&&&&&&&&&&&&&&&&&&&&&&&&&&&&&&&&&&&&&&&&&&&&&&&&&&&&&&&&&&&&&&&&&&&&&&&&&&&&&&&&&&&&&&&&&&&&&&&&&&&&&&&&&&&&&&&&&&&&&&&&&&&&&&&&&&&&&&&&&&&&&&&&&&&&&&&&&&&&&&&
 Transform0.toDF().createOrReplaceTempView("Transform0")
 Transform0 = spark.sql("select *, round(nameofthepartitionedcolumn/10000000) as partition_key from Transform0")
 Transform0_dc = DynamicFrame.fromDF(Transform0, glueContext, "nested")
 ####&&&&&&&&&&&&&&&&&&&&&&&&&&&&&&&&&&&&&&&&&&&&&&&&&&&&&&&&&&&&&&&&&&&&&&&&&&&&&&&&&&&&&&&&&&&&&&&&&&&&&&&&&&&&&&&&&&&&&&&&&&&&&&&&&&&&&&&&&&&&&&&&&&&&&&&&&&&&&&&&&&&&&&&&&&&&&&
 ## Add the partitioned key from above to the following line (partition_key --> "partitionKeys": ["partition_key"]):
 ####&&&&&&&&&&&&&&&&&&&&&&&&&&&&&&&&&&&&&&&&&&&&&&&&&&&&&&&&&&&&&&&&&&&&&&&&&&&&&&&&&&&&&&&&&&&&&&&&&&&&&&&&&&&&&&&&&&&&&&&&&&&&&&&&&&&&&&&&&&&&&&&&&&&&&&&&&&&&&&&&&&&&&&&&&&&&&&
 ##DataSink0 = glueContext.write_dynamic_frame.from_options(frame = Transform0, connection_type = "s3", format = "parquet", connection_options = {"path": "s3://parquet-test-rds/test_table/", "partitionKeys": []}, transformation_ctx = "DataSink0")
 DataSink0 = glueContext.write_dynamic_frame.from_options(frame = Transform0, connection_type = "s3", format = "parquet", connection_options = {"path": "s3://parquet-test-rds/test_table/", "partitionKeys": ["partition_key"]}, transformation_ctx = "DataSink0")
 ####&&&&&&&&&&&&&&&&&&&&&&&&&&&&&&&&&&&&&&&&&&&&&&&&&&&&&&&&&&&&&&&&&&&&&&&&&&&&&&&&&&&&&&&&&&&&&&&&&&&&&&&&&&&&&&&&&&&&&&&&&&&&&&&&&&&&&&&&&&&&&&&&&&&&&&&&&&&&&&&&&&&&&&&&&&&&&&
 job.commit()
Once you've made and verified the above changes, save the job and you can run it from here. Although this will show you the progress of the job and potential errors, the best place to monitor the jobs is from: Glue --> jobs --> Choose the job --> and you'll see the status below with "Error logs" "Output" and "Logs." You can click on those links and review the status. Example:
 You may want to look for errors ("INFO" and "Warning" are OK).
6. Create and run a crawler that will map an existing S3 folder to a Glue table
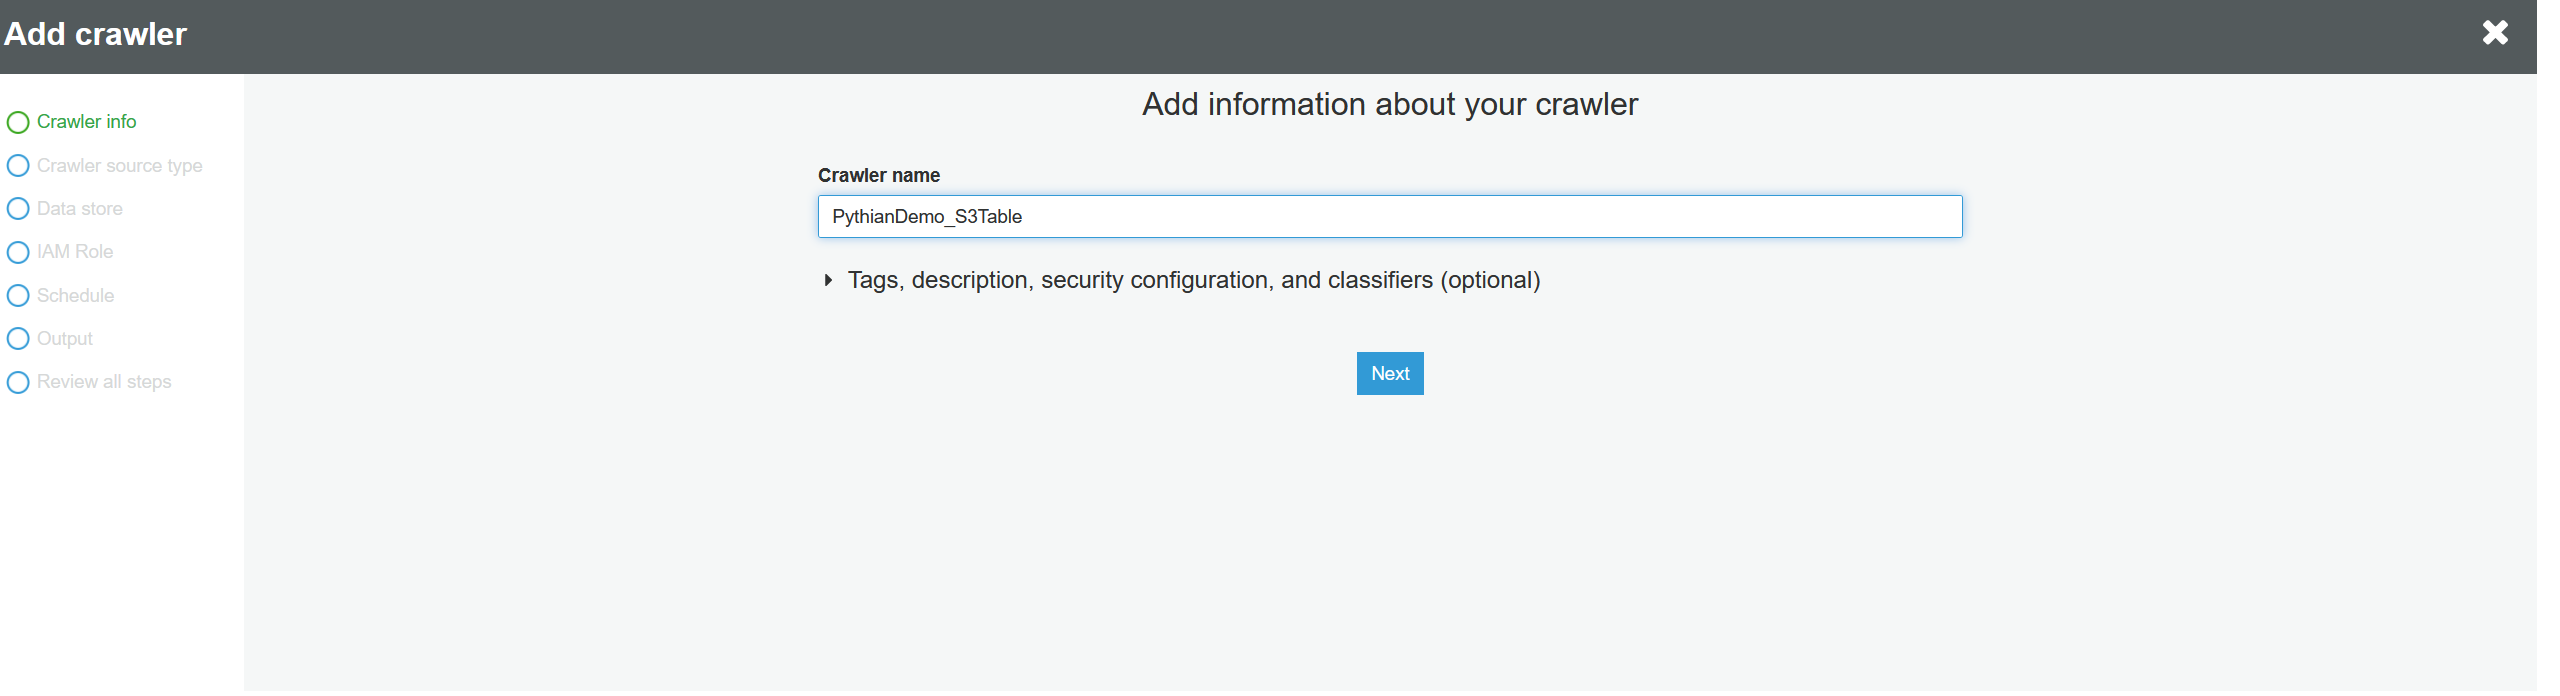
We're back to creating a crawler, but this time for the S3 bucket mapping table. It will create the Glue table pointing to the S3 bucket with the data of that table. You should only run this crawler once the job has fully created the S3 Parquet files (in other words, once the job has completed successfully). Back to Glue and Tables: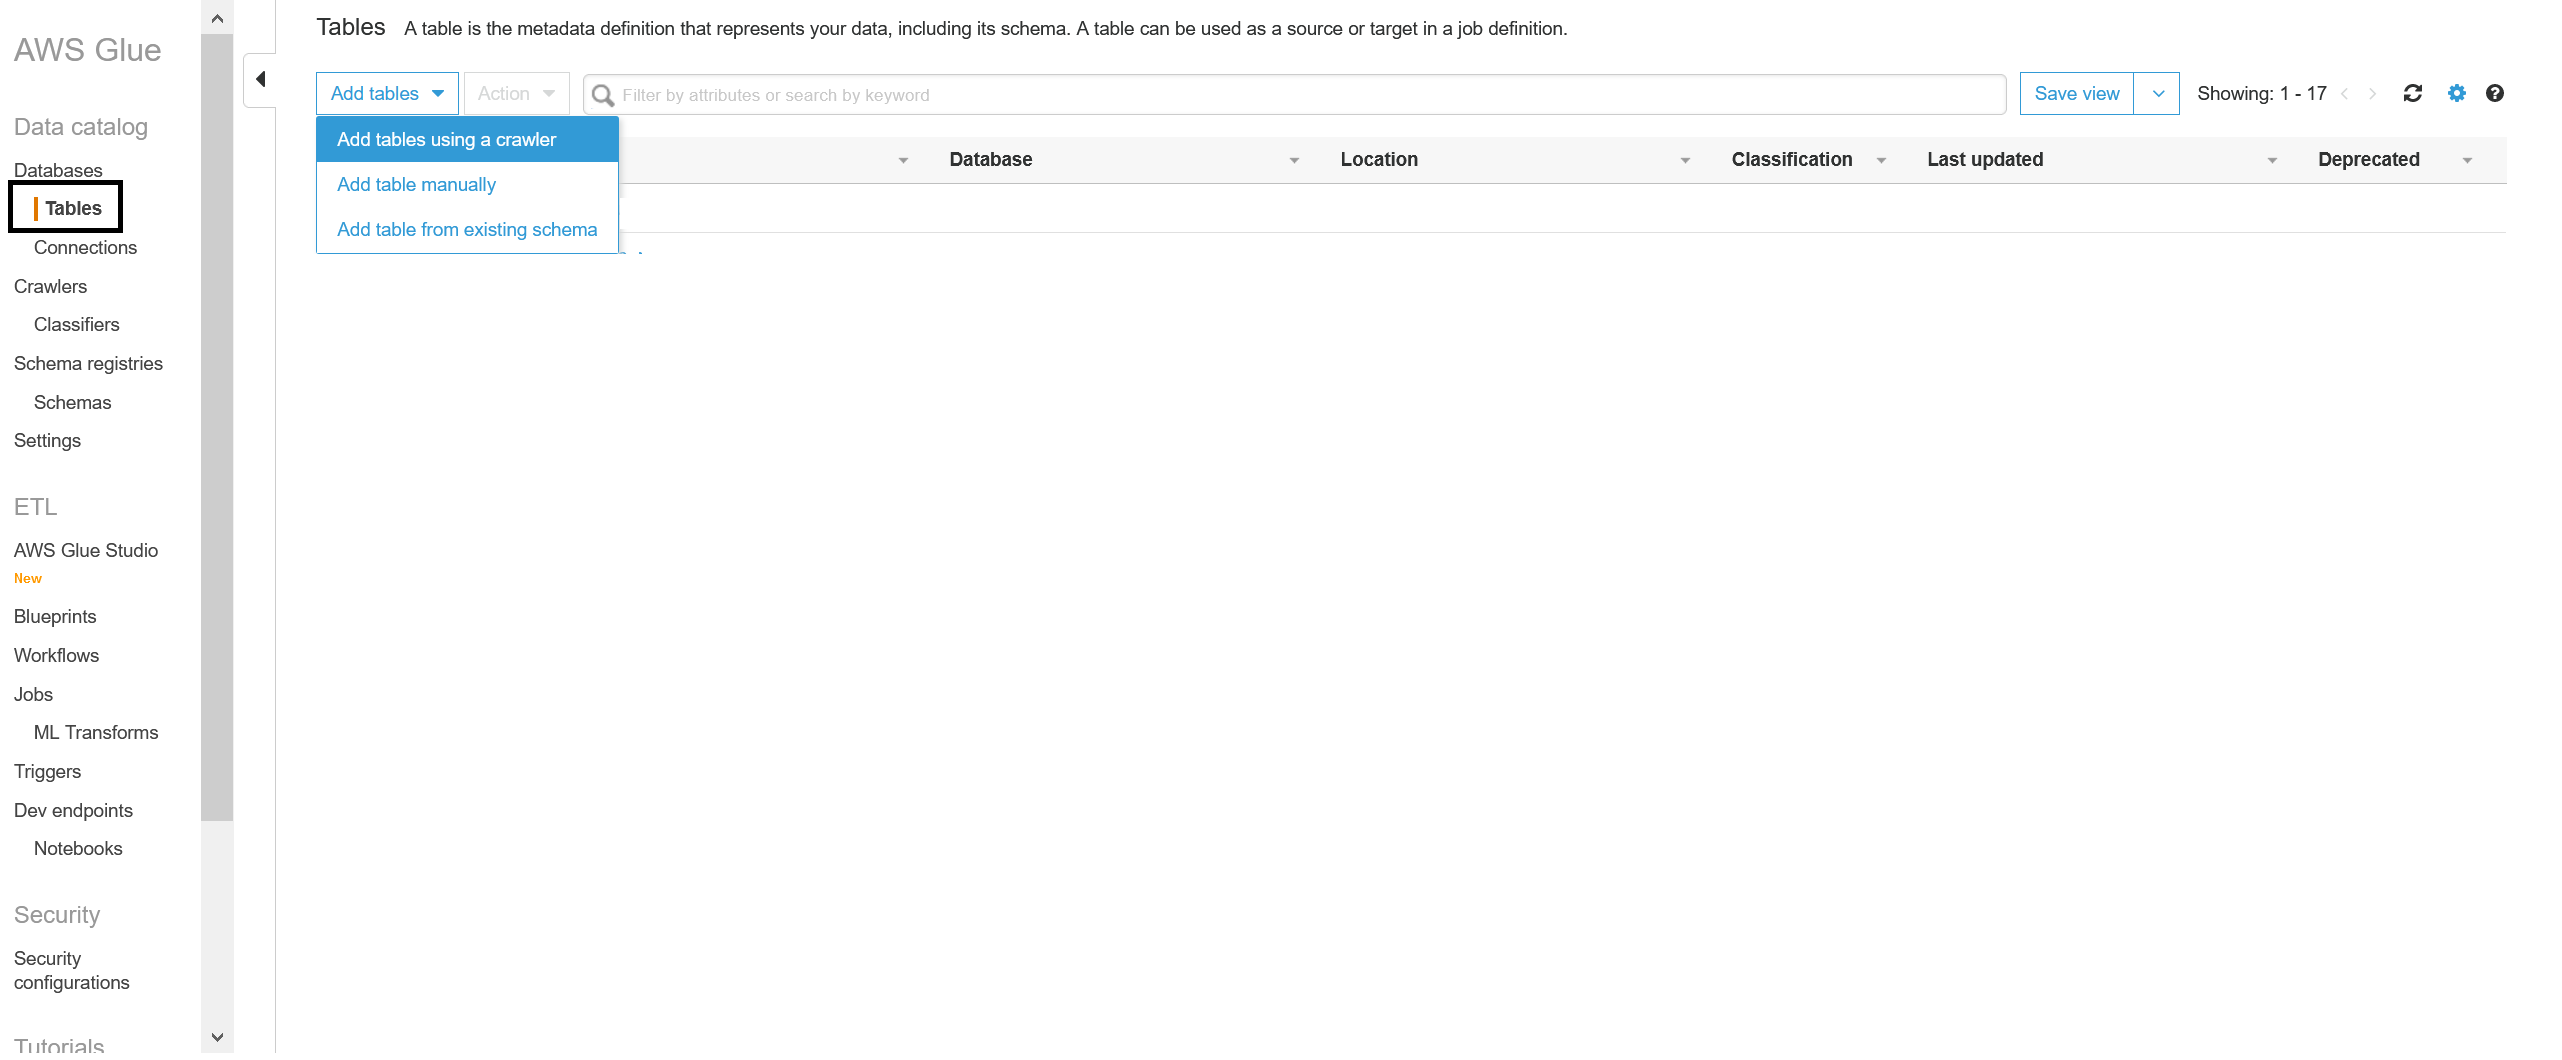 Give the crawler a name:
 Leave the next screen at default and click "Next":
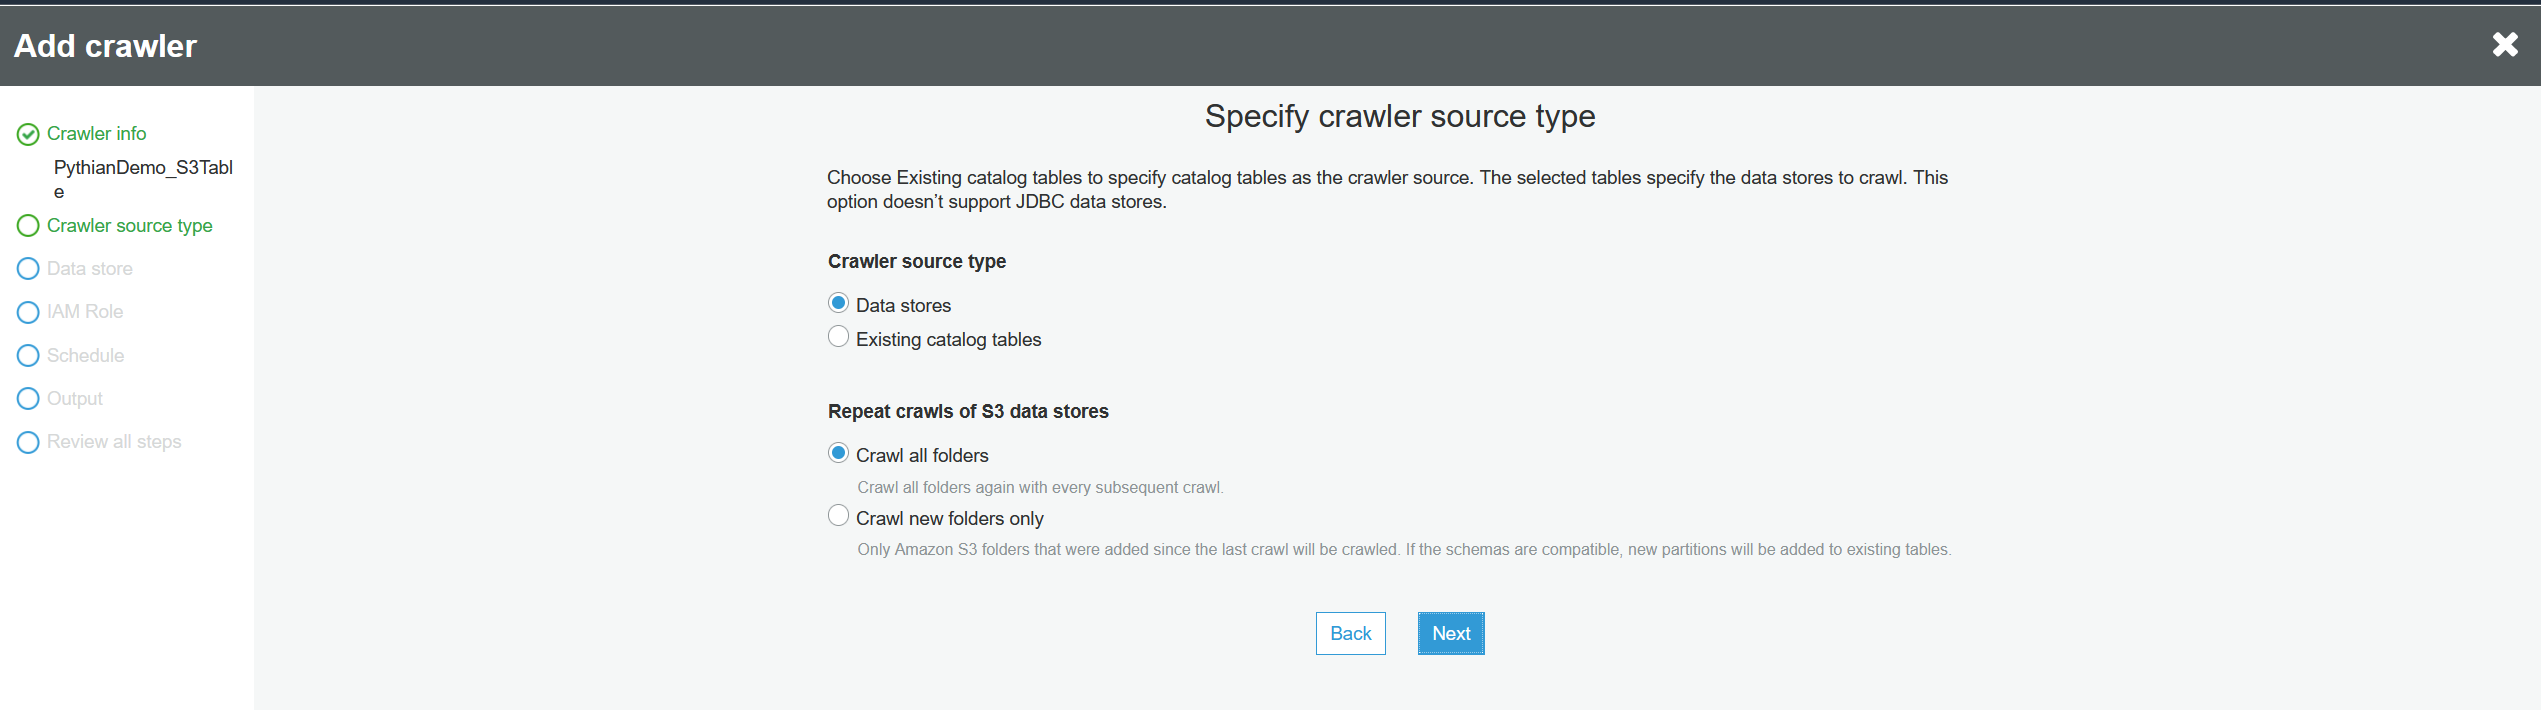 Choose "S3" and fill in the details. Do
not select a connection (it didn't work for us when we chose one):
Choose "S3" and fill in the details. Do
not select a connection (it didn't work for us when we chose one):
 We don't need to add another data store, so click "Next":
 Choose the IAM role:
 Select run on demand:
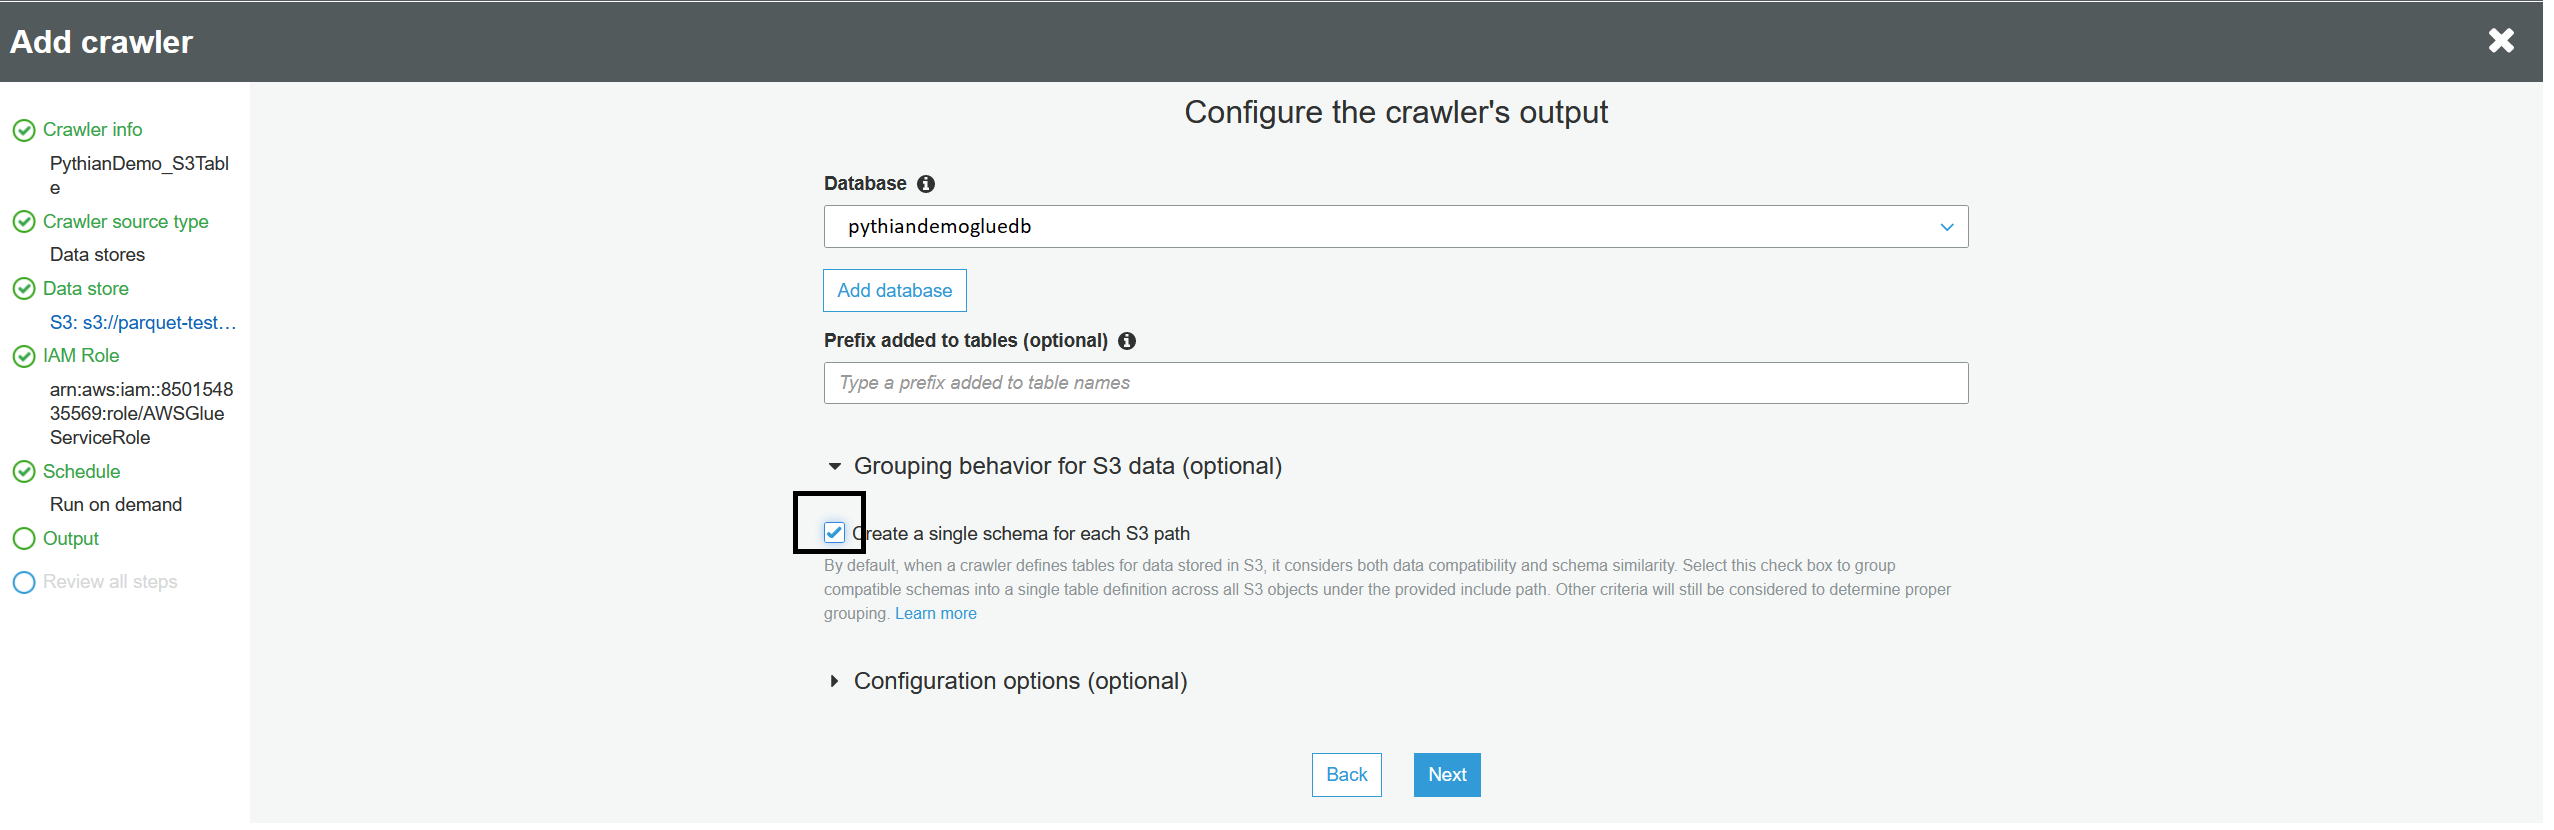
 Choose the Glue database, but this time choose "Create a single schema for each S3 path," otherwise Glue will create a table per partition or per file:
 Verify all the information and click "Finish." Now that you've created the crawler, choose it and run it. Once the crawler has completed, verify that the new table is in the list of tables (i.e.: "test_table") and it will show that this table is pointing to S3 data. If you want to call the table something else, you can add a table prefix when you're creating the crawler (otherwise the table name will be the name of the folder).
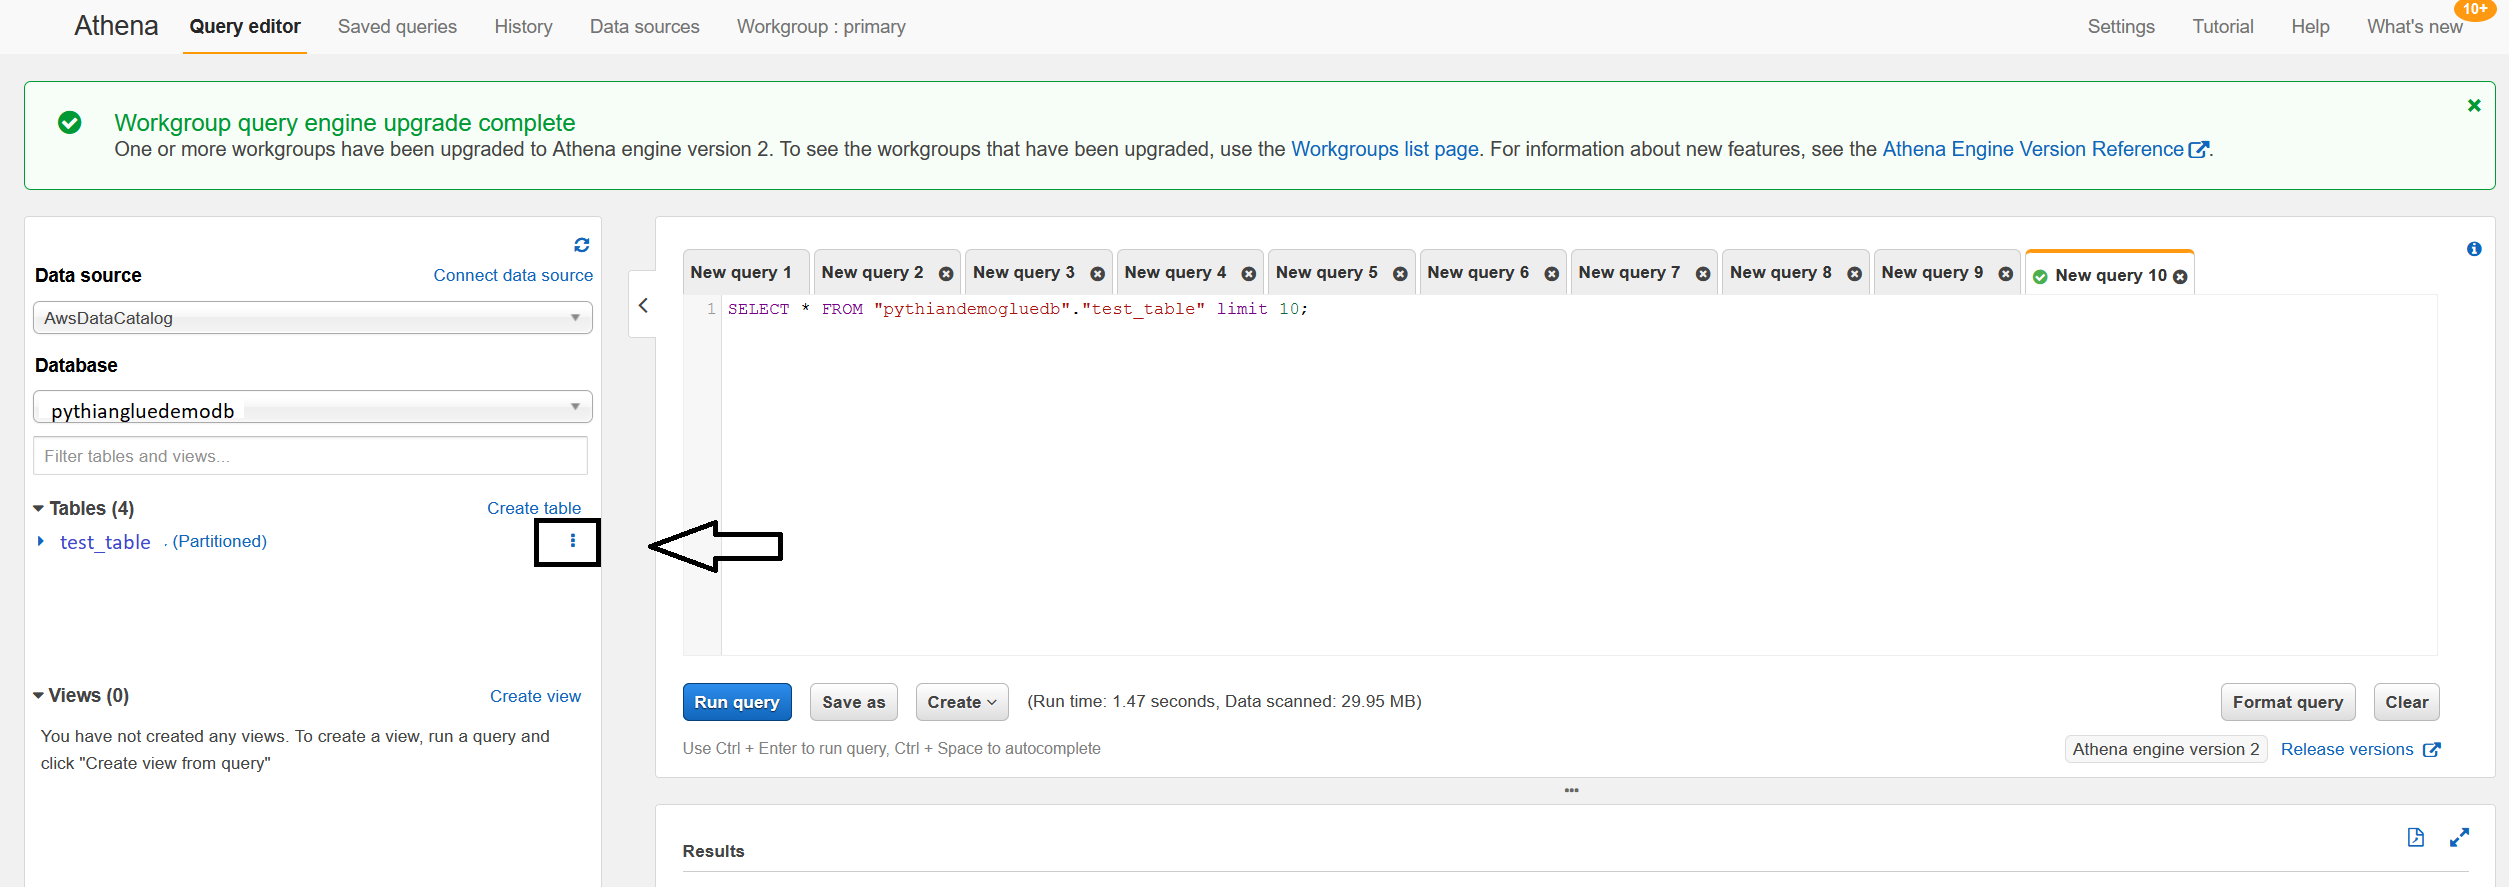
7. Query the above Glue table from Athena, using SQL
This part is exciting! Go to Services Menu --> Analytics --> Athena: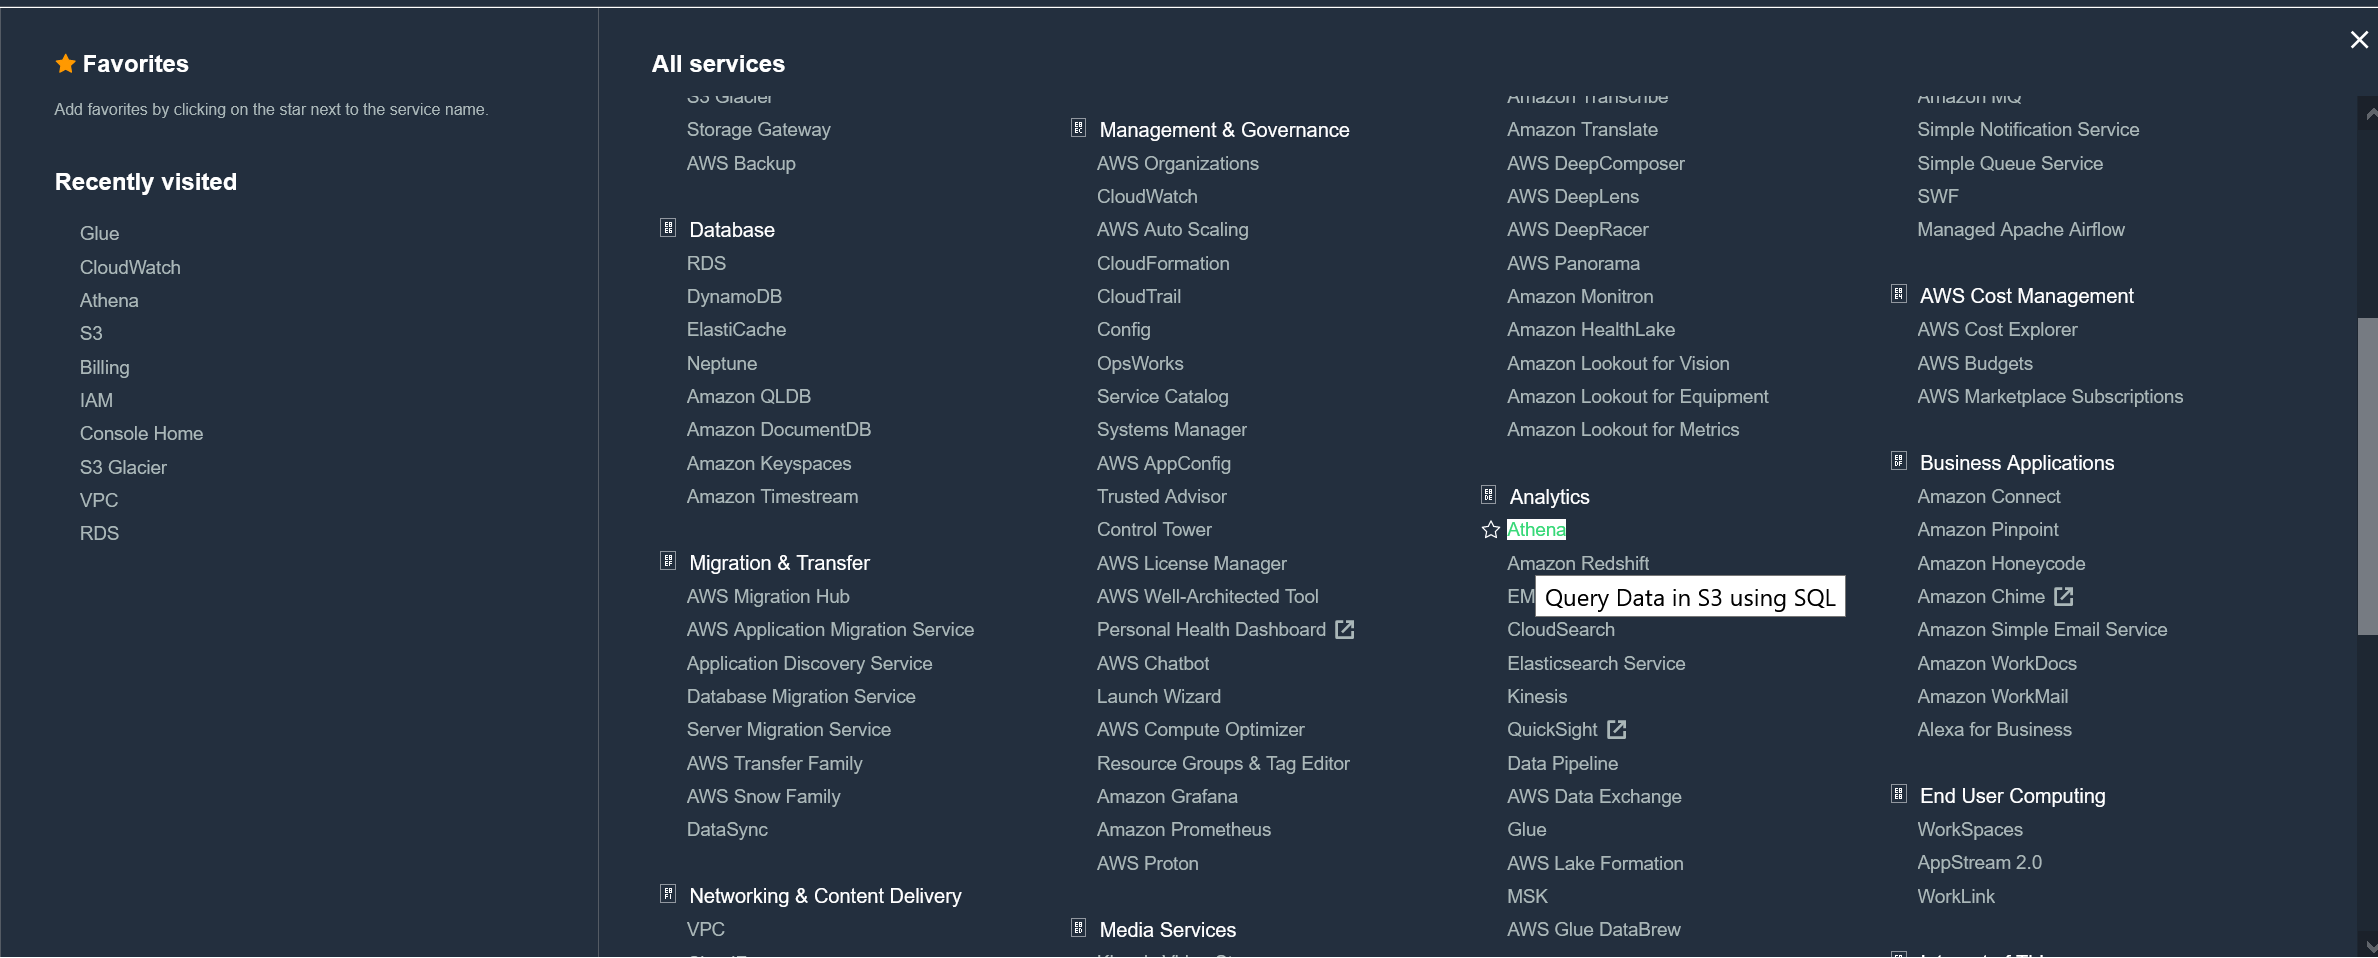 On the left, you'll see the list of S3 tables when you choose the database. You can either write queries manually or you can click on the three dots at the right of the table:
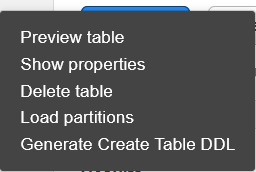
 If you click on the three dots, the following menu will open for you:
 The "Preview table" will open the default query above. You can play with the syntax and check your data. You'll notice that the data retrieval is SUPER fast even when adding WHERE clauses that don't include the partitioned column!
Conclusion
Now that you've verified you have all the data in S3, you can delete this data from the source database and save costs. With Athena you'll only pay for usage, so if you don't need to query the S3 buckets frequently, you pay a lot less and it's almost entirely for storage, which is cheap compared to a database! If you need to use the data for analytics and reporting, you can use the cloud modern toolOn this page
Share this
Share this
Oracle database upgrade on RDS AWS and SPM baselines
![]()
Oracle database upgrade on RDS AWS and SPM baselines
Dec 5, 2017 12:00:00 AM
9
min read
Migration and Upgrade from EC2 to RDS Using DBMS_FILE_TRANSFER

Migration and Upgrade from EC2 to RDS Using DBMS_FILE_TRANSFER
Sep 13, 2021 12:00:00 AM
3
min read
ORA-30926 while using impdp over a database link
![]()
ORA-30926 while using impdp over a database link
Feb 3, 2017 12:00:00 AM
3
min read