 Background
In November 2023, Oracle surprised many by finally releasing their Oracle Cloud Infrastructure (OCI) PostgreSQL managed database service. Although, the actual surprise really came over a year earlier, at Oracle CloudWorld 2022, when they announced that this service was in development and would be coming.
Given that Oracle already has its flagship Oracle Database and Enterprise MySQL in their portfolio, adding a PostgreSQL service is a little surprising, particularly since many see PostgreSQL as a direct competitor to Oracle Database. Regardless of their motivations, it’s now available to the general public (although availability by region varies and will expand over time).
About the New Service
The first question that many have, which is surprisingly not all that simple to answer, is: what is this new service actually called? From their main documentation page for the service, it is referred to as “OCI Database with PostgreSQL”. Within the database (as of the time of writing), it is called “OCI Optimized Postgres”:
postgres=> select version();

                version

---------------------------------------

 OCI Optimized PostgreSQL 14.9, 64-bit

(1 row)

postgres=>
Similar to some other OCI database services, Oracle uses the term “Database System” to refer to the cluster. Or “DB System” – sometimes with and sometimes without a space – for short.
Within the DB System, there are one or more “nodes”. Although only one node is read-write – known as the “primary” node. (This is similar to other PostgreSQL managed services in other clouds and is due to the fundamental nature of [non-distributed] PostgreSQL horizontal scalability.) Nodes can be created and removed at any time.
Backups, restorations, etc., all happen at the DB System level. Additional read-only nodes are for horizontal scale-out only.
Regardless of the names, there are also some initial service limits per tenancy. See: https://docs.oracle.com/en-us/iaas/Content/postgresql/overview.htm#limits for the current limits and details on how to request an increase.
Creating a PostgreSQL DB System
Creating an OCI PostgreSQL DB System is generally quite simple and intuitive from the web console. There are some nuances and considerations addressed below in this article.
Alternatively, all aspects can also be provisioned from OCI CLI. Generally, provisioning outside of the web console is recommended for consistency and automation. However, using the web console can be quick and easy and requires less setup/learning curve.
Creating a Configuration
Before creating a DB System, you will likely want to create a custom “Configuration”. The configuration includes any PostgreSQL settings/parameters you may wish to customize. The configuration can be specified at DB System creation time or can be changed later.
|
IMPORTANT At the time of writing, there is no option for adjusting the parameters within a Configuration post-creation. Instead of changing parameters, you must make a copy of the Configuration and set the new values while creating the copy. Then, switch your DB System to use the new Configuration. |
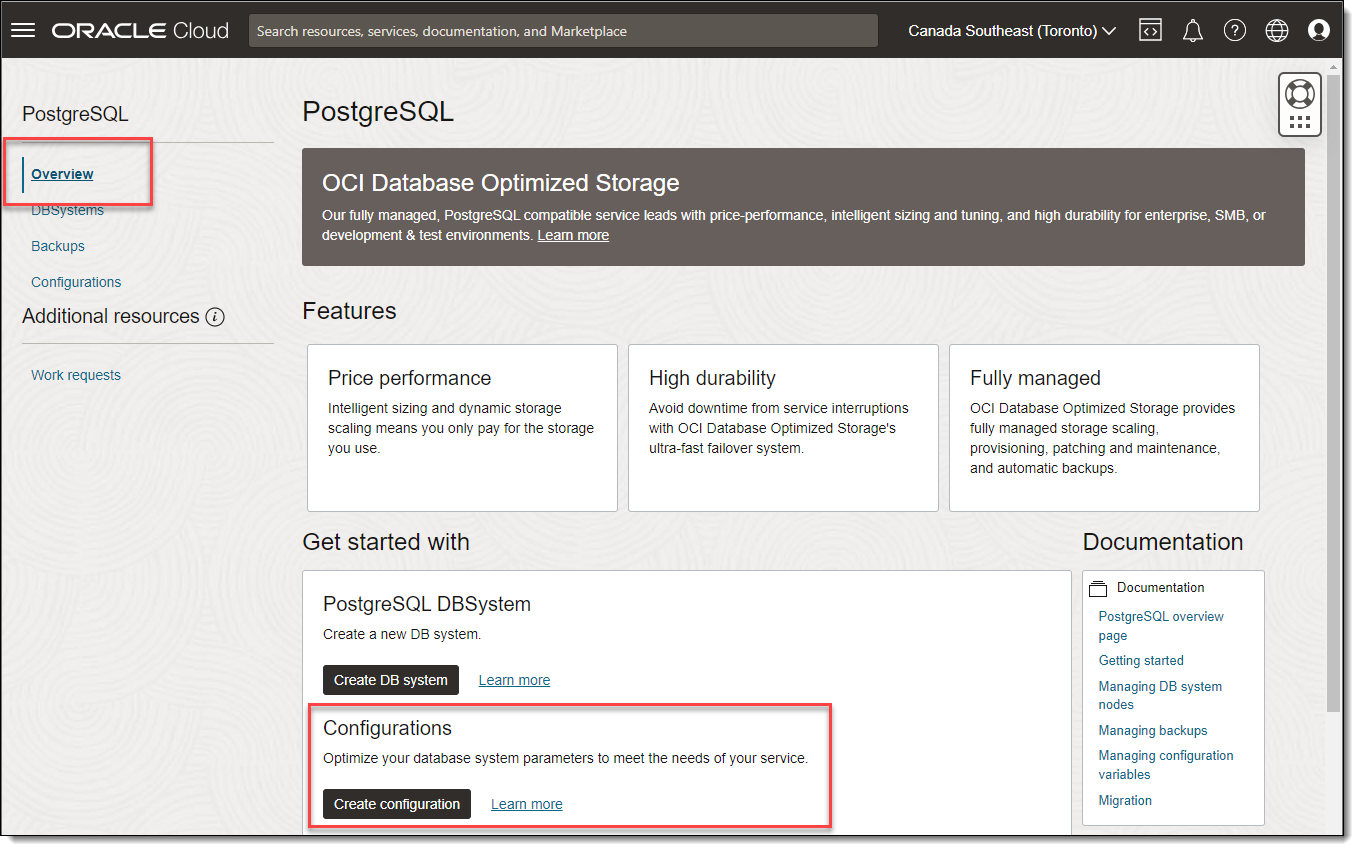
From the main PostgreSQL Database Overview page, a new configuration can be created by choosing the Configurations option, either from the menu on the left or from the button at the bottom of the Overview page:
Using the menu option on the left is recommended as it allows you to first review the default configurations already available:
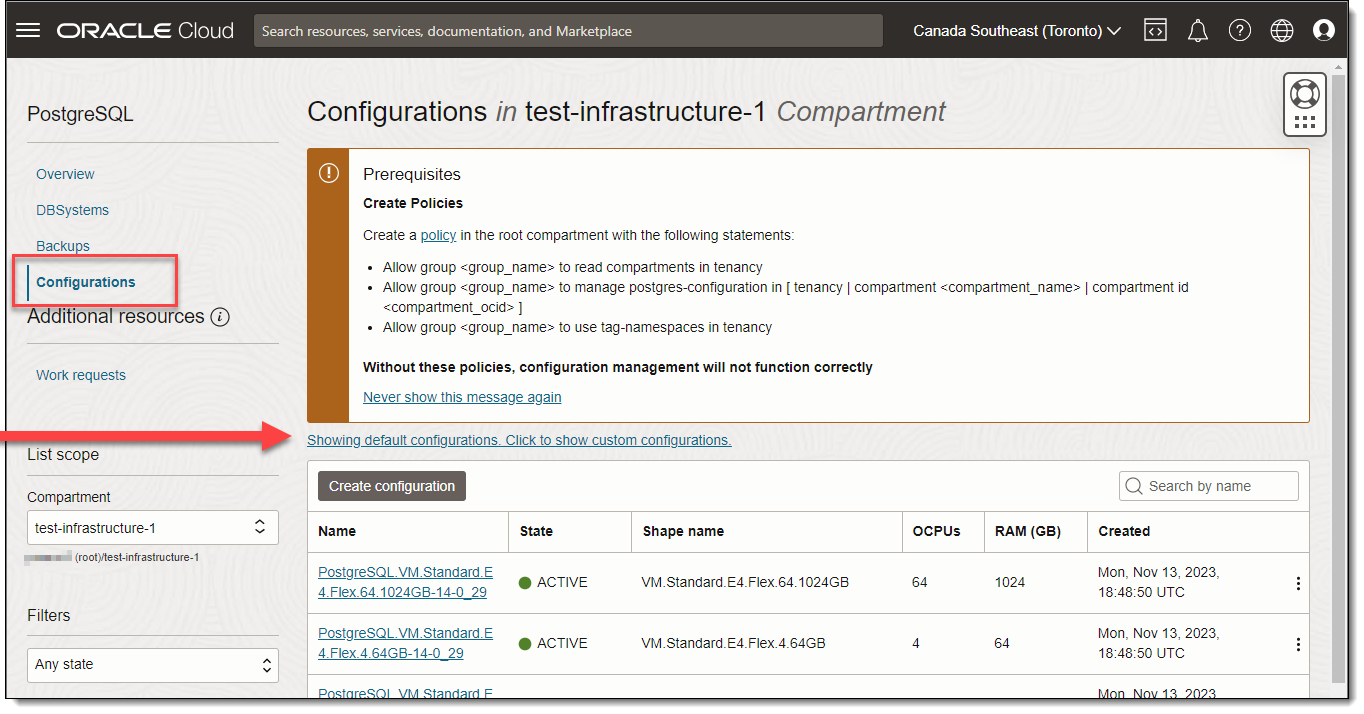
Note that the screen shows any prerequisite security policies required and you may have to click the link “Showing custom configurations. Click to show default configurations.” to see the list of default configurations. The link and message toggle between that and "Showing default configurations. Click to show custom configurations."
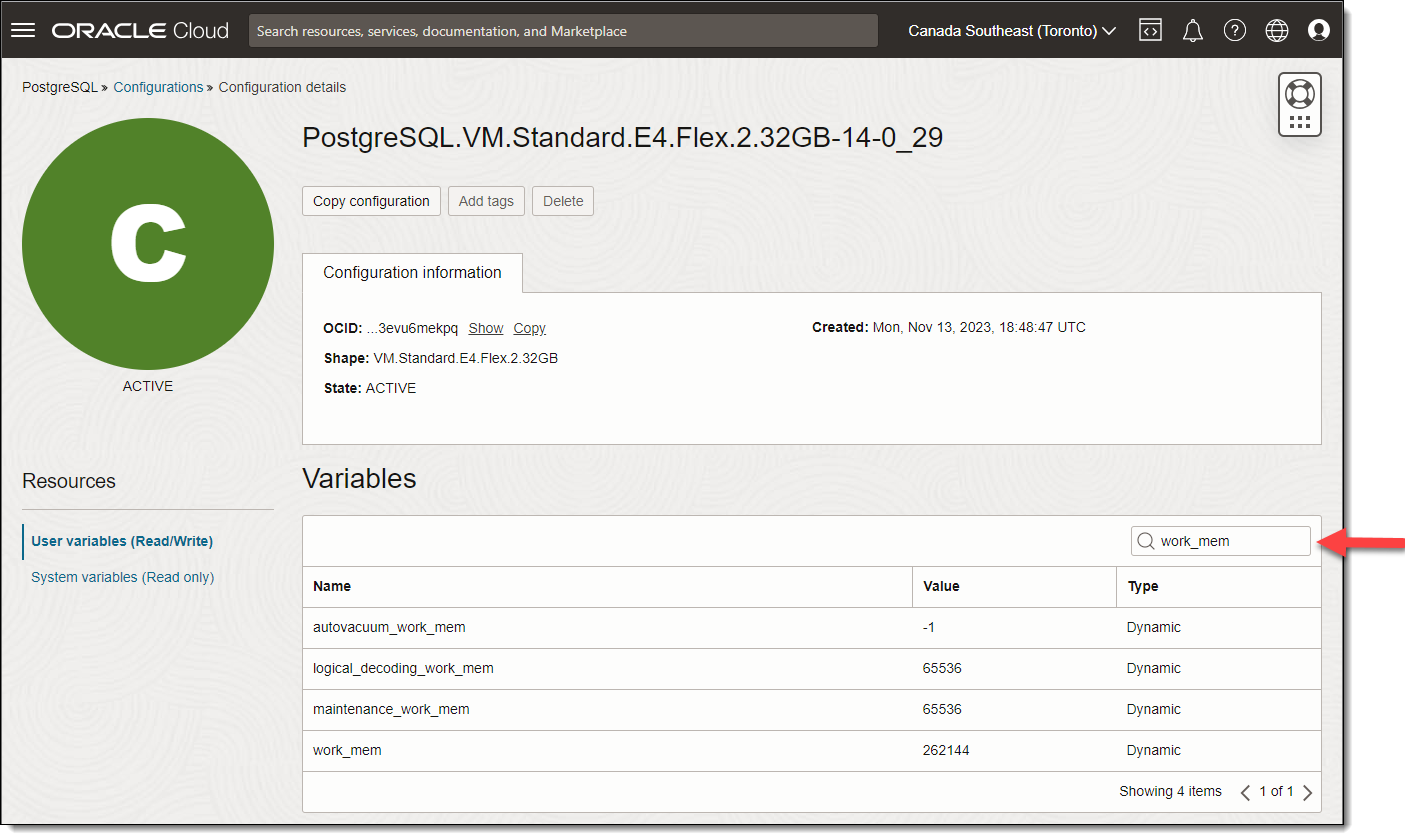
Optionally, review the default configurations to see if they meet your needs. Perhaps filtering on specific parameters of interest. For example:
Note that:
- The predefined, default configurations are not associated with (part of) your OCI Compartment.
- The default Configurations are aligned with the VM shape. As the VM shapes have varying characteristics (memory and CPU), the PostgreSQL variable values may vary accordingly.
If you would like to adjust any of these parameters - for example, increasing the work_mem parameter to 512MB, you will need to create a new, custom configuration.
Creating a new configuration as a copy of one of the default configurations or just using the Create Configuration button doesn’t make too much of a difference. The main difference is that when created as a copy, the associated VM shape value is copied. When creating a brand new, it must be selected.
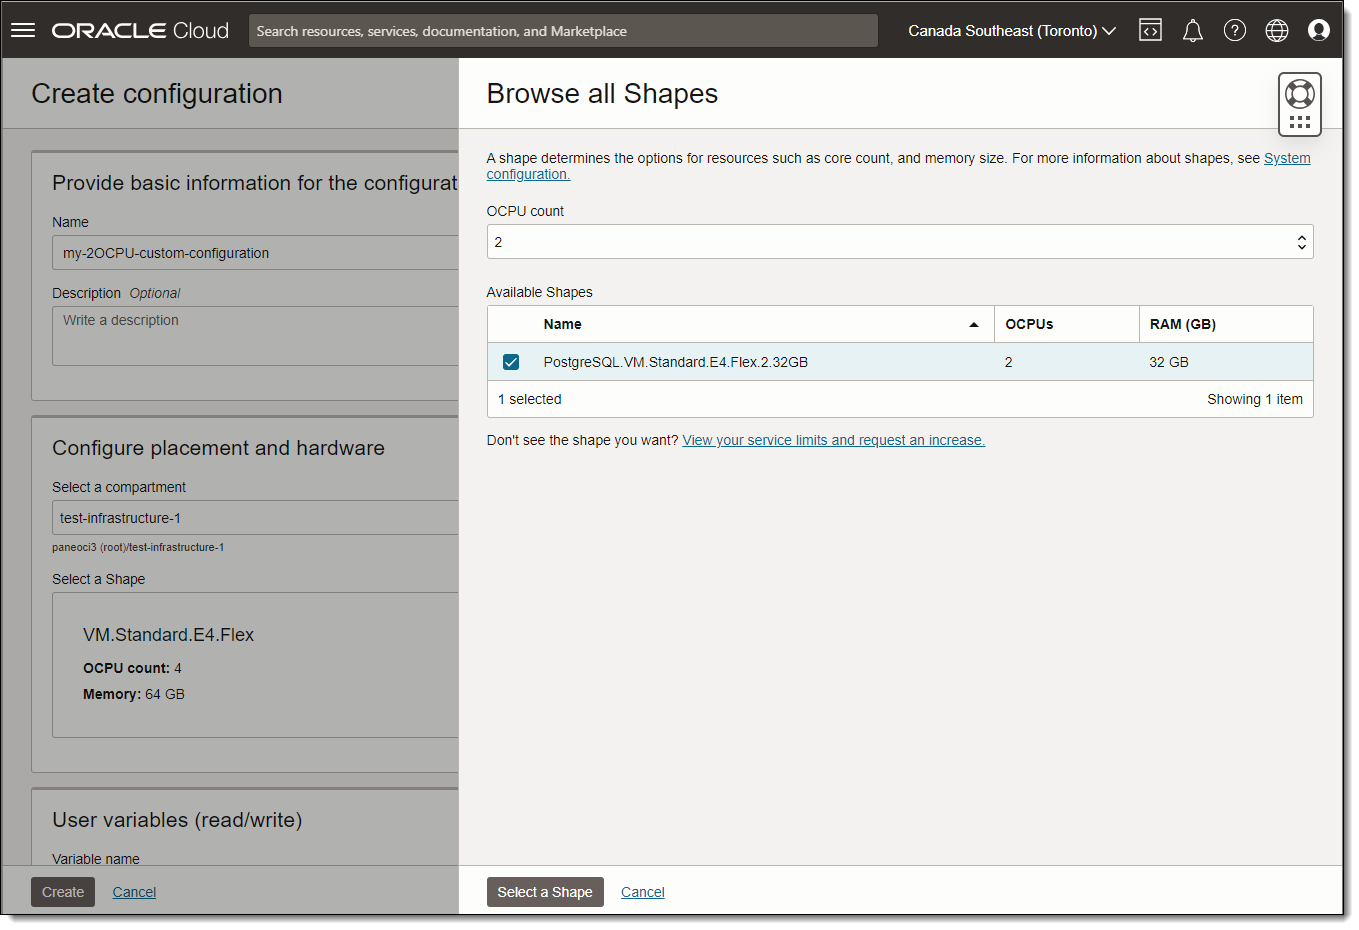
For example, creating a new configuration called “my-2OCPU-custom-configuration” requires you to select the shape based on the desired number of OCPUs:
The desired customized variables can then be specified. For example:
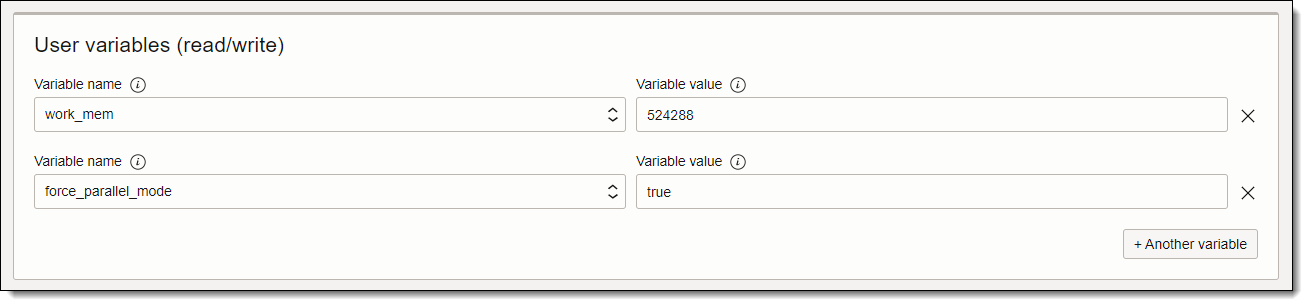
When done adding custom variables, hit the Create button at the bottom. If any of the variable values are incorrect or invalid, an error will be returned when you try to create the configuration.
Creating the DB System
Create a DB System by pressing the Create DB system button on the “Overview” page or the Create PostgreSQL DB system button on the “DB Systems” page.
On the “DB Systems” page, similar to when creating the Configuration, Creating a DB System shows the required security policies in case you need to provision as a non-administrator user:

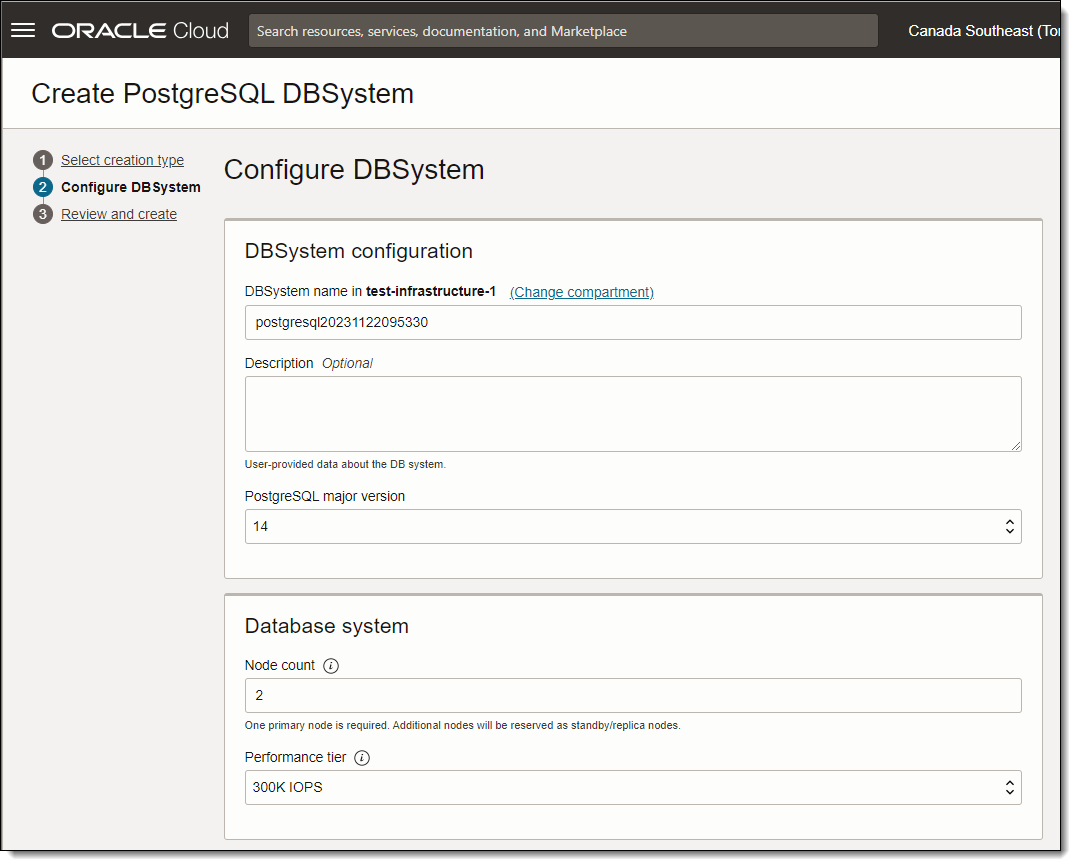
On clicking the button, the page titled “Create PostgreSQL DBSystem” is displayed. On the left-hand side, the various workflow steps are shown:

Click Next at the bottom, or the second workflow step, to get to the Configure DB System page.
After filling in the DBSystem configuration details section, note that in the Database system section, the Node count can be chosen. This option currently allows up to 8 nodes – make note: only one will be read-write while the others will be read-only.
The IO Performance Tier currently only has a single option of 300K IOPS:
Further down on the same page, the OCPU count can be selected – binary multiple values between 2 and 64 are available as of the time of writing. Some points worth noting:
- This is the number of OCPUs per node.
- The service costs are based on numerous metrics, including the OCPU per hour. Thus, you will pay for the OCPU count selected here multiplied by the Node count chosen above.
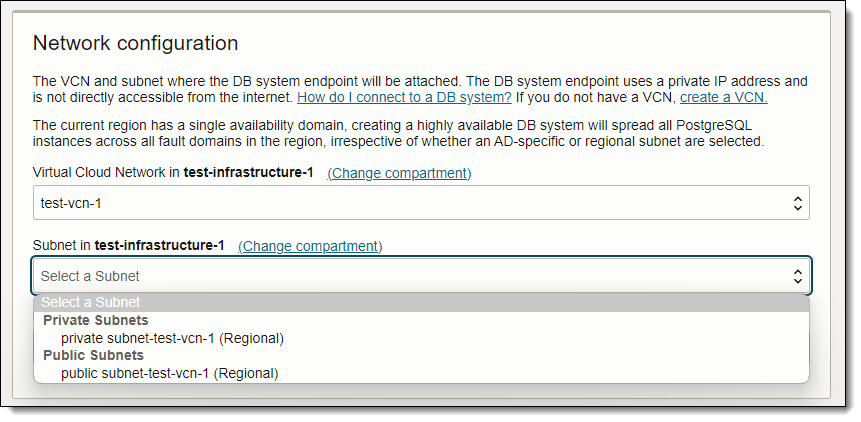
When it comes to providing the Network configuration details, it may be necessary to first select the Change Compartment links – possibly, if this is your first time using this service, the Virtual Cloud Network and Subnet lists will default to your root compartment.
When choosing a subnet, be careful, as when a public subnet is chosen, it results in a creation error. Therefore, even though public subnets are shown, choose a private subnet:
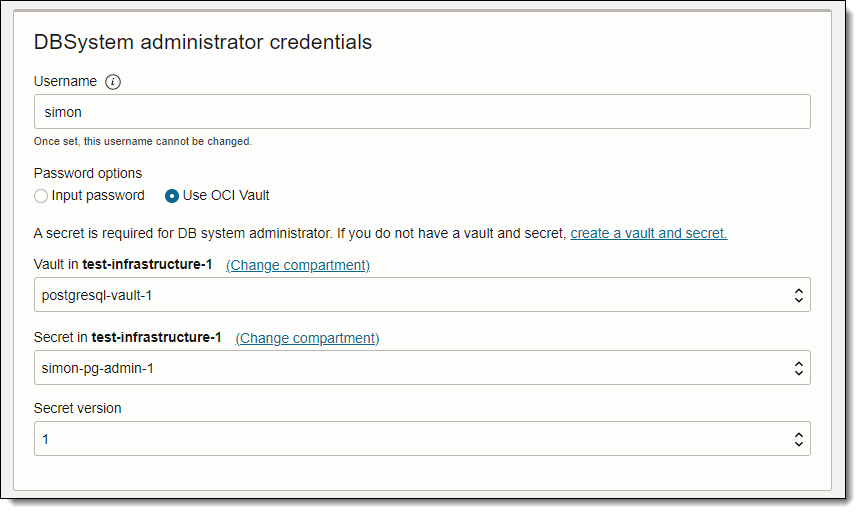
Regarding administrator access to the new DB System, this new OCI PostgreSQL service adds a few nice options:
- The actual username can be specified. This is different to other/competing cloud PostgreSQL DBaaS offerings where the username is often “postgres”. This may allow you to align administrator usernames with your site-specific standards and nomenclatures if you choose. However, this value cannot be changed post-creation.
- The password can be entered here in the web console or referenced through an OCI Vault “Secret”.
This second point is really nice as it allows for programmatic API (command-based) deployments without having to specify a sensitive password in the command or command’s workflow. This makes things like saving provisioning commands into things like source code repositories (Git) much safer – the risk of accidental password leakage is reduced. Consequently, using the OCI Vault Secret option is recommended. However, with the caveat that you must ensure that your OCI Vault access is secured. Anyone with OCI administrator access to the OCI Vault can view the Secret value and consequently access your PostgreSQL database.
If using OCI Vault Secrets is not considered sufficiently secure, enter a plaintext password. Otherwise provide the Secret details:
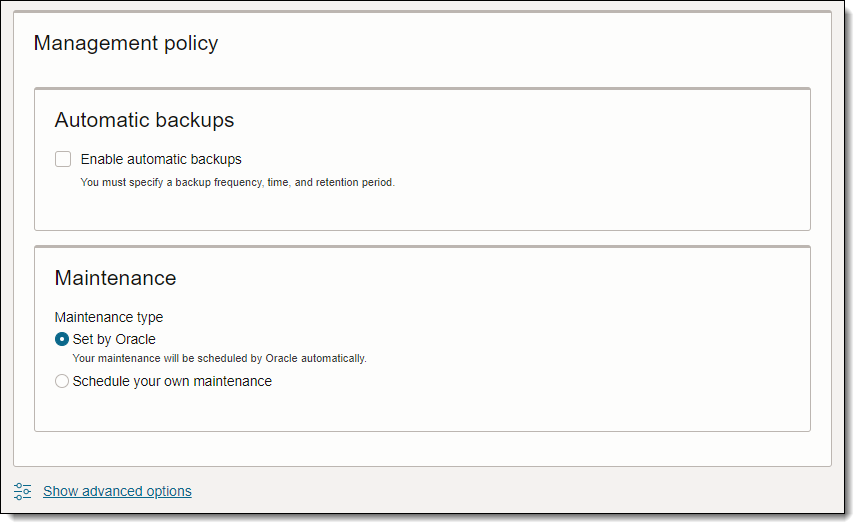
Choose the backup and maintenance windows as desired – these can both be adjusted post-creation:
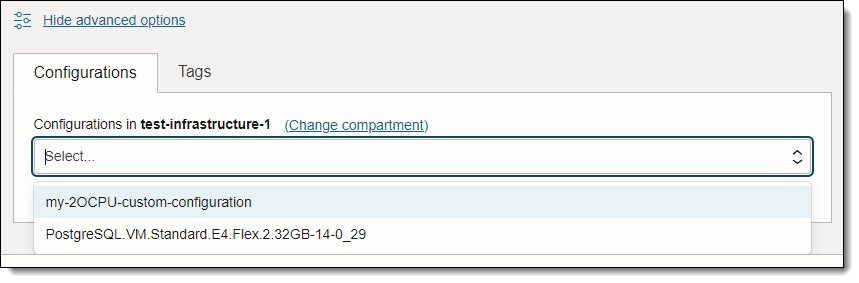
In order to configure your own custom configuration, you must choose the (somewhat subtle) “Show advanced options” link at the bottom before pressing the Next button.
With the advanced options shown, your custom “Configuration” can be selected:
Finally, press the Next button at the bottom, review settings on the subsequent screen, and then Submit. The database creation normally takes around 5 to 10 minutes.
Endpoint Details and Access
Once the new DB System is created, access is required. And for that, there are at least two endpoints.
The first endpoint (IP address / FQDN) is a floating cluster address that will always connect to the PRIMARY node. This is found under the “DBSystem information” tab:
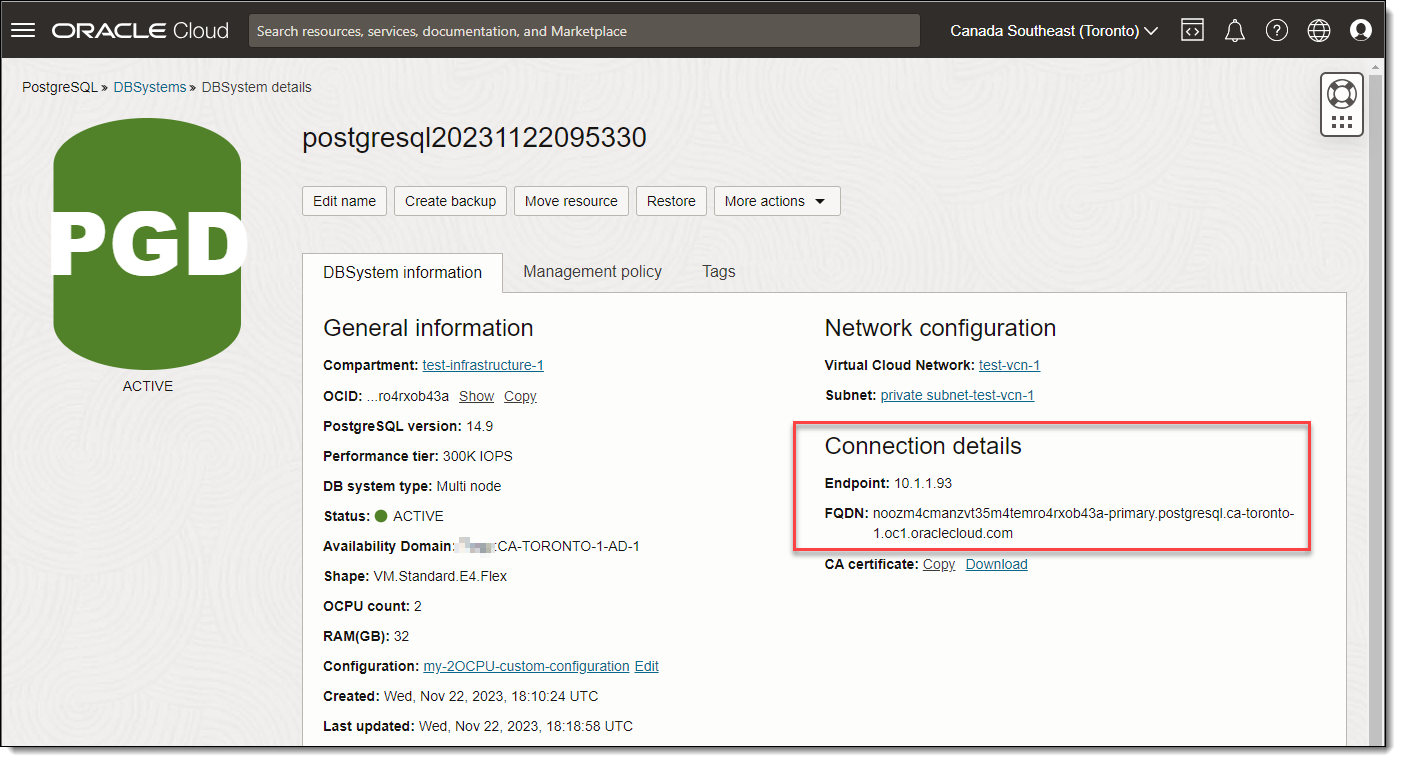
For any read-write connections, this floating endpoint is probably the one that should be used as it will always connect to the node that is running as the Primary.
However, if required, the individual nodes' endpoints can also be used. This may be applicable when you want to connect users performing only queries to one of the read-only nodes.
The node private endpoints are provided from the node details, which can be reached from the three vertical dots in the DBSystem nodes section:
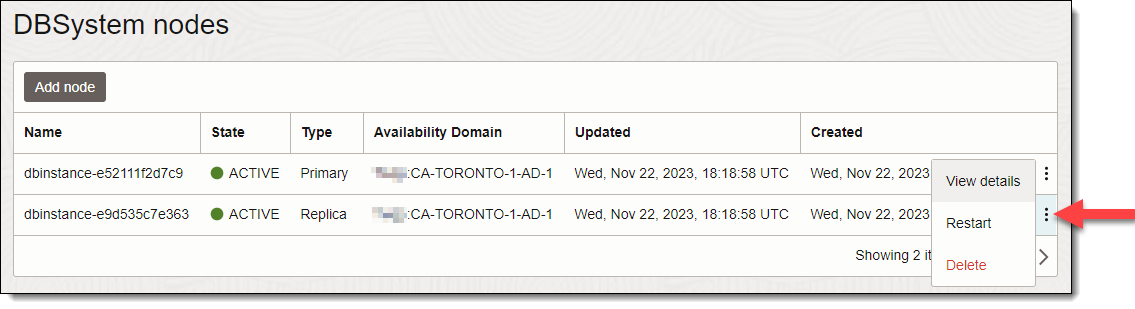
A sidebar pop-up shows the endpoint details:
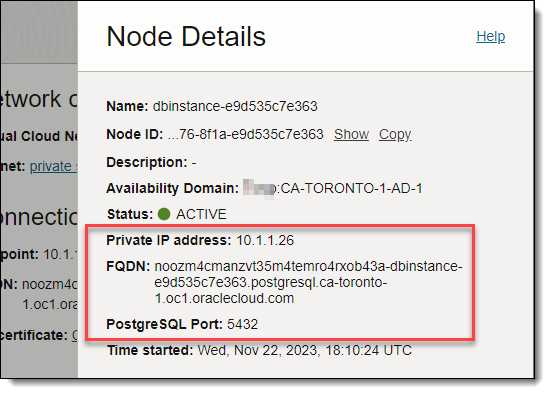
Take care using these node-specific private endpoints if there are any problems, such as the node is deleted or the node has transitioned to a different state, then your application’s connection string may need to be updated accordingly.
PostgreSQL Database Consulting
Looking to innovate through PostgreSQL?
Share this
Share this
How to Set Up REPMGR with WITNESS for PostgreSQL 10

Solving PostgreSQL's pg_basebackup 'ERROR: temporary file size exceeds temp_file_limit'