This is the sixth in a series of blog posts, that covers the details to deploy the Oracle Management Servers for a high available set up of Oracle Enterprise Manager 13.5 using Oracle Cloud Infrastructure‘s resources.
Recap
This is the last of a six-part series on how to deploy a high available installation of Oracle Enterprise Manager (OEM) 13.5 using Oracle Cloud Infrastructure (OCI) services.
Details of previous posts:
- First: Initial configuration of the OCI environment and the setup of a 2-Node RAC VM Database
- Second: How to launch and configure the first application machine
- Third: Setup of the Data Guard Standby DB, the shared storage area and the deployment of the second application machine.
- Fourth: How to install and configure OEM 13.5 on the first application machine
- Fifth: How to set up an OCI Load balancer
- Sixth: How to install (extend) OEM 13.5 on the second host, then include it in the load balancer rotation
This post shows how to configure and include additional Management Services behind the load balancer.
Overview
To add more Management Servers (also called application machines) to your environment there are a series of prerequisites:
- The Management Agent should be up and running on the host.
- Ensure proper communication between OEM and the management agent on the host where OMS will be installed.
- Configure the network to allow traffic between Oracle Management Server (OMS) and the agents.
- And finally, install OMS on the new machine.
The full requirements for a high available installation of OEM can be found here:
Part VI Configuring Enterprise Manager for High Availability
Deploy the management agent on the host
To deploy the management service in a new host first you need to deploy the agent on it.
- Install the Management Agent using the alias host name and ensure that it is up and running.
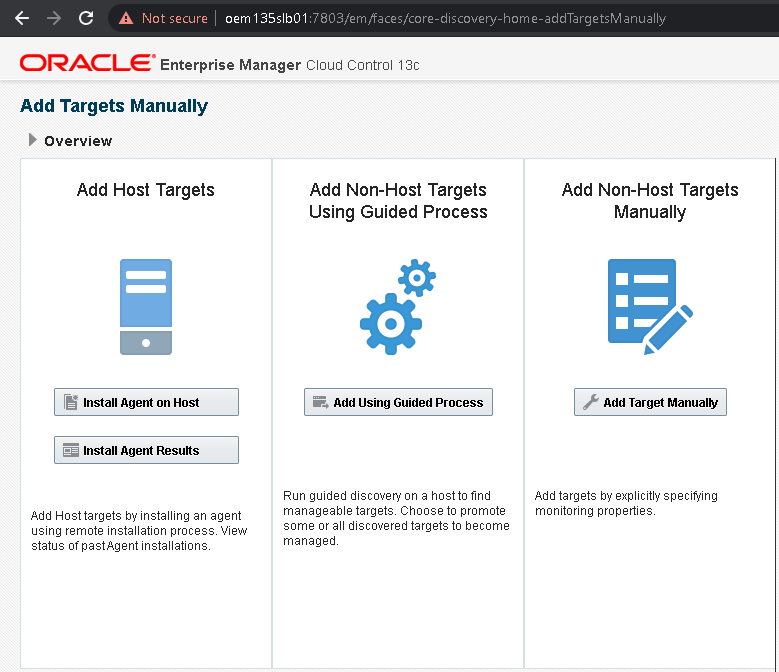
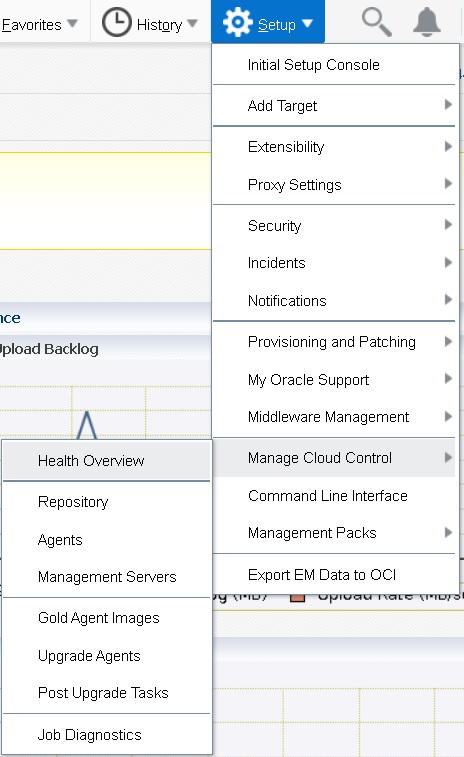
- To deploy the management agent, log into Enterprise Manager, then click on “Add targets Manually”, under “Setup -> Add target” menu:

- Click on “Install Agent on Host”:
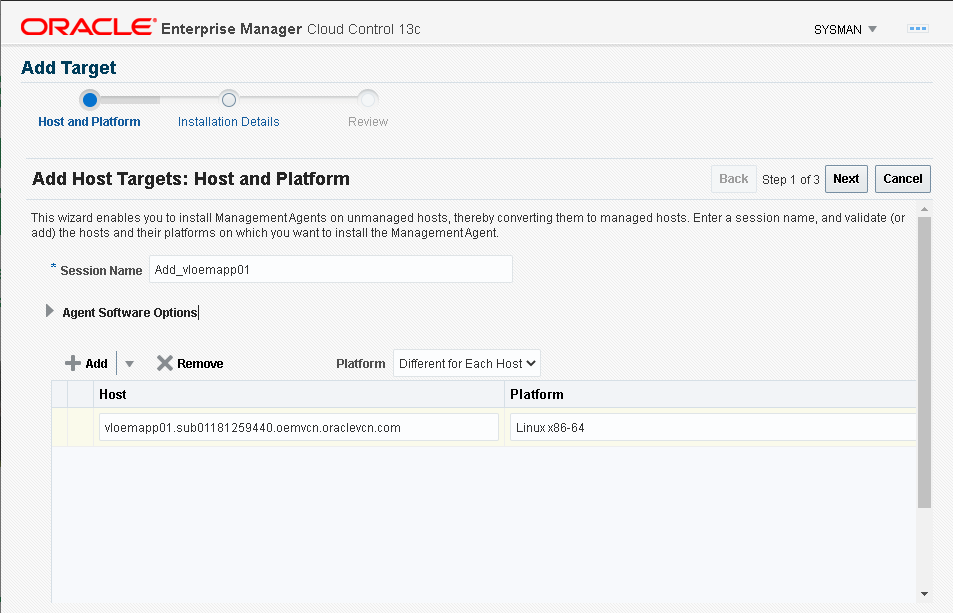
- Enter the fully qualified domain name of the host and select its operating system, then click “Next”:
- While deploying the management agent, I had issues with privileges on several folders, both on the existing server as on the new one. To avoid this issue, I recommend creating additional SSH Keys to connect directly to the “oracle” user. Note: As this is just a test, I’m going to use the same key from the “opc” user to “oracle” because a live system is safer to have separate keys.
- Log into the application machines, copy the keys existing in: /home/opc/.ssh/authorized_keys
[root@vloemapp01 oracle]# cat /home/opc/.ssh/authorized_keys
ssh-rsa XXXXXXXXXXXXXXXXXXXXXXXXXXXXXXXXXXXXXXXXXXXXXXXXXXXXXXXXXXXXXXXXXHQeOcjx9qcyl8erGt956Lq6uLnAzXFMF2VcxItPbMTG3HNVkuKLVGSecmrjxTcTRTY2XEG7vgnCQCbY6n7J3mZasahmZCD1MhPJ93uD4ze7FBdcJYvNnuxWIeXmMlisWXFCFHsF75jMYm5DWRrFeyBAkuOxVuJ5+DfIqLPD/apcdsr0SzJzZGbU2PtpTf302aAK/G4PtxO0GAh8NKK19OlX6mo1c1u3n59ADYb//vp5xYln3+Q== salgado-oci
- Copy your SSH key to /home/oracle/.ssh/authorized_keys:
[root@vloemapp01 oracle]# vi /home/oracle/.ssh/authorized_keys
[root@vloemapp01 oracle]# cat /home/oracle/.ssh/authorized_keys
ssh-rsa XXXXXXXXXXXXXXXXXXXXXXXXXXXXXXXXXXXXXXXXXXXXXXXXXXXXXXXXXXXXXXXXXHQeOcjx9qcyl8erGt956Lq6uLnAzXFMF2VcxItPbMTG3HNVkuKLVGSecmrjxTcTRTY2XEG7vgnCQCbY6n7J3mZasahmZCD1MhPJ93uD4ze7FBdcJYvNnuxWIeXmMlisWXFCFHsF75jMYm5DWRrFeyBAkuOxVuJ5+DfIqLPD/apcdsr0SzJzZGbU2PtpTf302aAK/G4PtxO0GAh8NKK19OlX6mo1c1u3n59ADYb//vp5xYln3+Q== salgado-oci
- Now create a credential to use the SSH Keys, but connecting directly to “oracle,” as shown below:
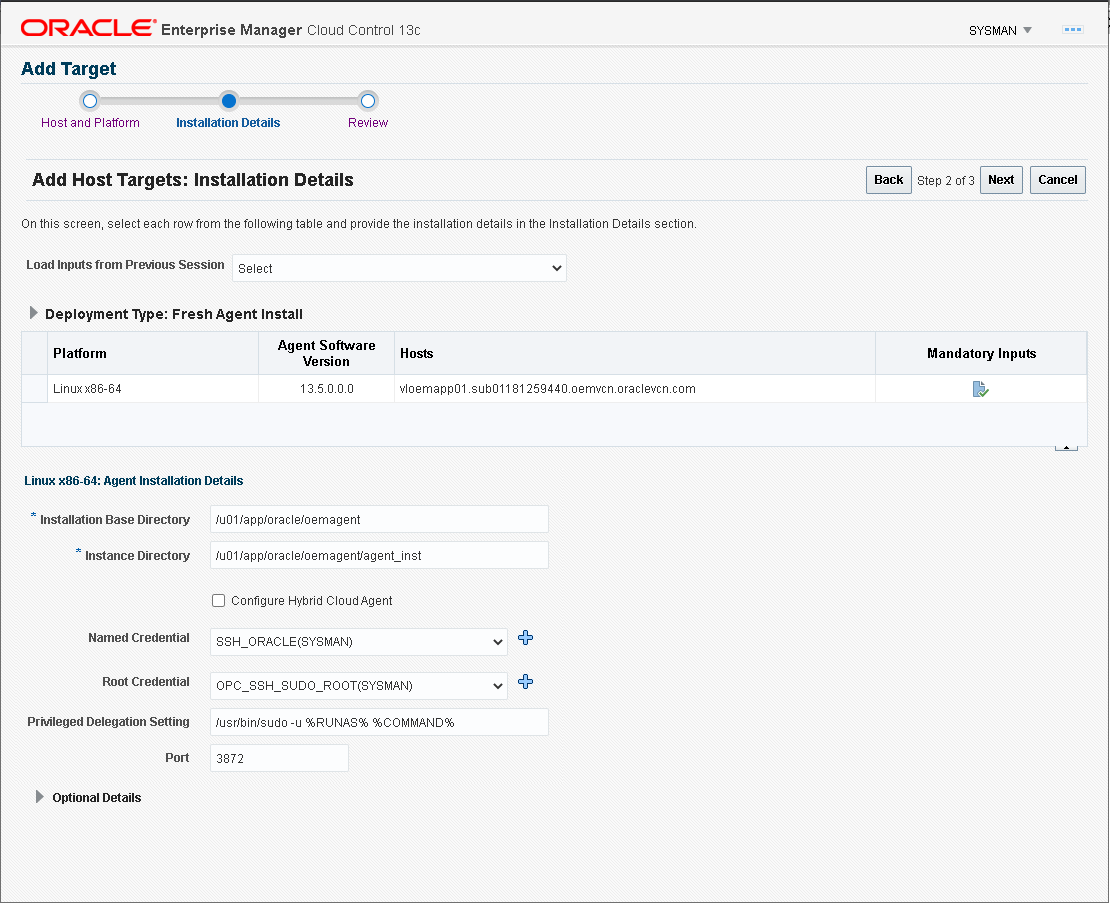
- To create the credentials used to deploy the agent, click on the blue plus sign (“+”) in front of each field.
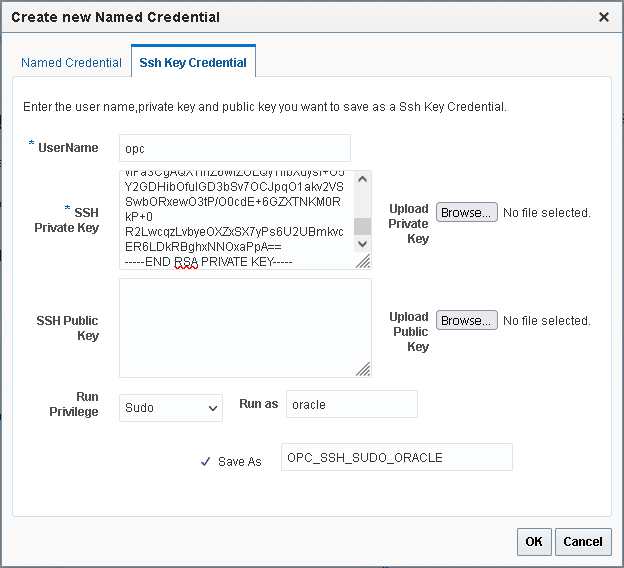
- Create two named credentials to connect to the second application machine using “oracle” and our private SSH Key. And set up a second credential to connect with the SSH Key to “opc” and sudo to root:

- Now click the “Deploy agent” button:
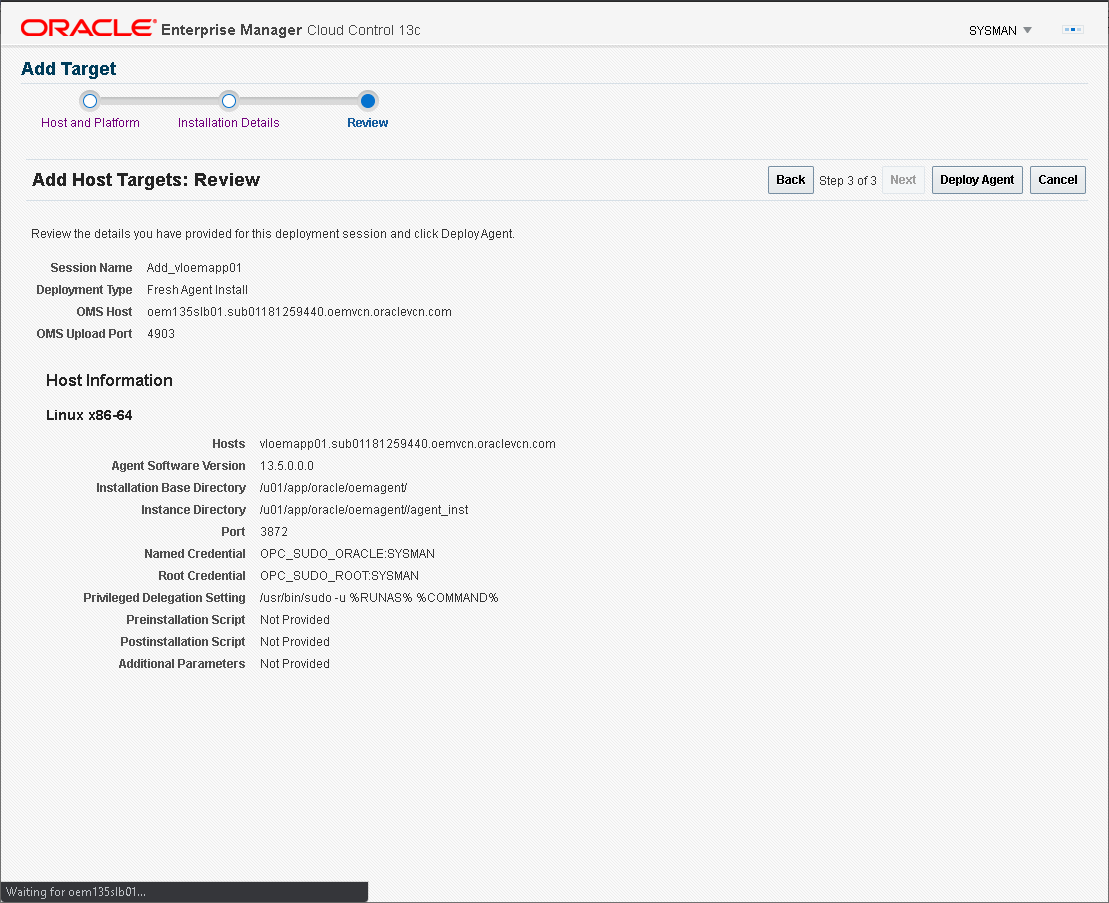
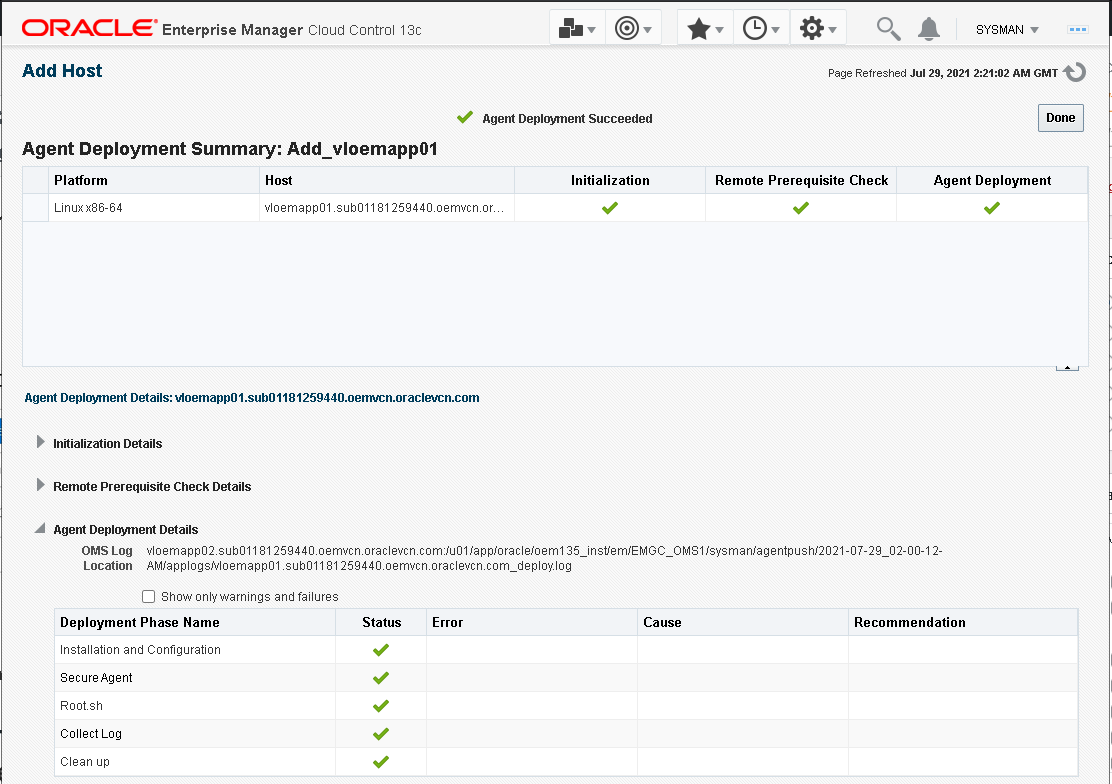
- If everything went according to plan, you should see the following screen:
Note: To use SSH Connection while deploying the agent, the key must be in OpenSSH mode.
To convert your Base64 key to OpenSSH, open your Private Key with Putty Generator, then save it in OpenSSH mode (Conversions -> Export OpenSSH Key), otherwise it won’t work.
Also, add only the private key exported in OpenSSH mode, there’s no need to add the public key.
- Execute the root.sh script to complete the agent installation:
[root@vloemapp02 ~]# cd /u01/oemagent/agent_13.5.0.0.0
[root@vloemapp02 agent_13.5.0.0.0]# ./root.sh
Finished product-specific root actions.
/etc exist
[root@vloemapp02 agent_13.5.0.0.0]#
- You can check the status of the agent using “emctl status agent”:
[oracle@vloemapp02 ~]$ /u01/app/oracle/oemagent/agent_13.5.0.0.0/bin/emctl status agent
Oracle Enterprise Manager Cloud Control 13c Release 5
Copyright (c) 1996, 2021 Oracle Corporation.  All rights reserved.
---------------------------------------------------------------
Agent Version          : 13.5.0.0.0
OMS Version            : 13.5.0.0.0
Protocol Version       : 12.1.0.1.0
Agent Home             : /u01/app/oracle/oemagent/agent_inst
Agent Log Directory    : /u01/app/oracle/oemagent/agent_inst/sysman/log
Agent Binaries         : /u01/app/oracle/oemagent/agent_13.5.0.0.0
Core JAR Location      : /u01/app/oracle/oemagent/agent_13.5.0.0.0/jlib
Agent Process ID       : 29923
Parent Process ID      : 29855
Agent URL              : https://vloemapp02.sub0XXXXXXXXXX.oemvcn.oraclevcn.com:3872/emd/main/
Local Agent URL in NAT : https://vloemapp02.sub0XXXXXXXXXX.oemvcn.oraclevcn.com:3872/emd/main/
Repository URL         : https://oem135slb01.oemtest.com:4903/empbs/upload
Started at             : 2021-07-31 04:19:52
Started by user        : oracle
Operating System       : Linux version 4.14.35-1902.8.4.el7uek.x86_64 (amd64)
Number of Targets      : 38
Last Reload            : (none)
Last successful upload                       : 2021-07-31 05:34:56
Last attempted upload                        : 2021-07-31 05:34:56
Total Megabytes of XML files uploaded so far : 0.34
Number of XML files pending upload           : 0
Size of XML files pending upload(MB)         : 0
Available disk space on upload filesystem    : 39.08%
Collection Status                            : Collections enabled
Heartbeat Status                             : Ok
Last attempted heartbeat to OMS              : 2021-07-31 05:36:18
Last successful heartbeat to OMS             : 2021-07-31 05:36:18
Next scheduled heartbeat to OMS              : 2021-07-31 05:37:19

---------------------------------------------------------------
Agent is Running and Ready
Additional network settings
Even after successfully installing the agent, the following error message was displayed while trying to access the host:
“Target data is currently being uploaded to the repository. The Target will be accessible once the process is complete”
I found that the connections between the agent and OMS were being blocked due to missing rules on my VCN, as well as the firewalls installed in the hosts. So, make sure to add the required rules. In this test, I simply allowed all connections and disabled the firewalls, which is not recommended in a live system.
You must also add the required ingress/egress rules for all ports used by the management service and the agents. The full list of ports used by OEM can be found, summarized, in My Oracle Support:
Prepare the secondary machine
Before adding Management servers, the Load Balancer must be configured to work with the first OMS. All Management Agents communicating with the first OMS must be uploading data only through this SLB.
If you’re following the whole procedure to set up OEM 13.5 on OCI, check the fifth post on how to set up the load balancer, before deploying the application in the second machine:
Furthermore, the management agent must be up and running on the target host, otherwise you won’t be able to proceed with the deployment procedure.
Also, there are a few more things to be checked in the machine.
- Ensure that you have 10 GB of space on the source as well as the destination host for creating a temporary stage directory.
- Make sure that the 32 GB swap file is active in the new machine, otherwise create it:
- Create a 32 GB swap file on the new file system as OEM requires it:
[root@vloemapp02 ~]# dd if=/dev/zero of=/u01/swapfile bs=1024 count=33554432
- Set up the swap file:
[root@vloemapp02 ~]# mkswap /u01/swapfile
Setting up swapspace version 1, size = 33554428 KiB
no label, UUID=310c3383-fa5b-4e0f-b1db-bea13a416db0
- Enable the swap file immediately, but not automatically at boot time:
[root@vloemapp02 ~]# swapon /u01/swapfile
- Include the following entry on /etc/fstab to mount it at every boot:
UUID=310c3383-fa5b-4e0f-b1db-bea13a416db0 /u01/swapfile swap swap defaults 0
Install the management service on the secondary host
Before installing a secondary management server, you need to copy the SSL keys to the repository, otherwise you’ll hit the following error:
Copy the key to the repository before adding the new server:
[oracle@vloemapp01 ~]$ /u01/app/oracle/middleware135/bin/emctl config emkey -copy_to_repos
Oracle Enterprise Manager Cloud Control 13c Release 5
Copyright (c) 1996, 2021 Oracle Corporation. All rights reserved.
Enter Enterprise Manager Root (SYSMAN) Password :
The EMKey has been copied to the Management Repository. This operation will cause the EMKey to become unsecure.
After the required operation has been completed, secure the EMKey by running "emctl config emkey -remove_from_repos".
- Restart the primary management service:
[oracle@vloemapp02 ~]$ /u01/app/oracle/middleware135/bin/emctl stop oms -all -force
[oracle@vloemapp02 ~]$ /u01/app/oracle/middleware135/bin/emctl start oms
- Connect to your first application server using the load balancer address: https://oem135slb01.sub0XXXXXXXXXX.oemvcn.oraclevcn.com:7803/em
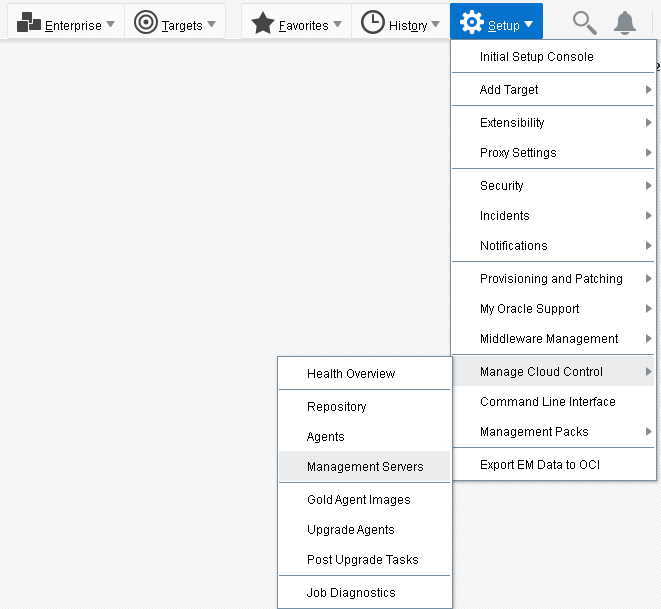
- Select “Management Servers”, under the “Setup -> Manage Cloud Control” menu:
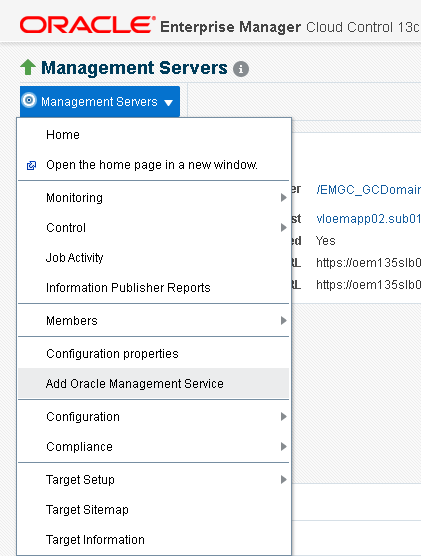
- Then select “Add Oracle Management Server” from the “Management Servers” menu:
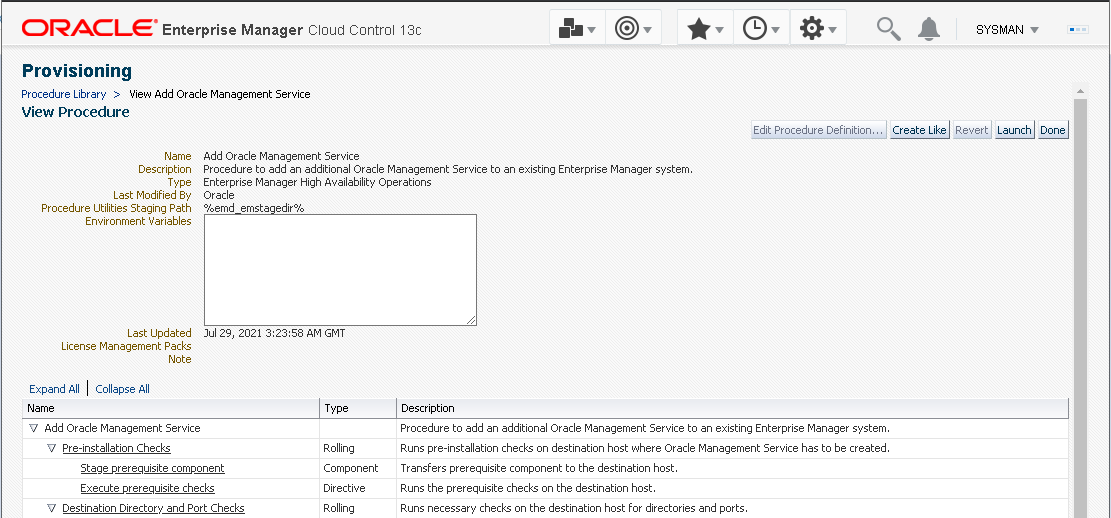
- Click on the procedure “Add Oracle Management Server”:
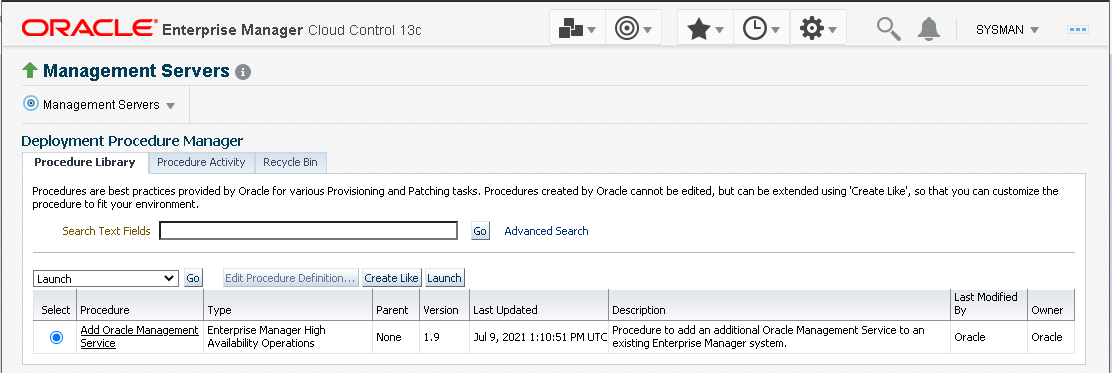
- Now click the “Launch” button:
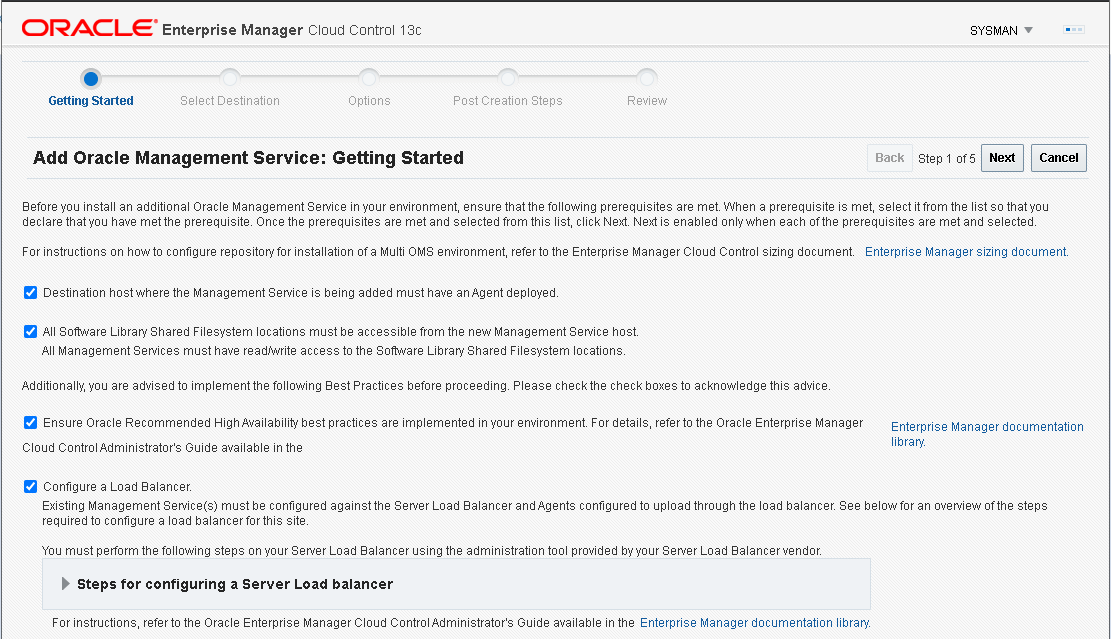
- Check all the boxes and click “Next”:
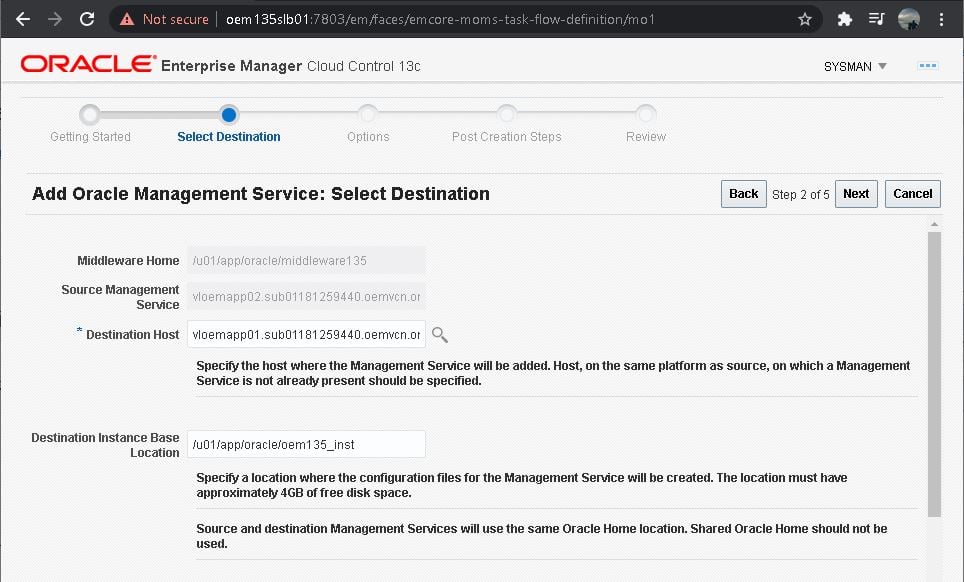
- Click the magnifier icon and search for the machine where you want to deploy OMS, vloemapp02, and click “Next”: Note: In my lab, I first installed vloemapp02 and later added vloemapp01, which is why the names are switched in some screenshots:
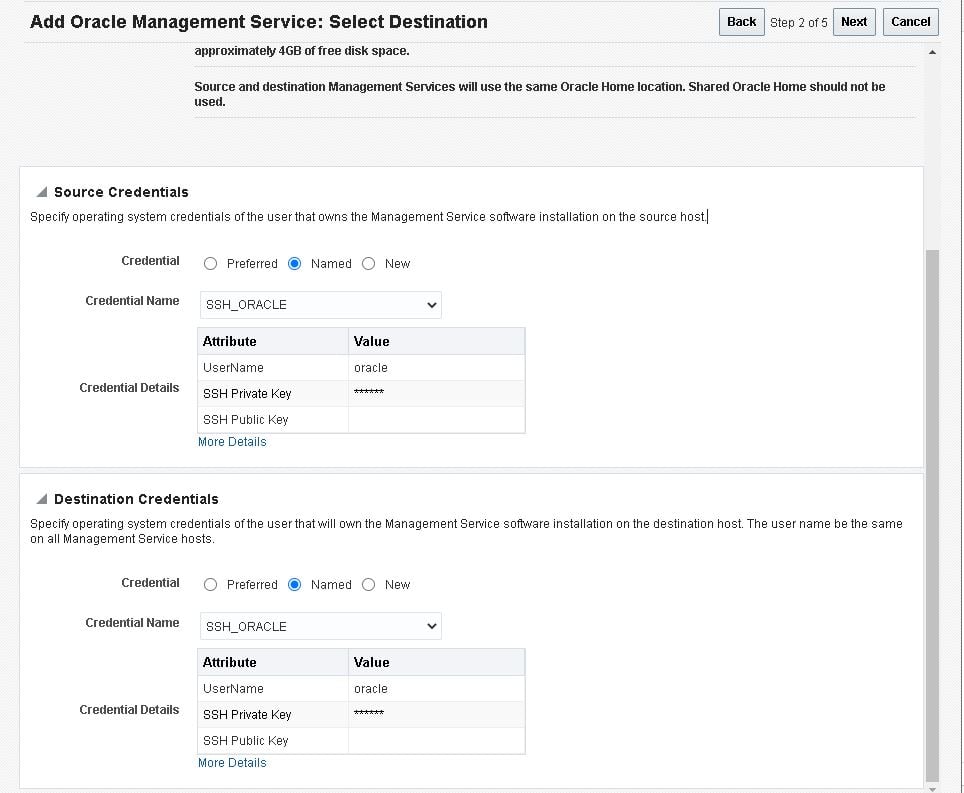
- For both servers select the credential that was created during the agent deployment, using SSH key to connect directly to “oracle”, and click “Next”:
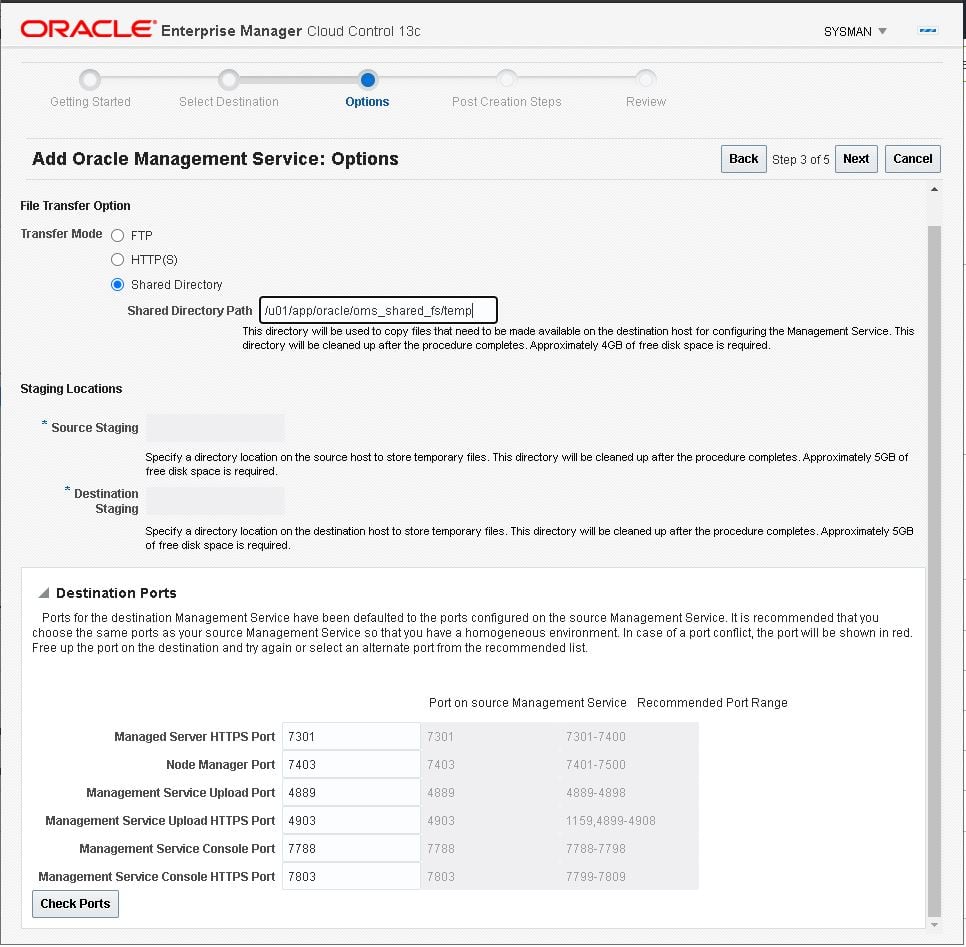
- Since we already have a shared storage area between the two servers, we’ll use this area to stage the management servers files. Enter the location “/u01/app/oracle/oms_shared_folder/temp”, and click “Next”:
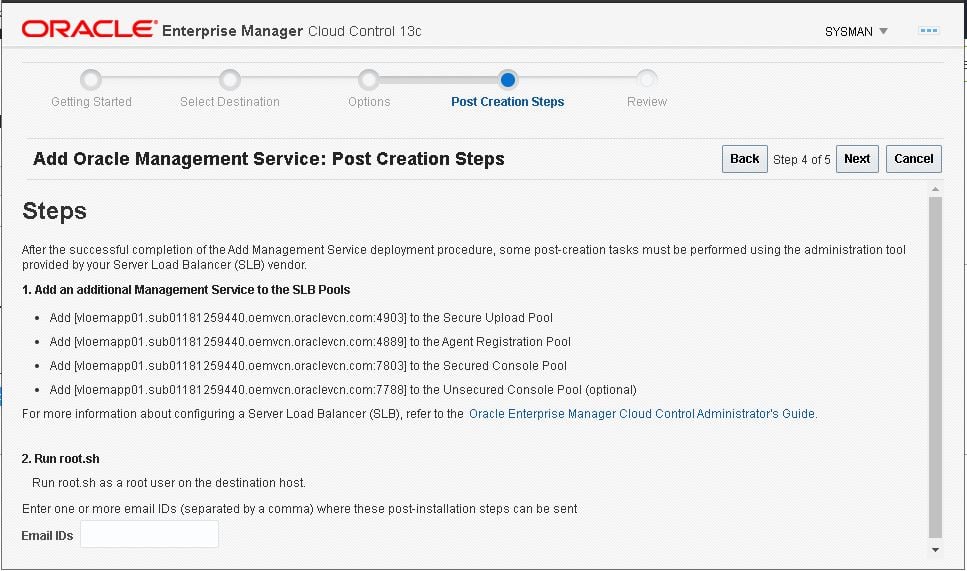
- Review the steps and click “Next”:
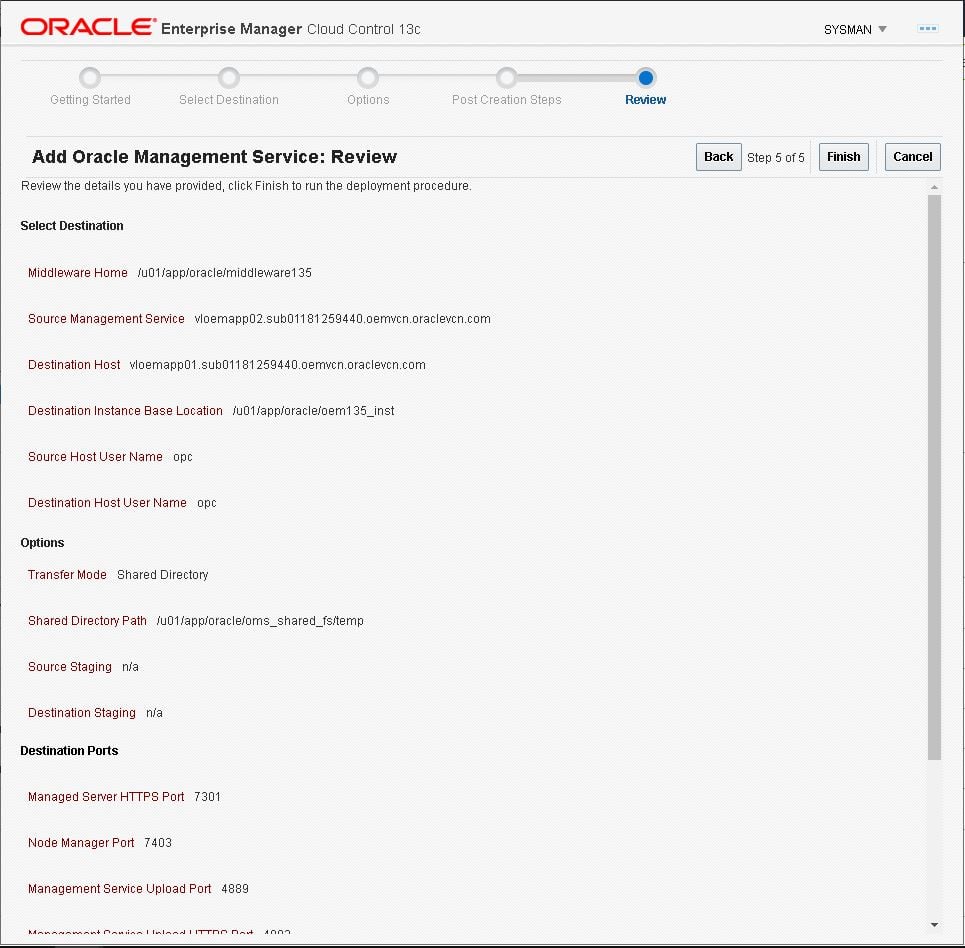
- Review everything and click “Finish”:
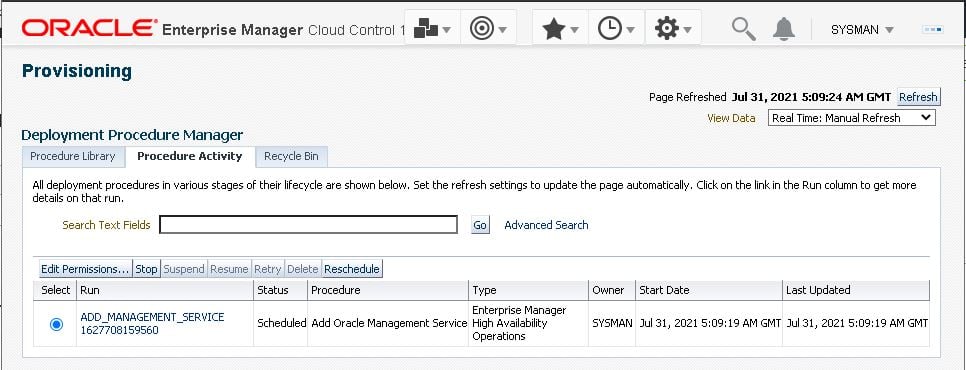
- Once the job starts running, OEM will take you to the “Provisioning” page; click on the name of the “Run” we just started to monitor the progress:
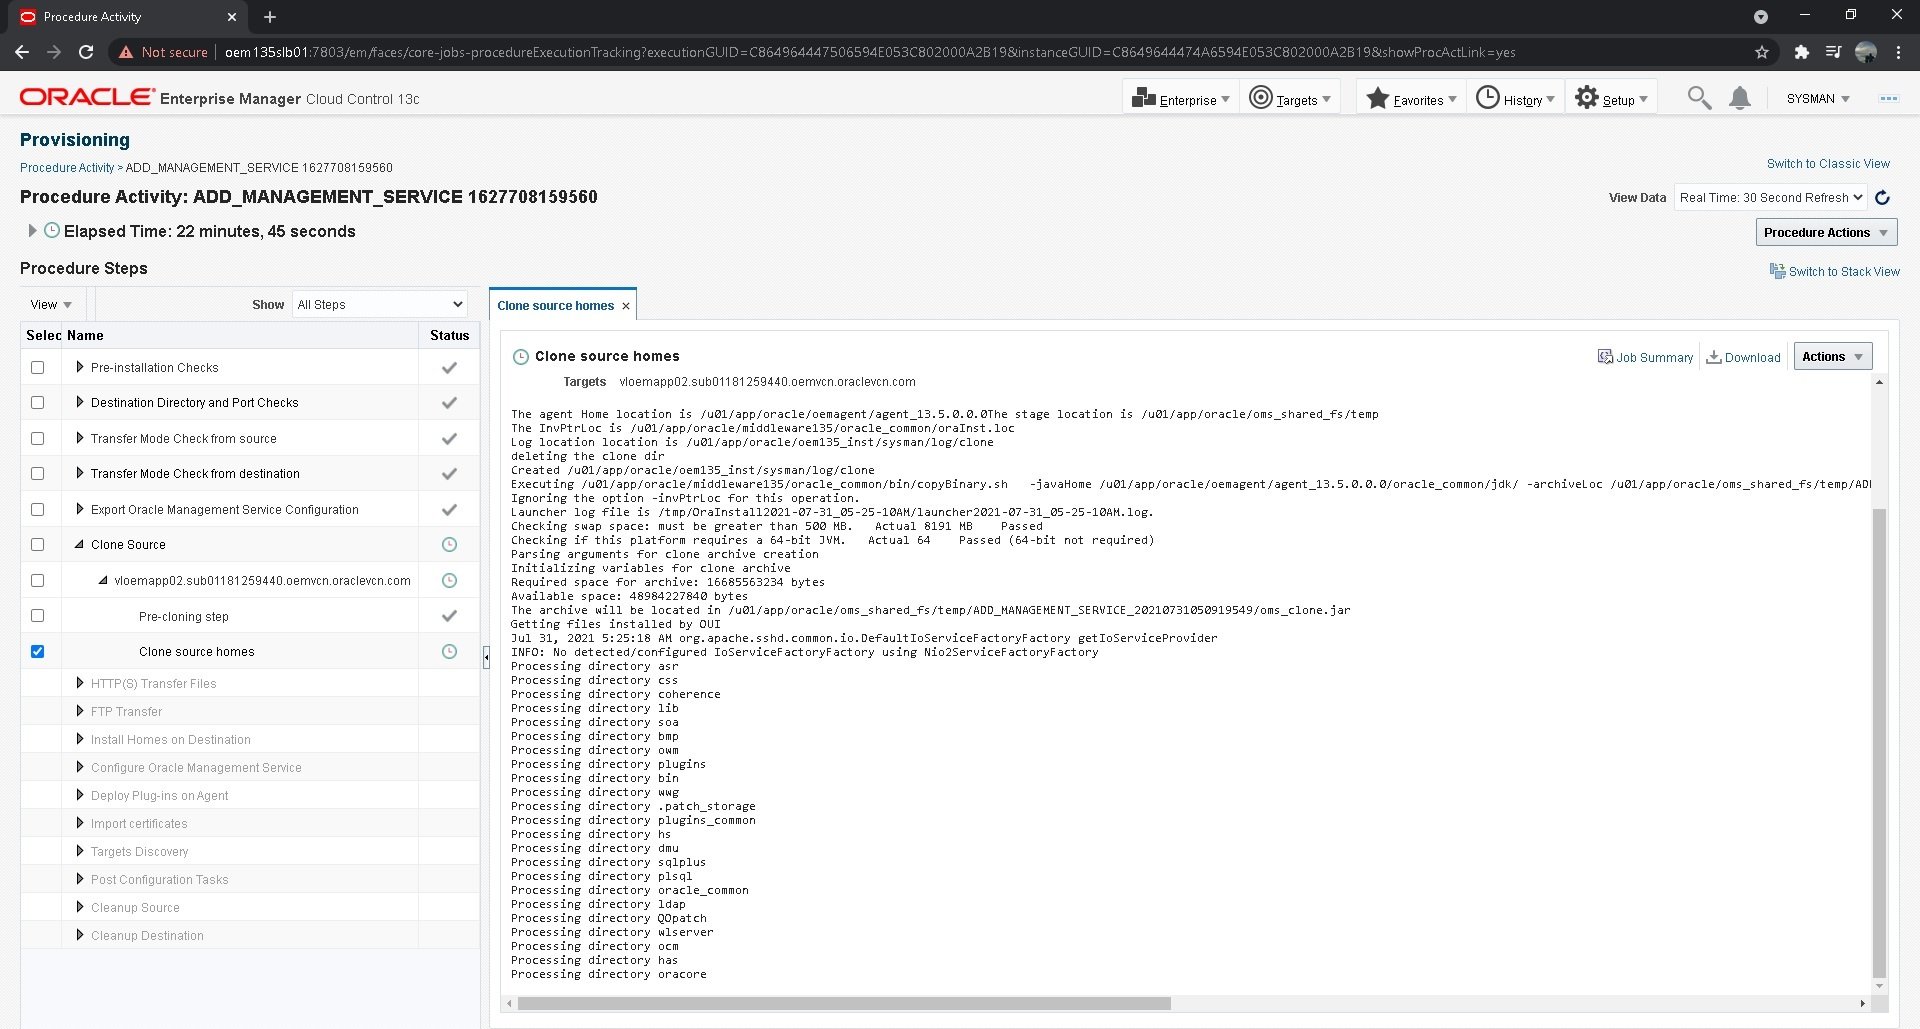
- Click each step to monitor the execution of the substeps:
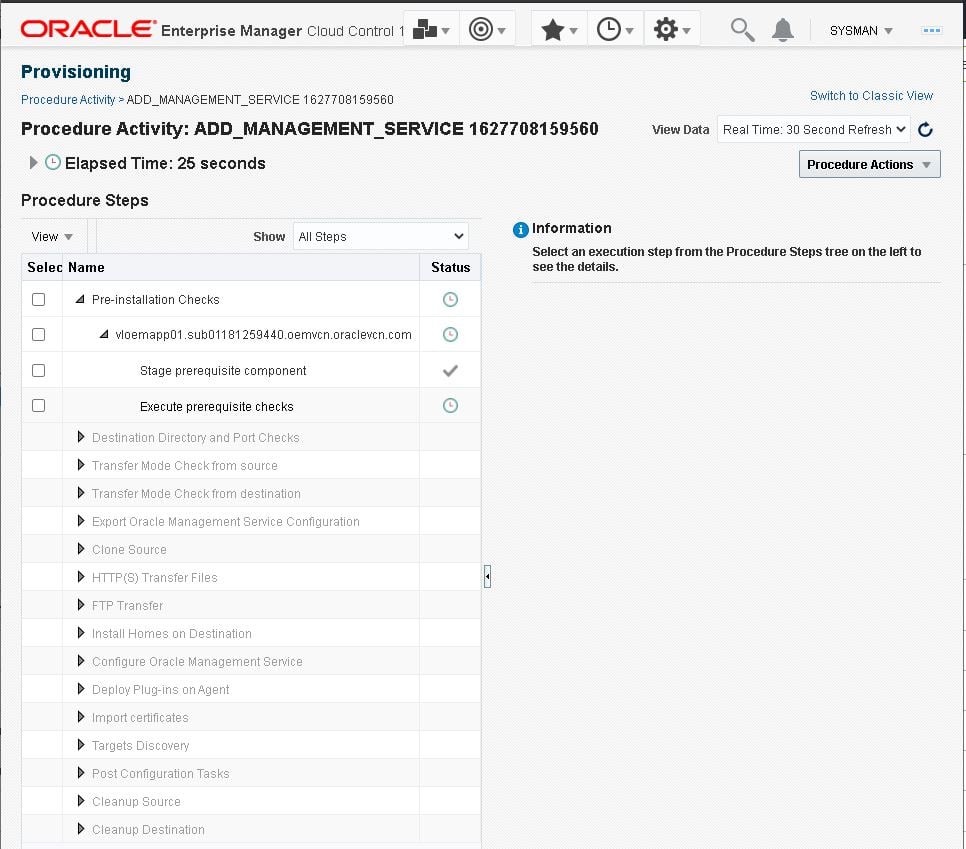
- Clicking on a substep will show its details:
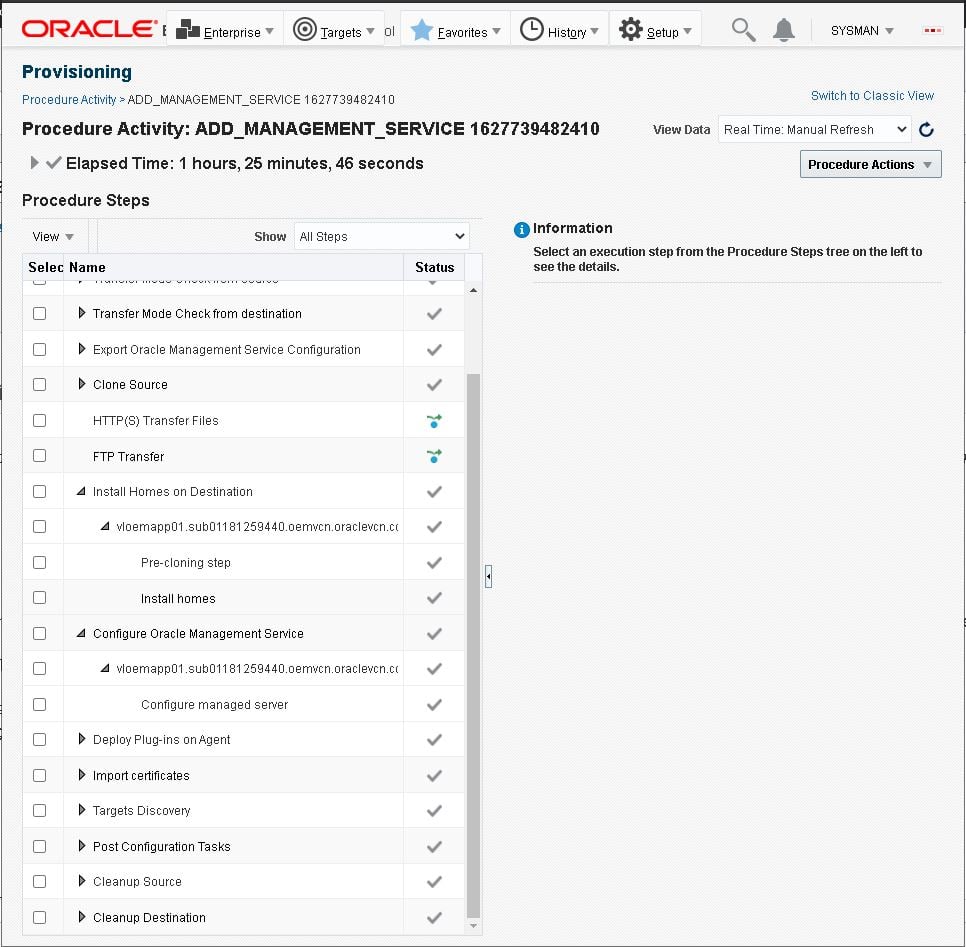
- When the procedure completes, you’ll see the following screen:
- At this point, the management services should be up and running on the second node, so log in there and check it:
[oracle@vloemapp02 ~]$ emctl status oms -details
Oracle Enterprise Manager Cloud Control 13c Release 5
Copyright (c) 1996, 2021 Oracle Corporation.  All rights reserved.
Enter Enterprise Manager Root (SYSMAN) Password :
Console Server Host        : vloemapp02.sub0XXXXXXXXXX.oemvcn.oraclevcn.com
HTTP Console Port          : 7788
HTTPS Console Port         : 7803
HTTP Upload Port           : 4889
HTTPS Upload Port          : 4903
EM Instance Home           : /u01/app/oracle/oem135_inst/em/EMGC_OMS1
OMS Log Directory Location : /u01/app/oracle/oem135_inst/em/EMGC_OMS1/sysman/log
SLB or virtual hostname: oem135slb01.oemtest.com
HTTPS SLB Upload Port : 4903
HTTPS SLB Console Port : 7803
HTTPS SLB JVMD Port : 7803
Agent Upload is locked.
OMS Console is locked.
Active CA ID: 1
Console URL: https://oem135slb01.oemtest.com:7803/em
Upload URL: https://oem135slb01.oemtest.com:4903/empbs/upload

WLS Domain Information
Domain Name            : GCDomain
Admin Server Host      : vloemapp02.sub0XXXXXXXXXX.oemvcn.oraclevcn.com
Admin Server HTTPS Port: 7102
Admin Server is RUNNING

Oracle Management Server Information
Managed Server Instance Name: EMGC_OMS1
Oracle Management Server Instance Host: vloemapp02.sub0XXXXXXXXXX.oemvcn.oraclevcn.com
WebTier is Up
Oracle Management Server is Up
JVMD Engine is Up
- To make sure everything is working as expected, connect to the console using the second management server:
httsp://vloemapp02.subXXXXXXXXXX.oemvcn.oraclevcn.com:7803/em
Add the new Oracle Management Server to the Backend Sets of your Load Balancer
Now that our environment has two management servers, we need to include the second one in our backend sets, so the load balancer balances the load between the two.
Check the Fifth Post of this series for details on how to add a server to the backend set of a load balancer.
Oracle also mentions we need to execute the “root.sh” script, but since we included the OPC credential with privileges to use “sudo” as “root,” we don’t need to.
Remove keys from OEM’s repository
As recommended by Oracle, after adding the secondary management server, it’s important to remove the SSL Keys from the repository.
- Log into either one of your application servers and remove the keys with the following command:
[oracle@vloemapp01 ~]$ emctl config emkey -remove_from_repos
Check OEM’s status and connection balancing
- Log into both your application servers and check OMS status:
[oracle@vloemapp02 ~]$ emctl status oms -details
Oracle Enterprise Manager Cloud Control 13c Release 5
Copyright (c) 1996, 2021 Oracle Corporation.  All rights reserved.
Enter Enterprise Manager Root (SYSMAN) Password :
Console Server Host        : vloemapp02.subXXXXXXXXXXXXXX.oemvcn.oraclevcn.com
HTTP Console Port          : 7788
HTTPS Console Port         : 7803
HTTP Upload Port           : 4889
HTTPS Upload Port          : 4903
EM Instance Home           : /u01/app/oracle/oem135_inst/em/EMGC_OMS1
OMS Log Directory Location : /u01/app/oracle/oem135_inst/em/EMGC_OMS1/sysman/log
SLB or virtual hostname: oem135slb01.oemtest.com
HTTPS SLB Upload Port : 4903
HTTPS SLB Console Port : 7803
HTTPS SLB JVMD Port : 7803
Agent Upload is locked.
OMS Console is locked.
Active CA ID: 1
Console URL: https://oem135slb01.oemtest.com:7803/em
Upload URL: https://oem135slb01.oemtest.com:4903/empbs/upload

WLS Domain Information
Domain Name            : GCDomain
Admin Server Host      : vloemapp02.subXXXXXXXXXXXXXX.oemvcn.oraclevcn.com
Admin Server HTTPS Port: 7102
Admin Server is RUNNING

Oracle Management Server Information
Managed Server Instance Name: EMGC_OMS1
Oracle Management Server Instance Host: vloemapp02.sub01181259440.oemvcn.oraclevcn.com
WebTier is Up
Oracle Management Server is Up
JVMD Engine is Up
Note: You’ll be asked to enter the SYSMAN password.
- Log into OEM using the Load Balancer’s address:
https://oem135slb01.oemtest.com:7803/em
- Log in, then select the option “Health Overview” under the “Setup -> Manage Cloud Control” menu:
- In the “Health Overview” page check which management server you’re connected to:
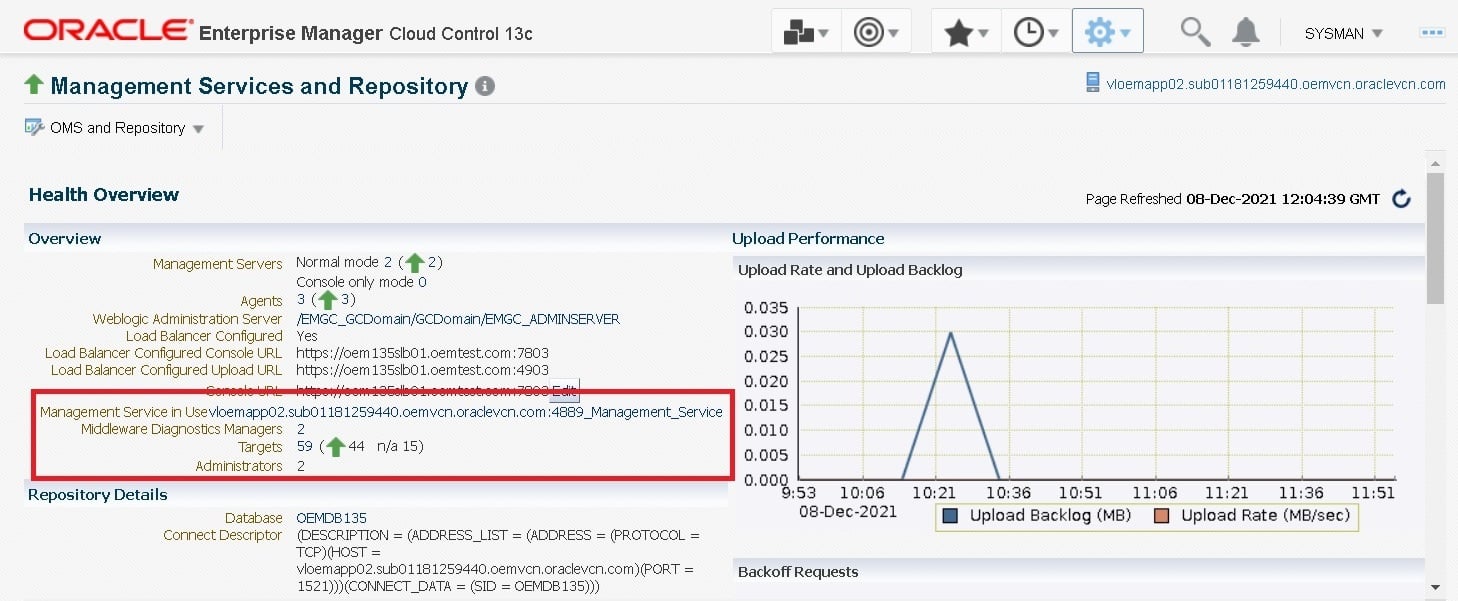
- Repeat the connection a few times (preferably from different computers) and go to the “Health Overview” page to check whether the load balancer is properly balancing the connections.
Draining traffic from the backend servers during maintenances
When dealing with multiple management servers, you’ll need to control the load balancer to make the most of your high available setup.
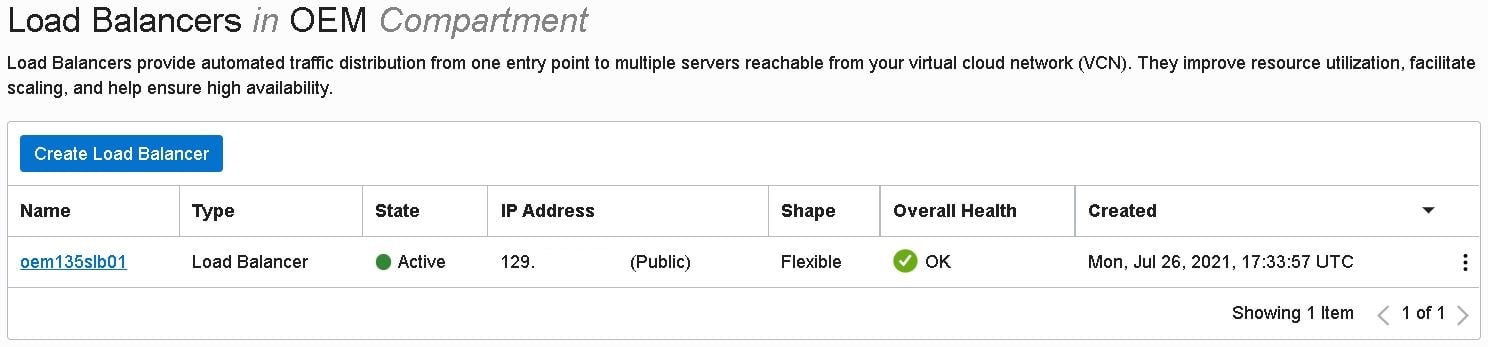
For instance, when patching a Management Server, you can change the load balancer settings to divert traffic from it. To do this, get into the “Load Balancer” section on OCI.
- Select your load balancer:
- Then select “Backend Sets”:

- Select the first backend set from your load balancer:
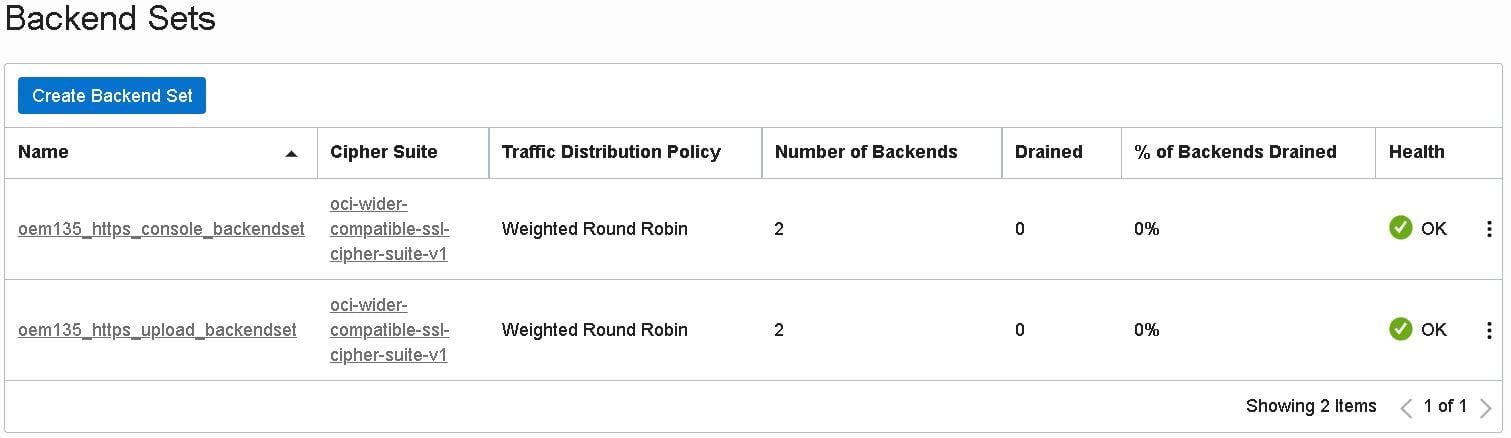
- In the “Backends” section, mark the checkbox for server you want to drain, then click the “Actions” button and select “Edit”:
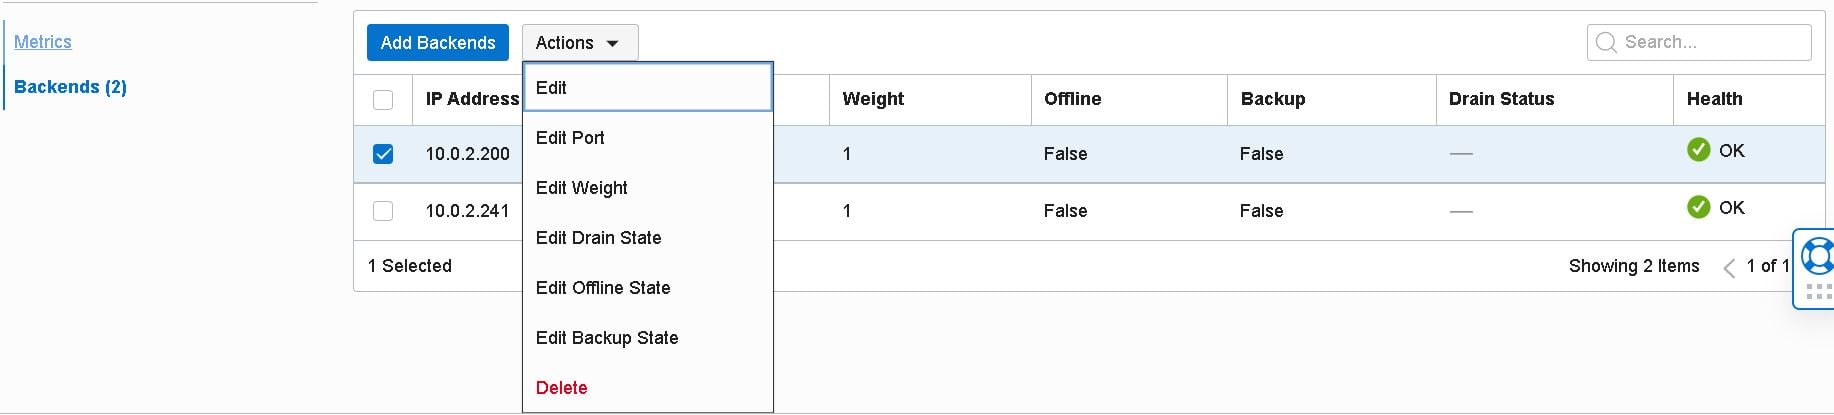
- Change “Drain” to “True” and click “Save”:
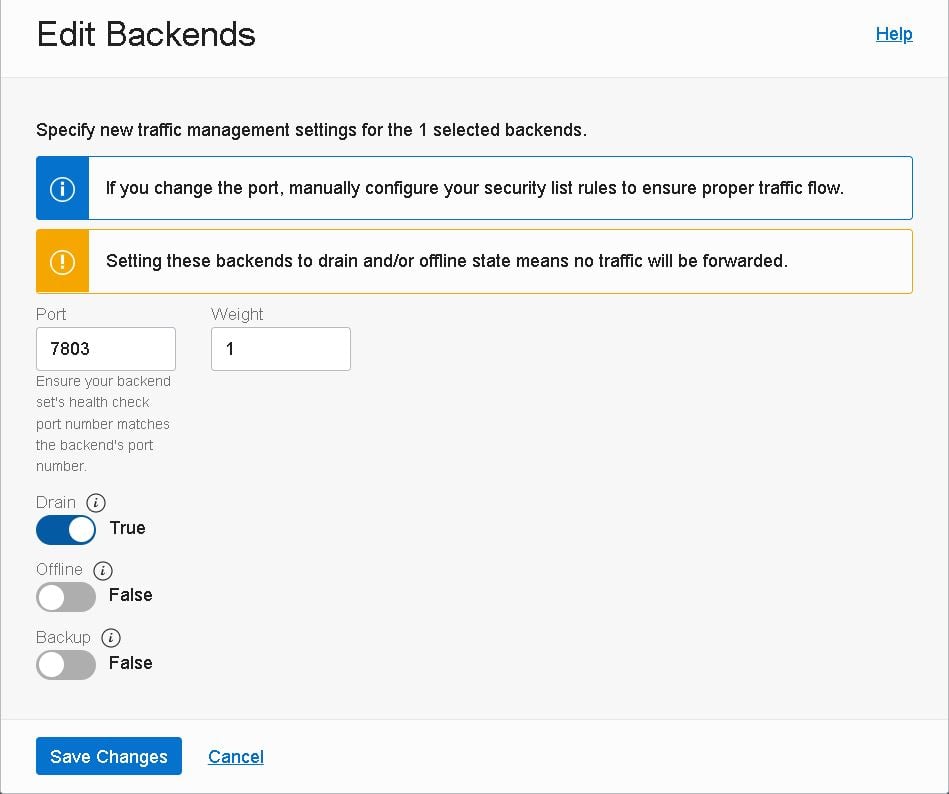
- Note: Draining a server will disable new TCP connections as well as new non-sticky HTTP requests to the backend server.
- Repeat the steps above to all the backend sets to which the server is a part of.
- After draining the server, you can shut it down and proceed with the maintenance.
Once the maintenance on the first server is over, disable the “Drain” option for it and drain the connections from the second one, using the steps above.
This allows for maintenance on each server individually without causing any outages to the system or its end users.
If you simply stop the servers without draining it or take it offline, the end users might get some errors until the Load Balancer marks that server as offline. Therefore it’s preferable to drain the server traffic through the load balancer before stopping it.
Conclusion
This series demonstrated all the steps required to launch a high available OEM 13.5 using OCI’s resources. Hope you enjoyed it and stay tuned for my next series.
As always, drop your questions in the comments. Don’t forget to sign up for our updates here.
Oracle Consulting Services
Ready to optimize your Oracle Database for the future?
Share this
Share this
Part Five: Deploying High Availability Applications in Oracle Cloud Infrastructure— SSL Certificates and Load Balancer Setup

Part Four: Deploying High Availability Applications in OCI—OEM 13.5 Setup