Apex Interactive Report
In a couple of cases, we want to have a button (or an image) added to an IR column working with an “on-click” event. It’s different of selecting rows and clicking on a single button to execute a task (such as a checkbox column). In this case, the goal is clicking on the icon to execute a task, such as changing the user status when the “gear” icon is clicked.
Let’s create it step by step …
First, add an IR report to your Apex application (without the “Change Status” column). For this example, we will use a table “tab_users” and the report using the following query:
select user_id,
       first_name,
       last_name,
       case when status = 0 then 'Active' else 'Inactive' end as Status
from tab_users;

….
Now, let’s add one more column with an icon that can be clicked and, when clicked, it will execute a database change.
Implementation
To accomplish this, we need to complete three steps:
- Add a new hidden item to the report: It will store the user_id and will be used by the SQL update statement
- Add and configure a new link column to the report whose content will be an icon
- Create an On Click Dynamic Action that will execute the change of user’s status
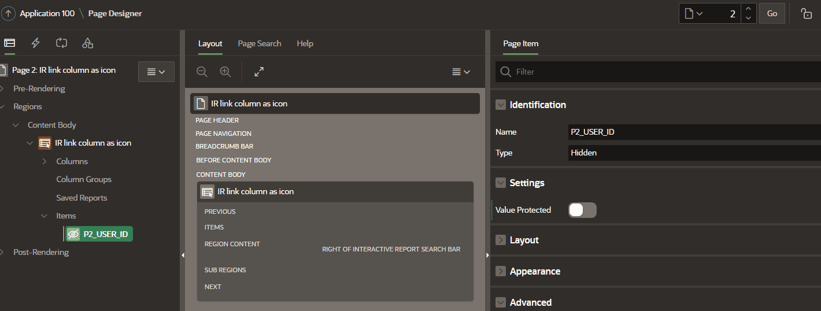
Step 1: Add a new hidden item to the report
For your IR region, add a new hidden item. In this example, the item P2_USER_ID was used.
Make sure that you have disabled the option “Value Protected”
Step 2: Add and configure a new link column to the report whose content will be an icon.
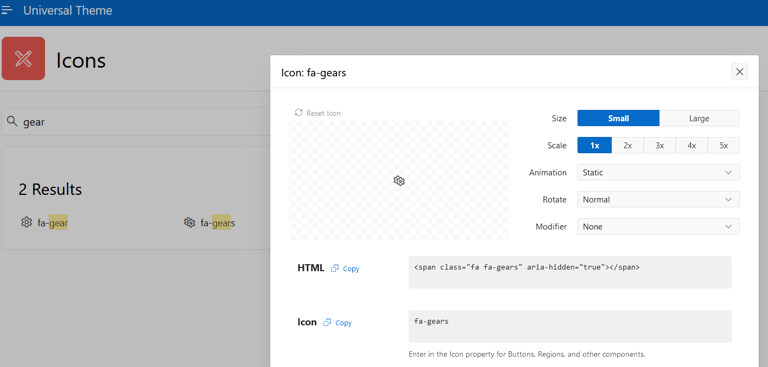
Change the report query adding a new column that will contain an icon. You can find the icons and their classes using the URL: https://apex.oracle.com/pls/apex/f?p=42:icons
The new column will have the following:
‘<span class=”t-Icon fa fa-gears change-status” aria hidden=”true”></span>’
Note: change-status is the name given to the JQuery Selector in this case
select user_id,
       first_name,
       last_name,
       case when status = 0 then 'Active' else 'Inactive' end as Status,
       '<span class="t-Icon fa fa-gears change-status" aria-hidden="true"></span>' LINKCOLUMN
from tab_users ;
Change the following attributes of new LINKCOLUMN
- Type: Link
- Alignment: Center
- Heading: Change Status
- Column Alignment: Center
- Link
- Type: URL
- URL: javascript:void(null);
- Link Text: #LINKCOLUMN#
- Link Attribute: data-id=#USER_ID#

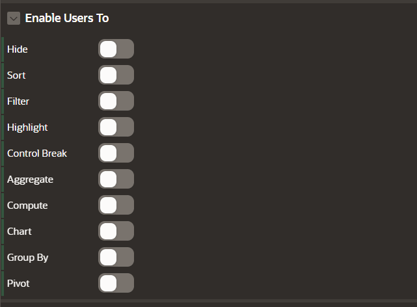
Disable all the options of “Enable Users to”
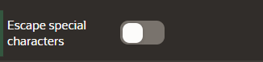
And finally, disable “Escape Special Characters” to enable the browser to render the HTML
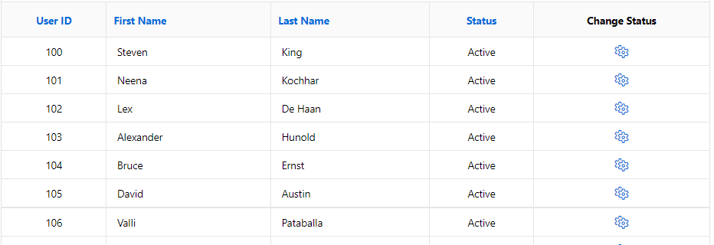
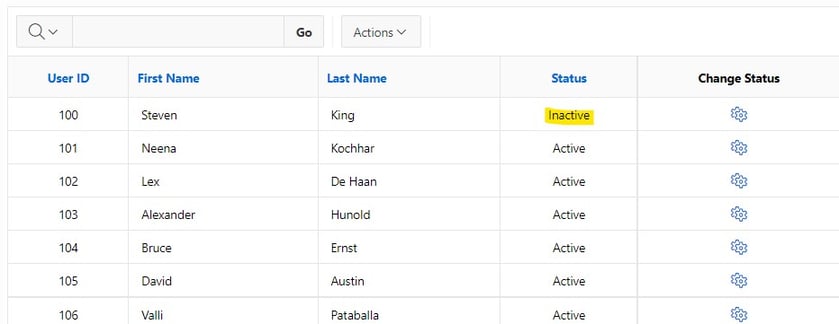
Run the report to make sure that the new column is being rendered as expected:
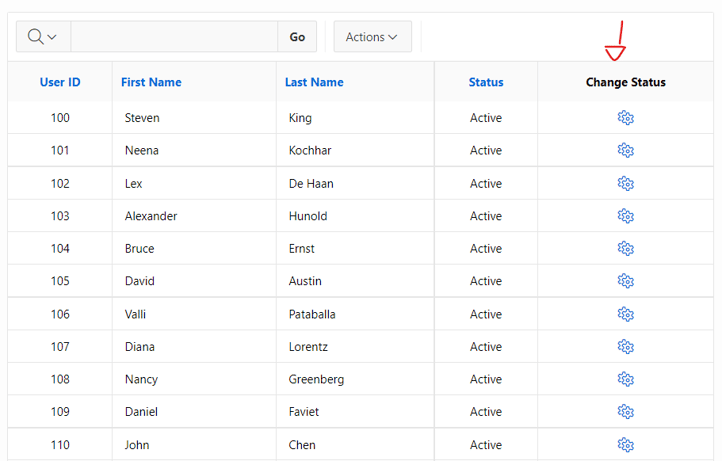
Yeah!!! we have the column with the icon
Now, it’s time to create the dynamic actions that will update the user status when clicked on the gears icon.
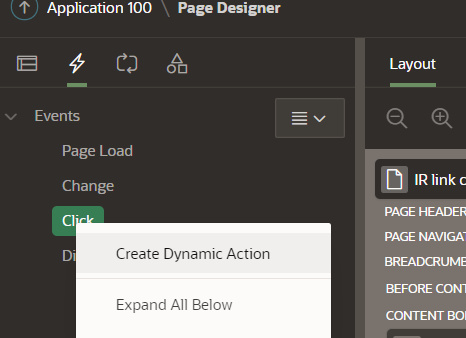
Step 3: Create an On Click Dynamic Action that will execute the change of user’s status:
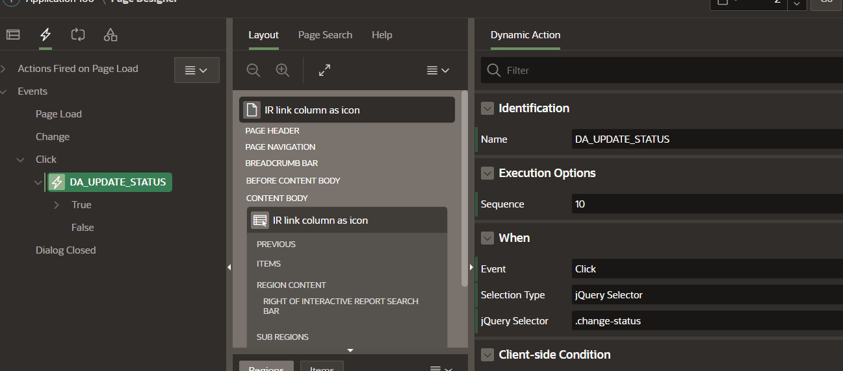
Add a new DA for a click event.
- Name: DA_UPDATE_STATUS
- When: Click
- Selection Type: JQuery Selector
- JQuery Selector: .change-status
The JQuery Selector name must be the same used in the added column text and the name prefixed by a dot (“.”)
Results
The dynamic action will have 3 TRUE actions:
- Set the value of P2_USER_ID hidden field
- Execute the database change
- Submit the page
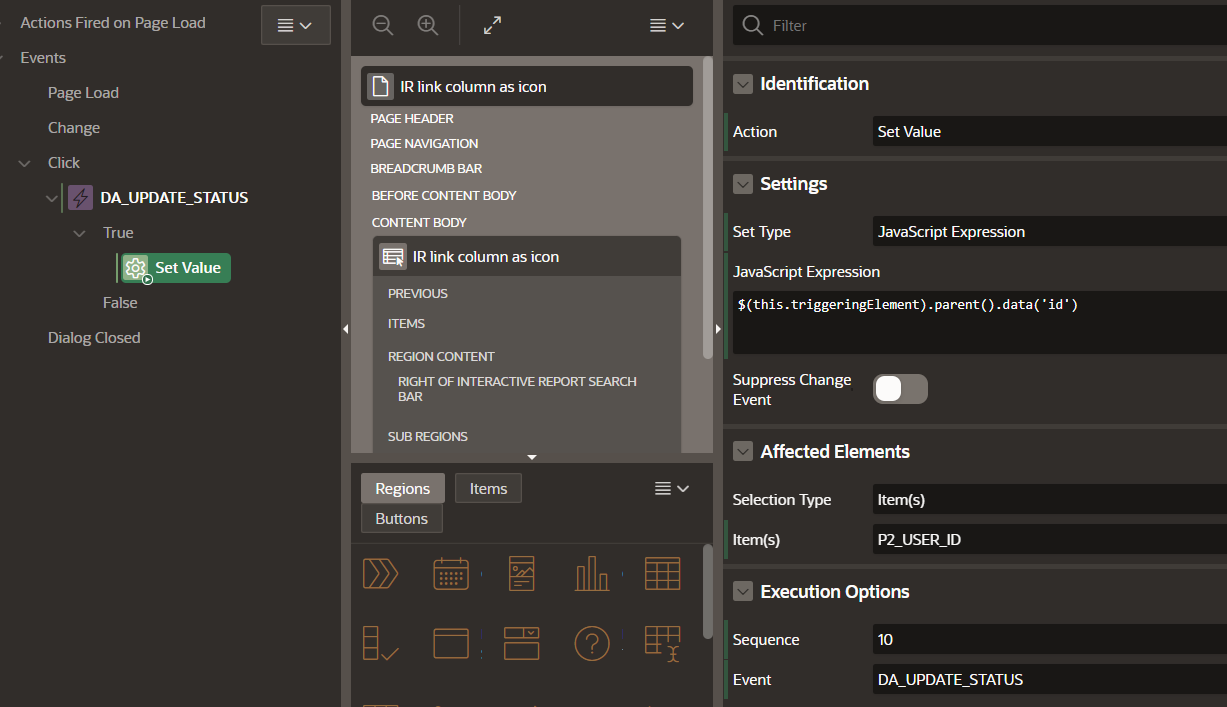
1) Set the value of P2_USER_ID hidden field
- Action: Set Value
- Set Type: Java Script Expression
- Java Script Expression: $(this.triggeringElement).parent().data(‘id’)
- Affected Elements Item: P2_USER_ID
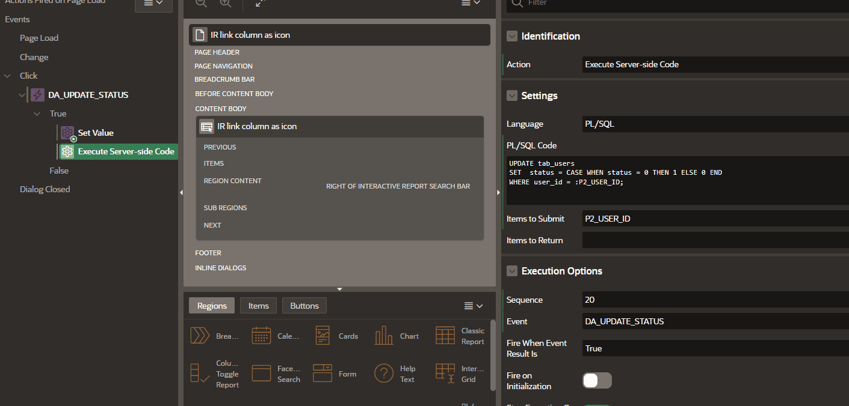
2) Execute the database change
- Action: Execute Server-side code
- Language: PLSQL
- PLSQL CODE: — for this example, let’s switch the user’s status
     UPDATE tab_users
     SET status = CASE WHEN status = 0 THEN 1 ELSE 0 END
     WHERE user_id = : P2_USER_ID;
- Items to submit: P2_USER_ID
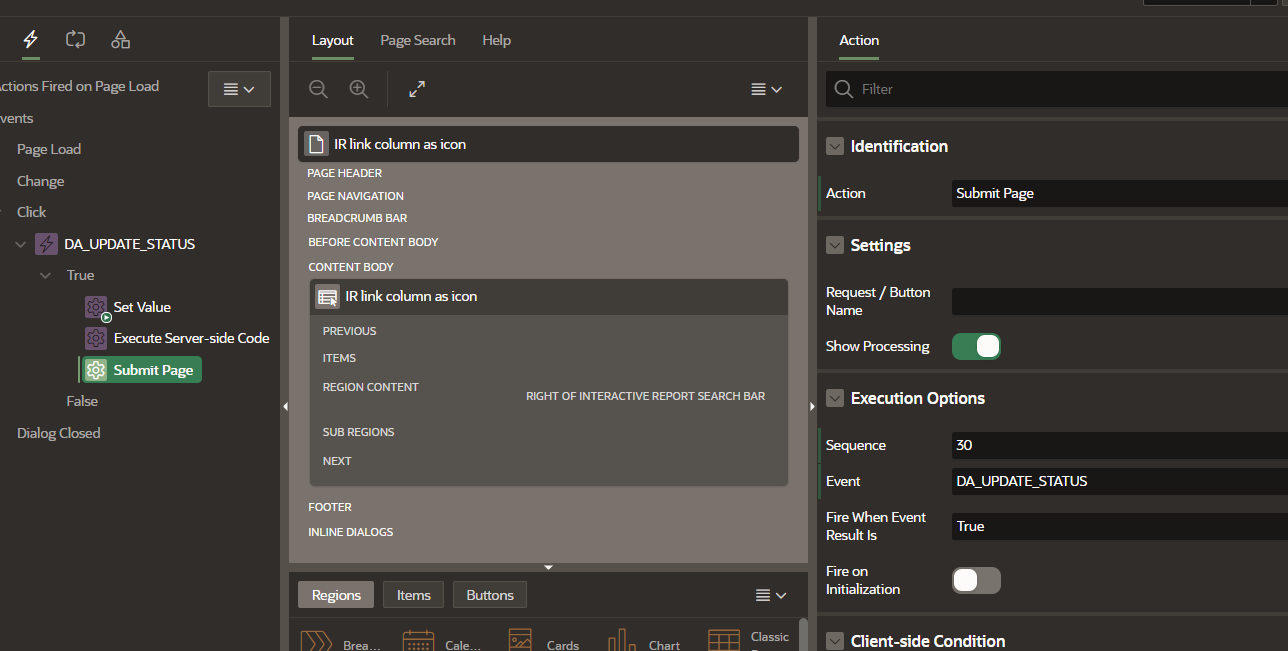
3) Submit the page
- Action: Submit Page
That’s it ;)
Run your report and click on the gear icon. The user’s status will be updated in the database.
Oracle Database Consulting Services
Ready to optimize your Oracle Database for the future?